How to use AdGuard DNS in iOS
Yesterday the world has finally seen iOS 14, which has some cool updates but we would love to mention one feature in particular:
DNS traffic can now be encrypted, so DNS entries aren’t seen by others watching network traffic.
Starting this year, Apple natively supports encrypted DNS. There are two supported protocols: DNS over TLS (DoT) and DNS over HTTPS (DoH). They use different methods to encrypt DNS traffic but ultimately provide very similar levels of reliability.
Why is it important?
With encrypted DNS traffic, it's very similar to HTTP vs. HTTPS: encryption is better than no encryption. A little glance into how encrypted DNS works:
When your app accesses a website, the system asks a question, a DNS query, to turn that name into a set of addresses. Generally, the question is sent to a DNS server configured by your local network. So where does privacy come into the picture?
One concern is that DNS questions and answers are usually sent over an unencrypted transport, UDP. That means that other devices on the network can not only see what names you're looking up, but they can even interfere with the answers. The other privacy concern is that you may not trust the DNS resolver on your local network. If you've joined a public Wi-Fi network, your internet usage could be tracked or blocked.
So how does encrypted DNS improve this situation? Encrypted DNS, simply put, is using encryption to protect your DNS questions and answers. And if you don't trust the network you're on, it can also involve sending your questions to a DNS server that you do trust.
How to configure it for AdGuard DNS
It includes several steps:
Step 1: Set up a profile
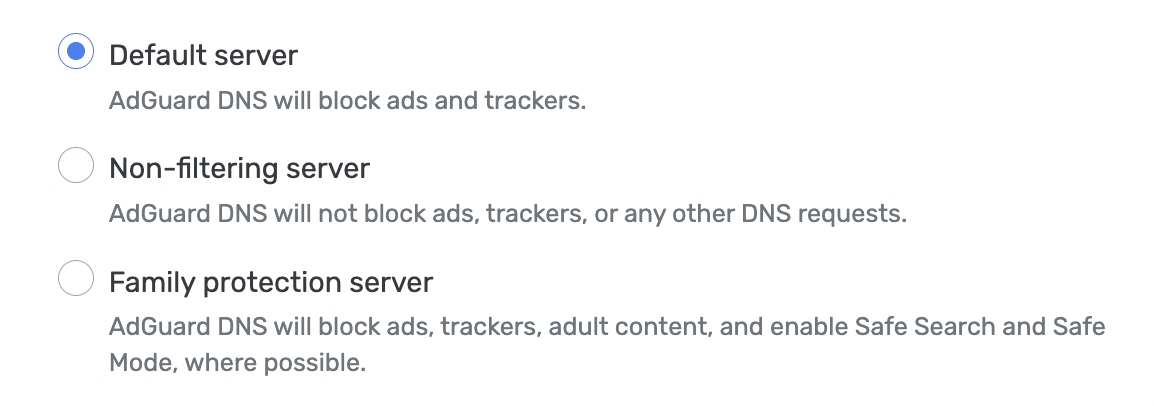
The very first step is to set up an AdGuard DNS profile. There are three options you can choose from: Default server, Non-filtering server, and Family protection server.
We provide profiles for all configurations of AdGuard DNS. Note that it is possible to set up all three and switch between them.
Simply open this page on your iOS device. Scroll down to Method №2: Configure AdGuard DNS manually. Tap it and find iOS in the opened list of devices, choose one of the following DNS servers:
- Default server blocks ads and trackers.
- Non-filtering server doesn't block or censor anything. Use it if you just need a fast and zero-logging DNS service.
- Family protection server — same as default one but it also blocks adult websites, enables Safe Search and Safe mode.
After selecting the server press the Download configuration profile button below.
Step 2: Download and install
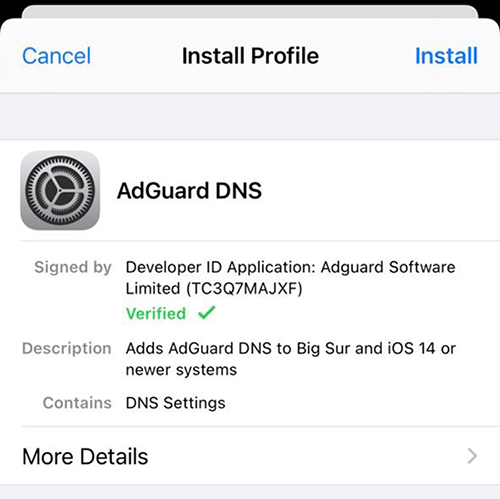
After you download a profile, go to Settings. You'll see there a Profiles downloaded item:
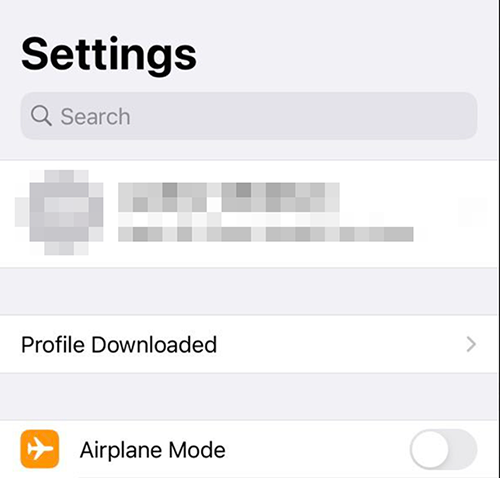
Tap it, check if everything's right with profile data, and install:
Step 3: Configure and test
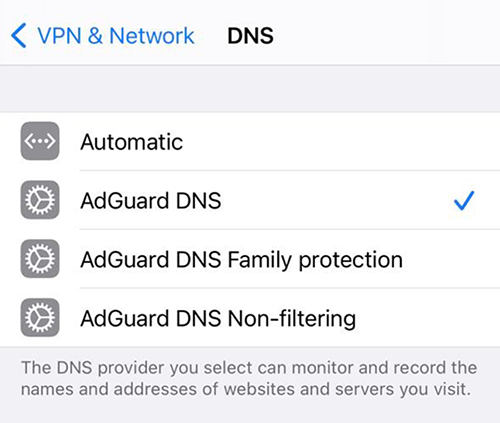
You can manage installed DNS profiles via your device's settings. Go to Settings → General → VPN, DNS, & device management → DNS. There you will find all installed DNS servers and will be able to jump from one to another..
To test if the configuration works correctly, follow this link to the AdGuard test page and check that AdGuard DNS is detected.
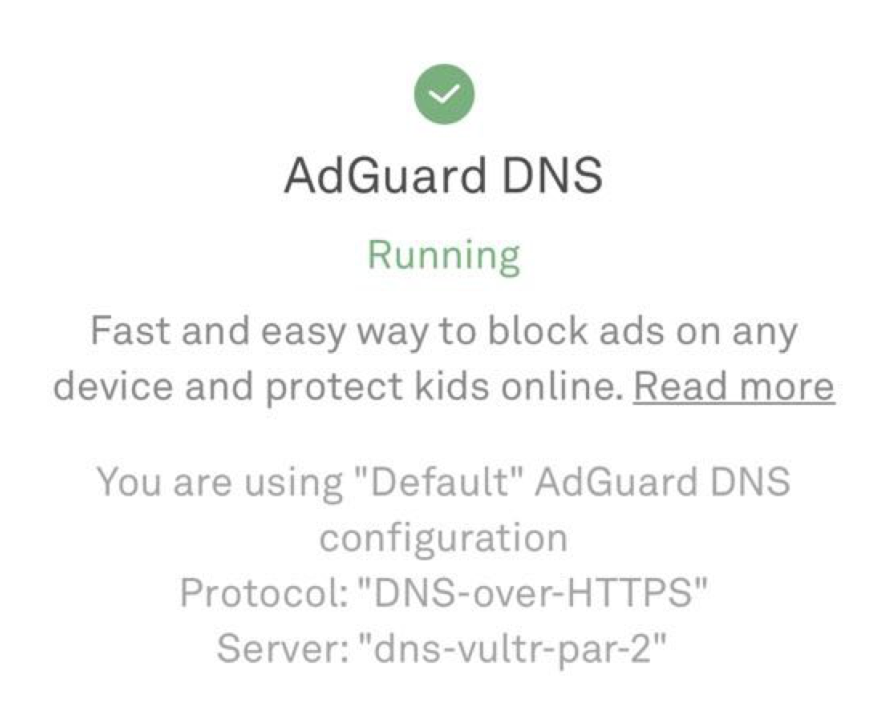
AdGuard DNS is running, all is good!
Keep in mind that if you use either AdGuard VPN or AdGuard Ad Blocker, the DNS server selected there will get preference.
The difference compared to the AdGuard app
Compared to the AdGuard app, there are a couple of significant drawbacks: you won't be able to see which requests exactly do apps on your device send. It will also be impossible to use DNS filtering and manually manage which servers to block and which to allow access to.
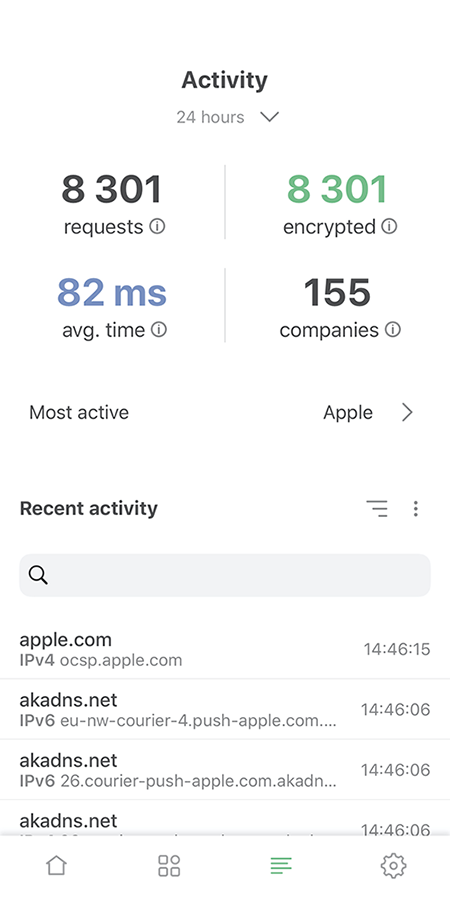
AdGuard for iOS allows you to monitor your phone's DNS activity
But in any case it's a very simple way to switch to start using encrypted DNS protocol. An additional advantage of this method is that it's native to the OS. In the next AdGuard for iOS version we will make sure to add an option to configure DNS servers using this mechanism.