How AdGuard Browser Assistant works on macOS 27+
This article is about AdGuard for Mac, a multifunctional ad blocker that protects your device at the system level. To see how it works, download the AdGuard app
Due to policy updates in macOS 27, AdGuard may be unable to communicate with its Browser Assistant, which could cause extension-based filtering features to stop working. To establish this connection, AdGuard must place a Native Messaging host manifest within the browser’s application data folder. Previously, AdGuard did this automatically in the background. However, macOS 27 restricts cross-app folder access by default and requires explicit permission. As a result, AdGuard can no longer place the manifest file automatically, which disrupts communication between the app and the extension.
Recommended solutions
This section covers how to grant AdGuard the required permissions across Chromium- and Gecko-based browsers.
Step 1: Grant access via Files & Folders
AdGuard checks folder access only for your system default browser. Consequently, the in-app prompts and the Allow Access… button will not appear if the browser is not set as default. In this case, you will need to grant permission manually via macOS System Settings.
-
Open Files & Folders
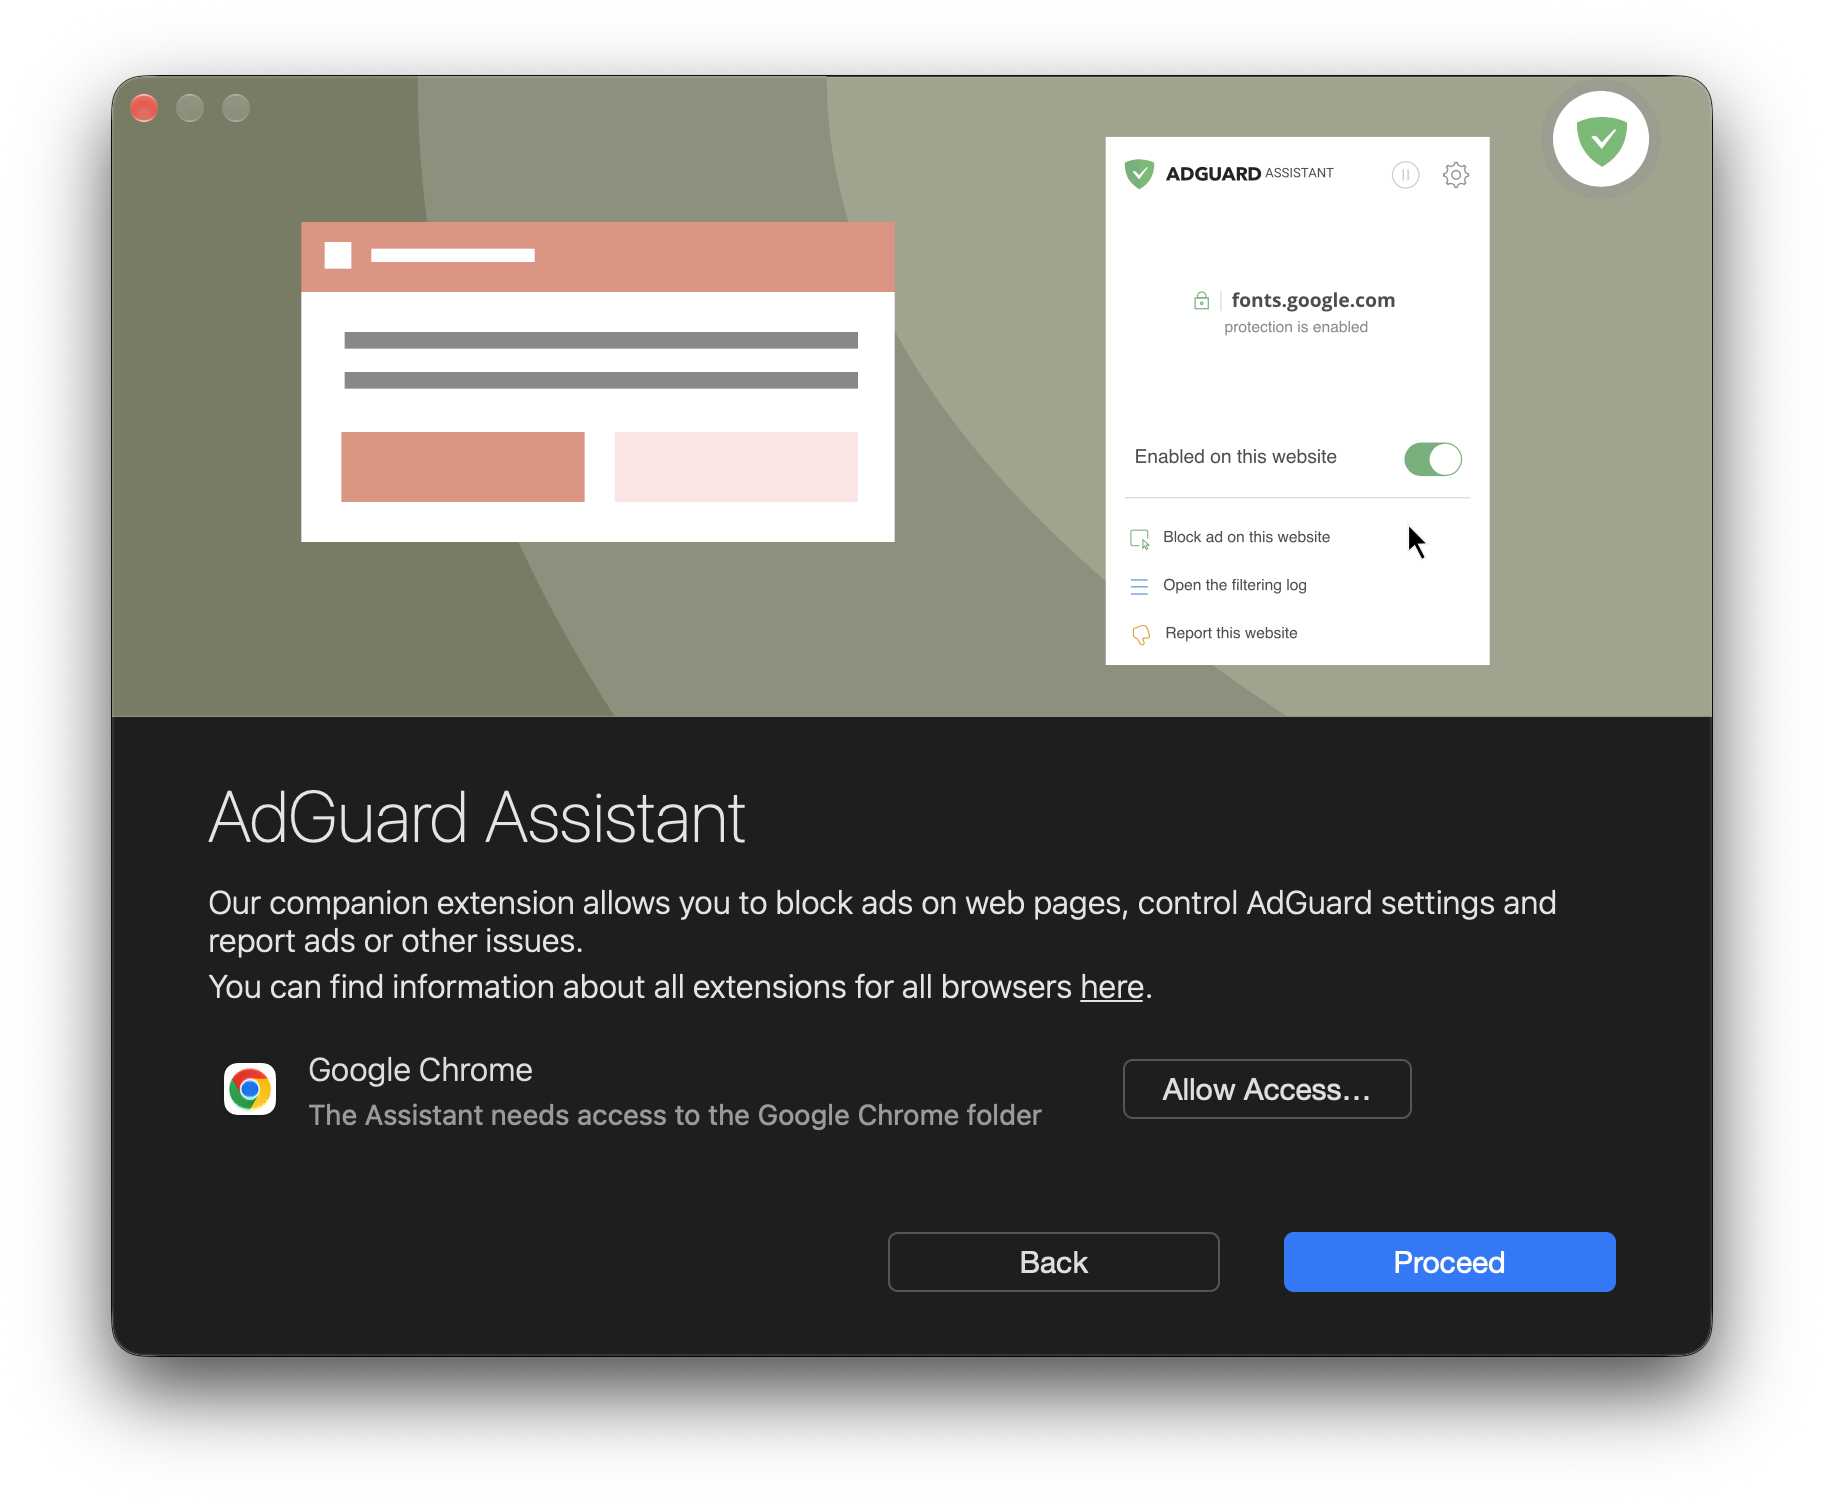
- via AdGuard Setup Assistant upon first launch: on the Browser Assistant installation screen, click Allow Access…. You’ll be taken directly to the Files & Folders section
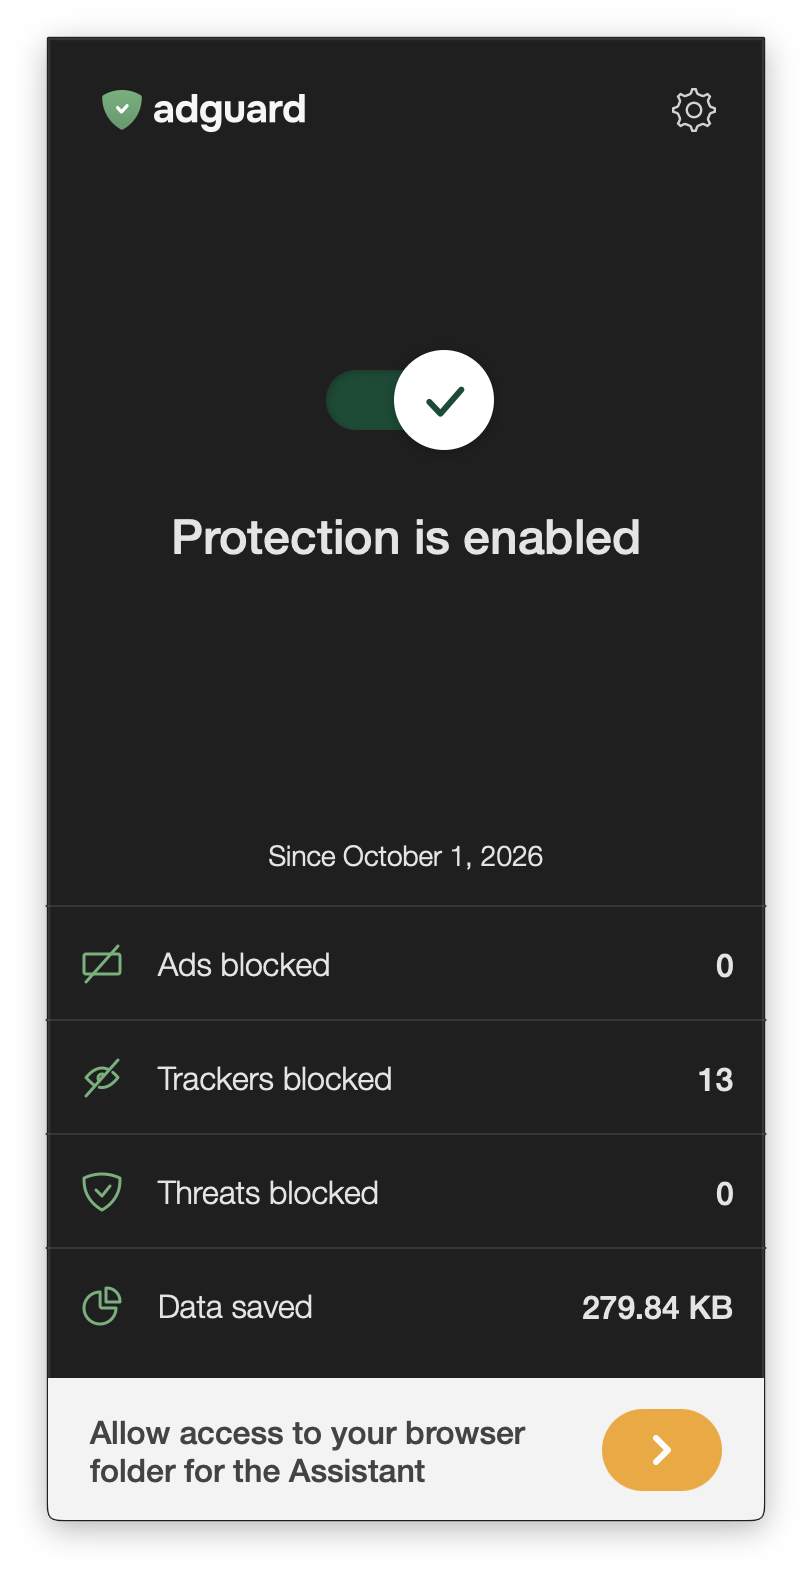
- via the AdGuard main window:
- click Allow access to your browser folder for the Assistant at the bottom → Assistant → Allow Access…. This prompt only appears if the Assistant was installed at least once and access is currently denied for your default browser. It permanently disappears after the first click. If you don’t see it, use the Preferences option below.
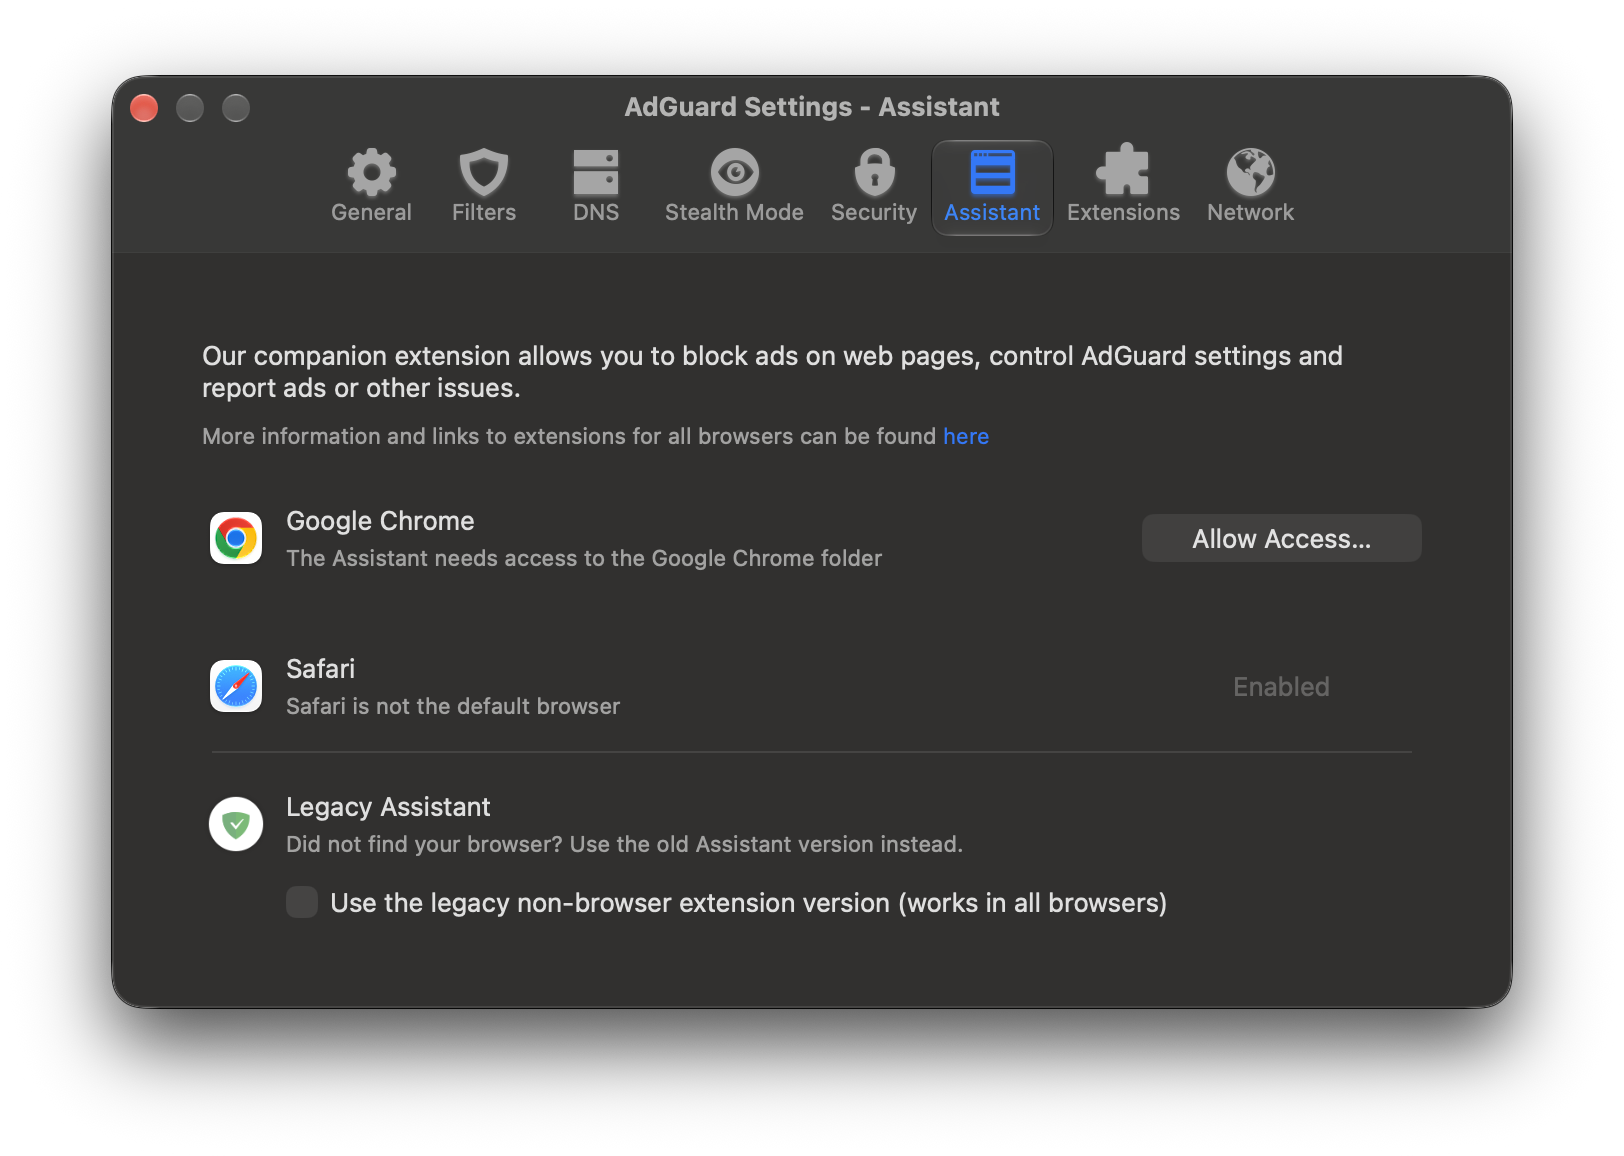
- or click the gear icon in the top-right corner → Preferences… → Assistant → Allow Access…
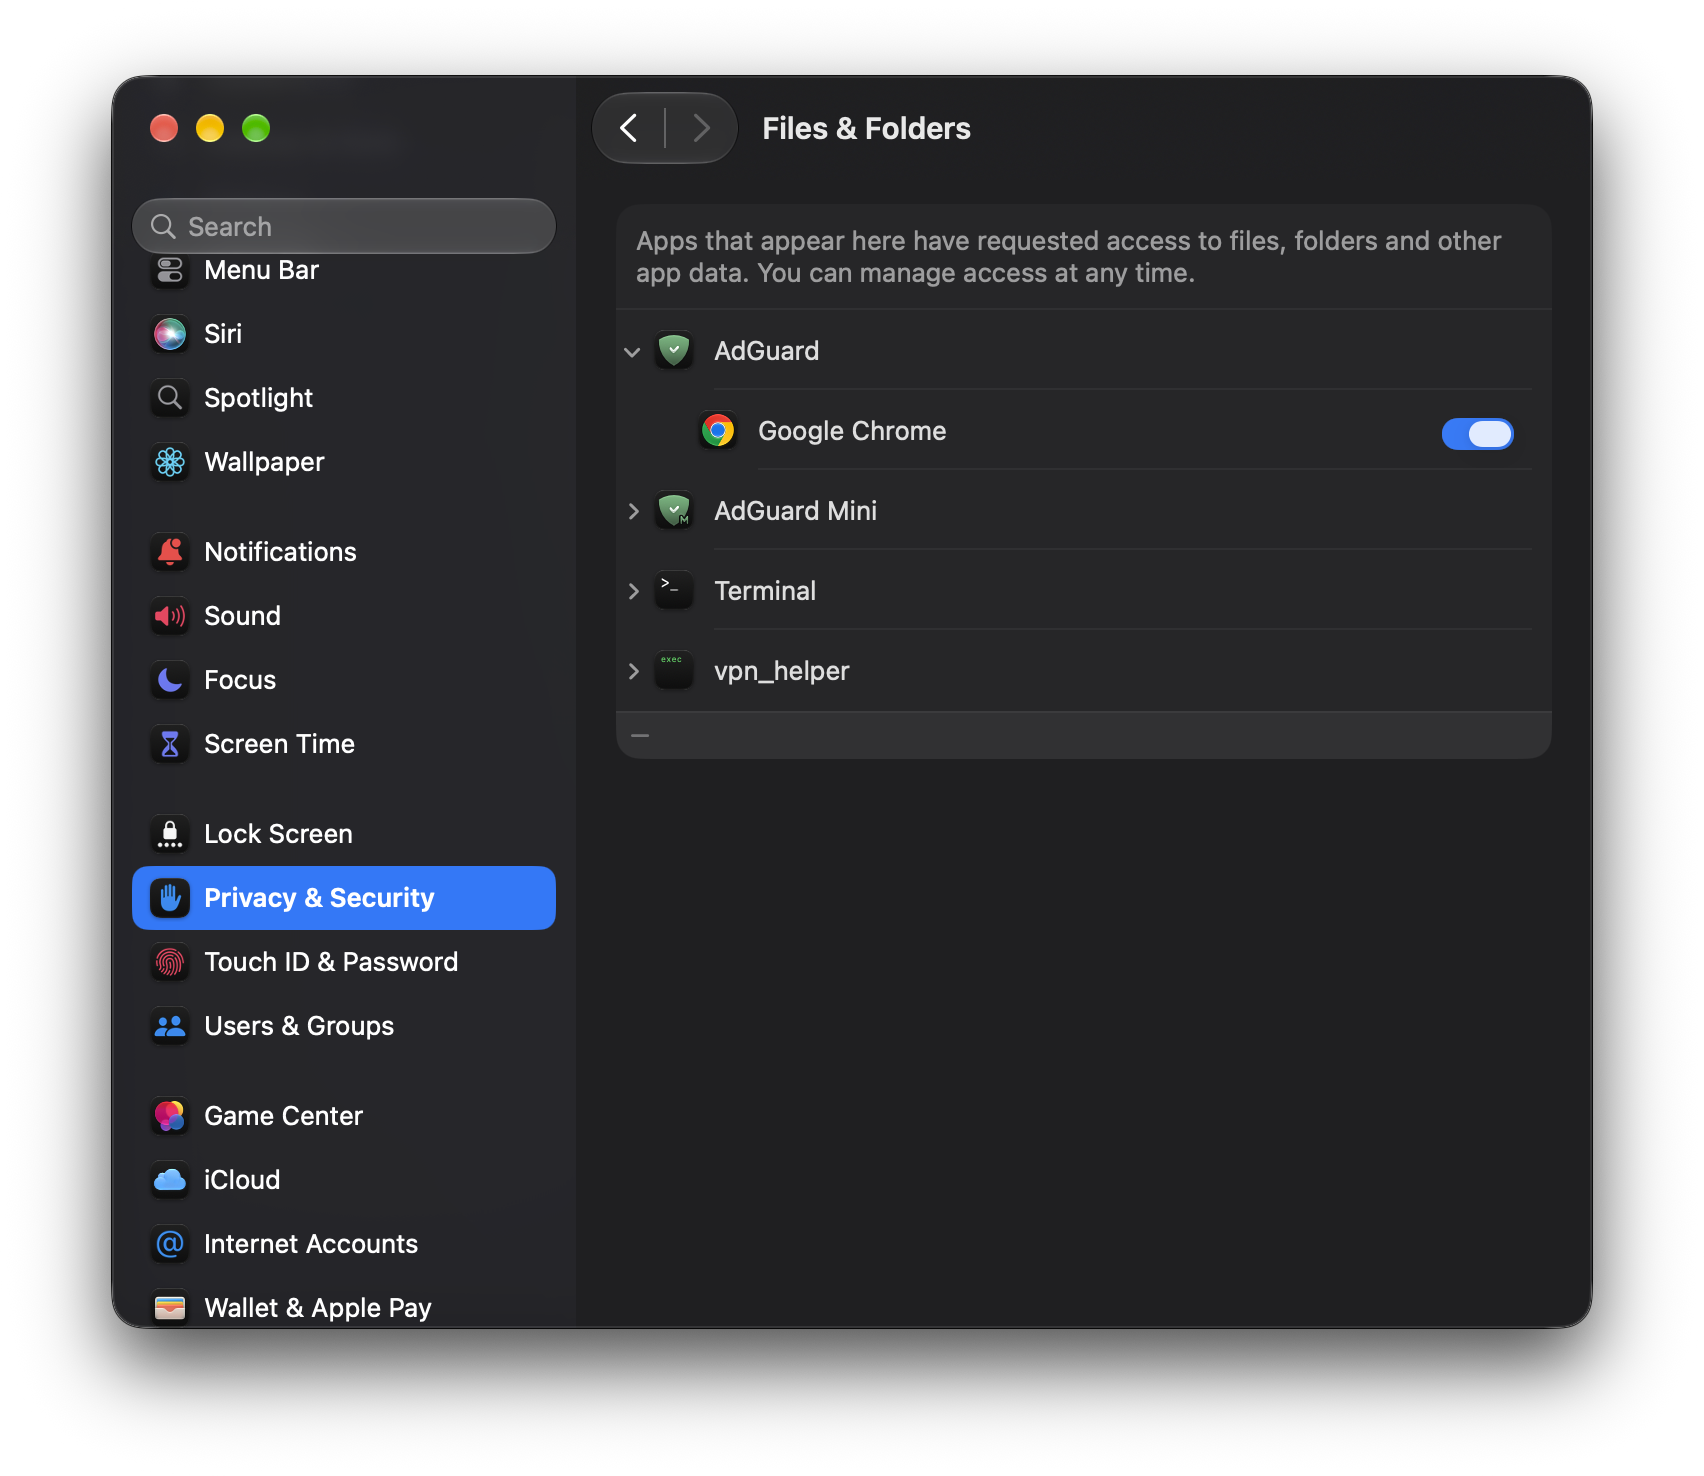
- via System Settings → Privacy & Security → Files & Folders
- via AdGuard Setup Assistant upon first launch: on the Browser Assistant installation screen, click Allow Access…. You’ll be taken directly to the Files & Folders section
-
Find AdGuard in the list and click it to expand the dropdown
-
Locate the browser (for example, Chrome or Brave) and turn on the toggle next to it
A toggle for a specific browser will only appear in this list if the browser is already installed. If your browser, Google Chrome, or Mozilla Firefox is not listed, proceed to Step 2.
Step 2: If the browser isn’t listed
Option A: Install Google Chrome or Mozilla Firefox
Some browsers built on Chromium or Gecko do not create their own dedicated Native Messaging directory. Instead, they share the directory used by Chrome or Firefox. On earlier macOS versions, AdGuard could simply create these folders itself. Starting with macOS 27, macOS does not allow AdGuard to request access to these folders unless the corresponding browser — Google Chrome or Mozilla Firefox — is actually installed on the system.
- Install Google Chrome or Mozilla Firefox (depending on whether your browser is Chromium- or Gecko-based) and open it at least once — the required Native Messaging folder will become available on the system
- Open Files & Folders (via the AdGuard main window, AdGuard Setup Assistant, or Mac System Settings, as described in Step 1)
- Find AdGuard in the list and click it to expand the dropdown
- Locate Google Chrome or Mozilla Firefox and turn on the toggle next to it. As a result, Browser Assistant will start working in the browser that relies on Chrome’s or Mozilla Firefox’s folder (such as Opera or Zen).
Option B: Grant Full Disk Access
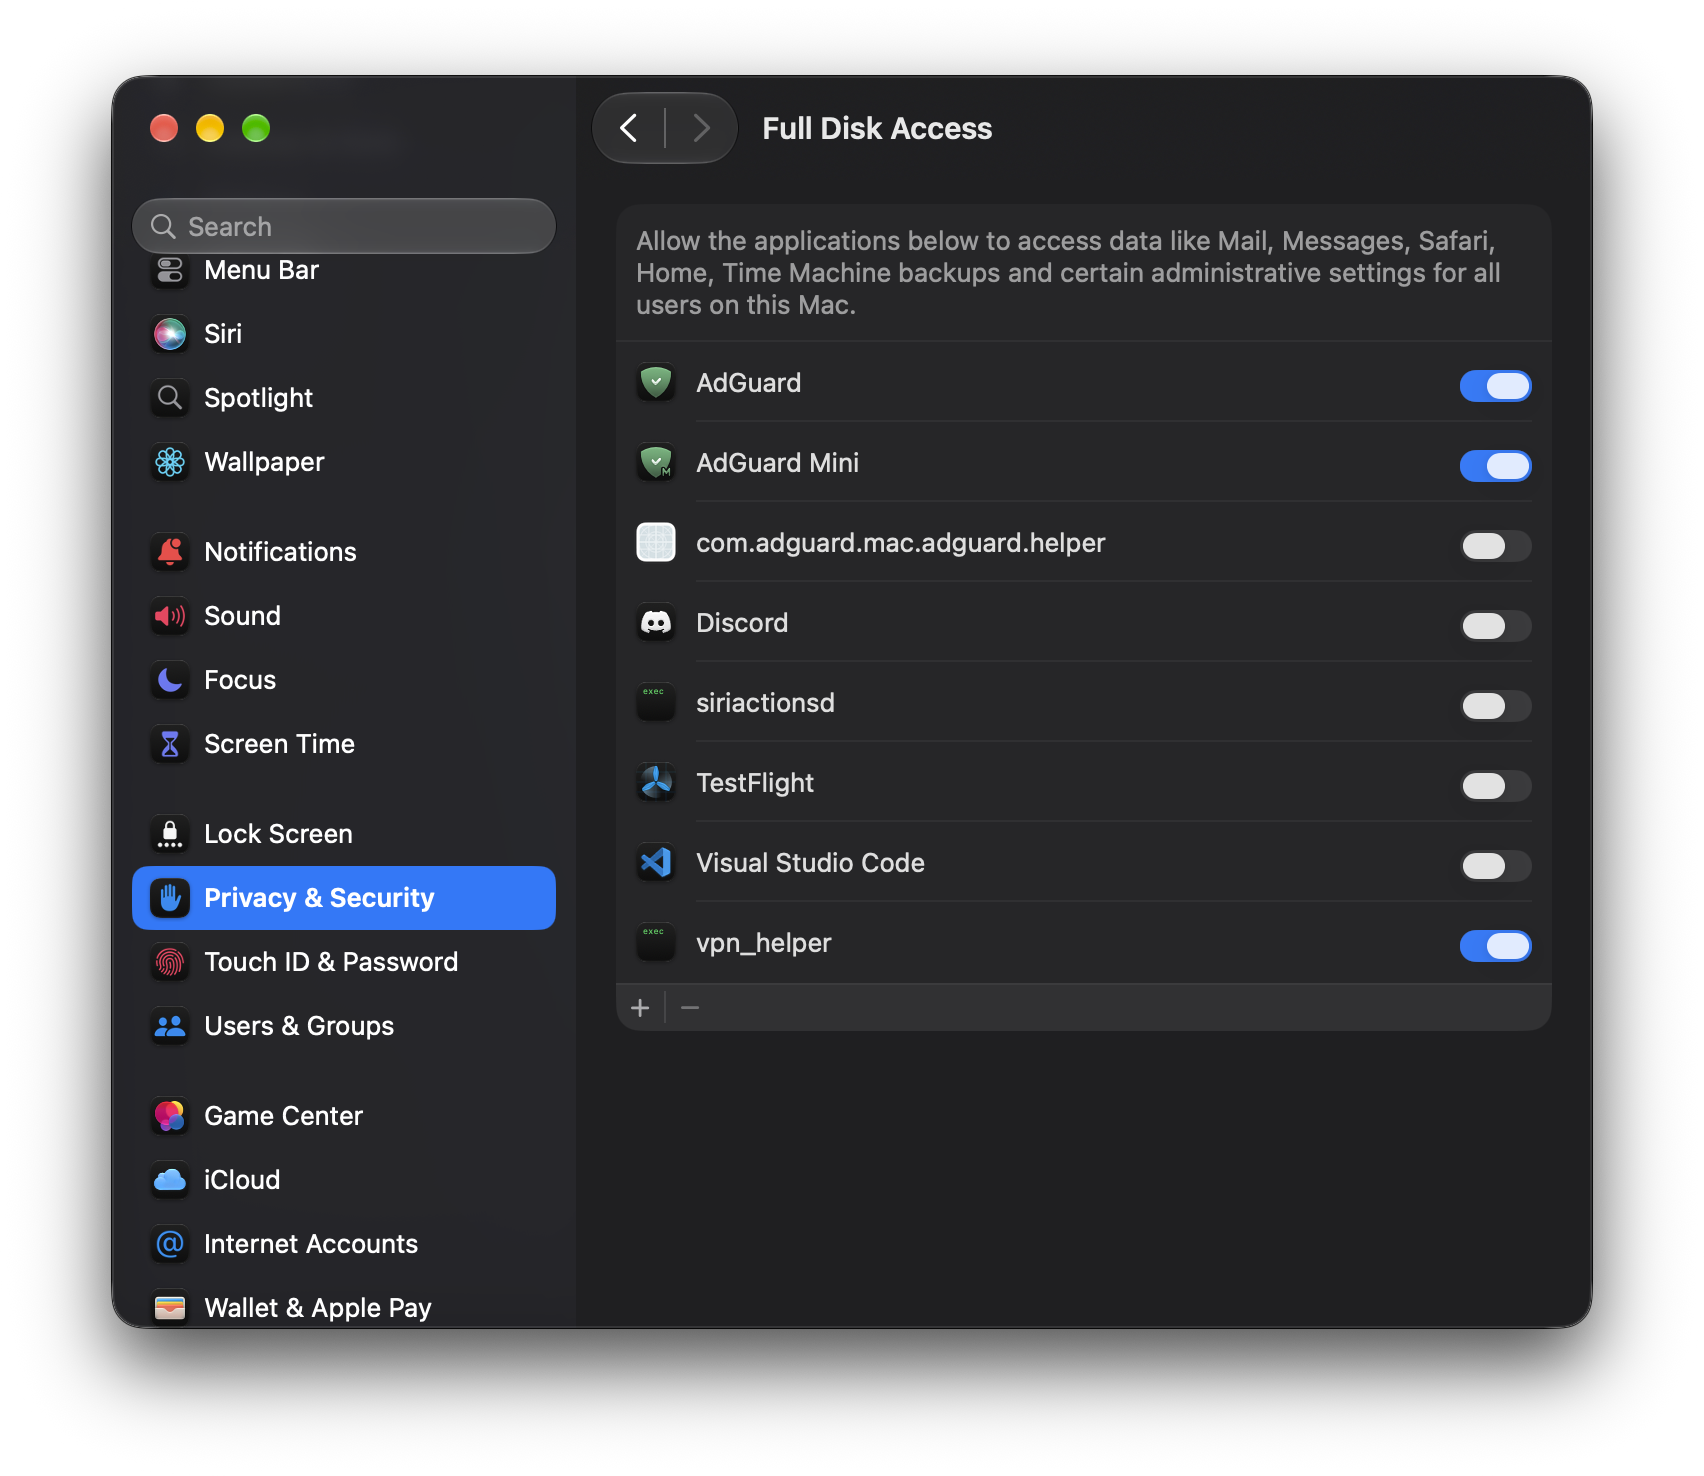
Granting Full Disk Access is a last-resort measure: we strongly recommend trying the options above first. Full Disk Access is not required for AdGuard in general. Use it only as a workaround for Browser Assistant if the options above did not work and you fully understand what you are doing.
- Open System Settings → Privacy & Security → Full Disk Access
- Find AdGuard in the list and turn on the toggle