Как собирать логи AdGuard
В этой статье рассказывается об AdGuard для Windows — многофункциональном блокировщике рекламы, который защищает ваше устройство на системном уровне. Чтобы увидеть, как он работает, скачайте приложение AdGuard.
Data and files provided in logs are processed in accordance with the AdGuard Privacy Policy.
To diagnose problems you may encounter while using AdGuard, our support team may need AdGuard log files. These files record errors and other events that occur in the application. This article explains how to change the logging level, collect the logs, and send them to support.
AdGuard for Windows offers two logging levels: Default and Debug. For most troubleshooting, Debug is sufficient, but it may slow down the app.
How to change the logging level
You can change the logging level in either of two ways:
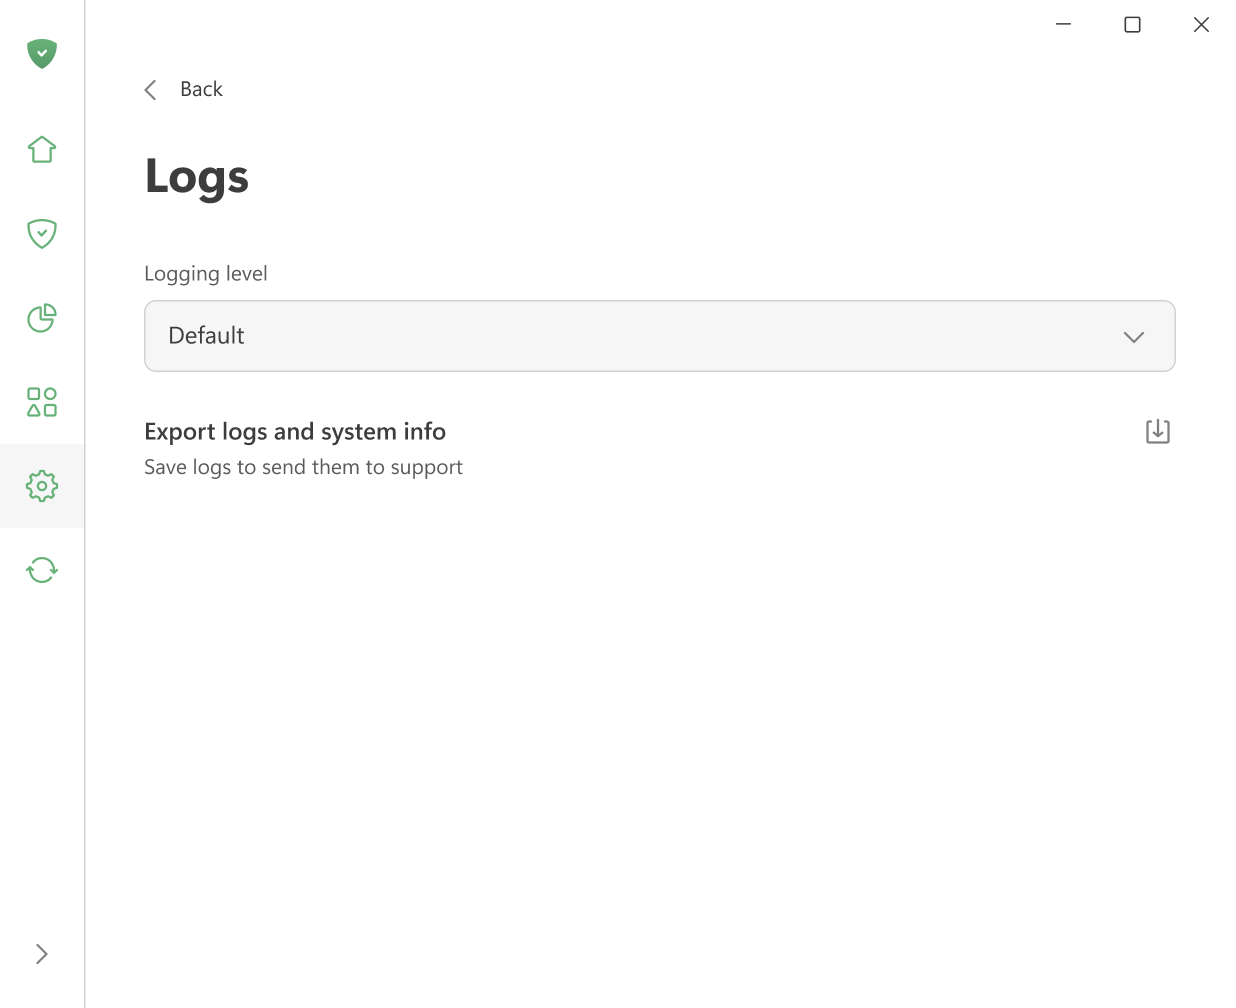
Option 1: In the app
Go to AdGuard settings → Support → Logs, and in the Logging level dropdown select Debug.
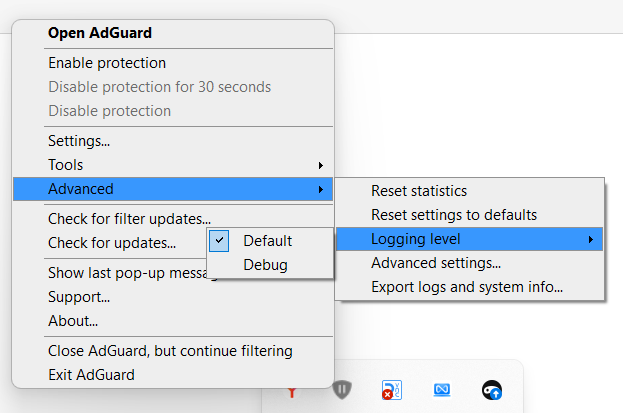
Option 2: From the tray menu
Right-click the AdGuard icon in the system tray, select Advanced → Logging level, and choose Debug.
Debug logs
For most issues, debug logs give the support team enough information to identify and fix the problem.
-
Set the logging level to Debug using one of the methods described above.
-
Воспроизведите ошибку. Note the exact time — it will help our support team find the relevant log entries and solve the problem faster.
-
Go to AdGuard settings → Support → Logs, and click Export logs and system info.
Once the export is complete, you’ll see a confirmation message. You can click Show in folder to open the folder where the exported archive with logs and system information was saved.
комментарийSet the logging level back to Default after exporting the logs. The Debug level slows down the application.
:::
- Send the archive to support@adguard.com, describe the problem, and mention the time you reproduced the issue.
Trace logs
Sometimes the support team may ask you for trace logs. Trace logging captures more detail than debug logging and is only available via command line.
-
Exit AdGuard by right-clicking the AdGuard icon in the tray menu and choosing Exit AdGuard.
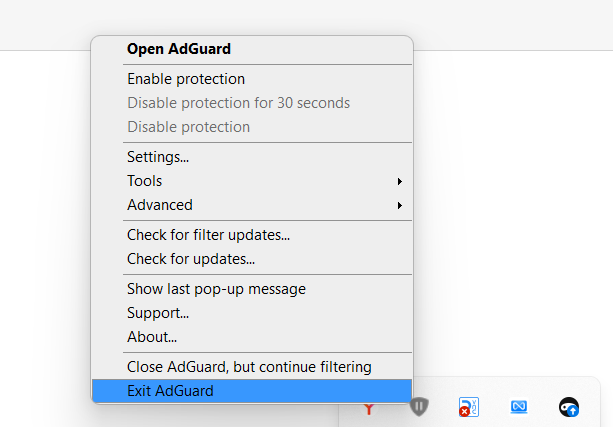
If prompted to keep the service running in the background, make sure to stop it — the service must not be running when you start AdGuard with trace logging.
-
Open the command prompt (type
cmdin the Start menu search). -
Run AdGuard with trace logging enabled:
C:\"Program Files"\Adguard\Adguard.exe /trace -
Воспроизведите ошибку. Note the exact time — it will help our support team find the relevant log entries and solve the problem faster.
-
Export the collected logs: go to Settings → Support → Logs → Export logs and system info.
Don’t worry if the log file is large — we need as much detail as possible to fix your problem.
-
After exporting the trace logs, close AdGuard and restart it normally to return to the default logging level.
Diagnostic report
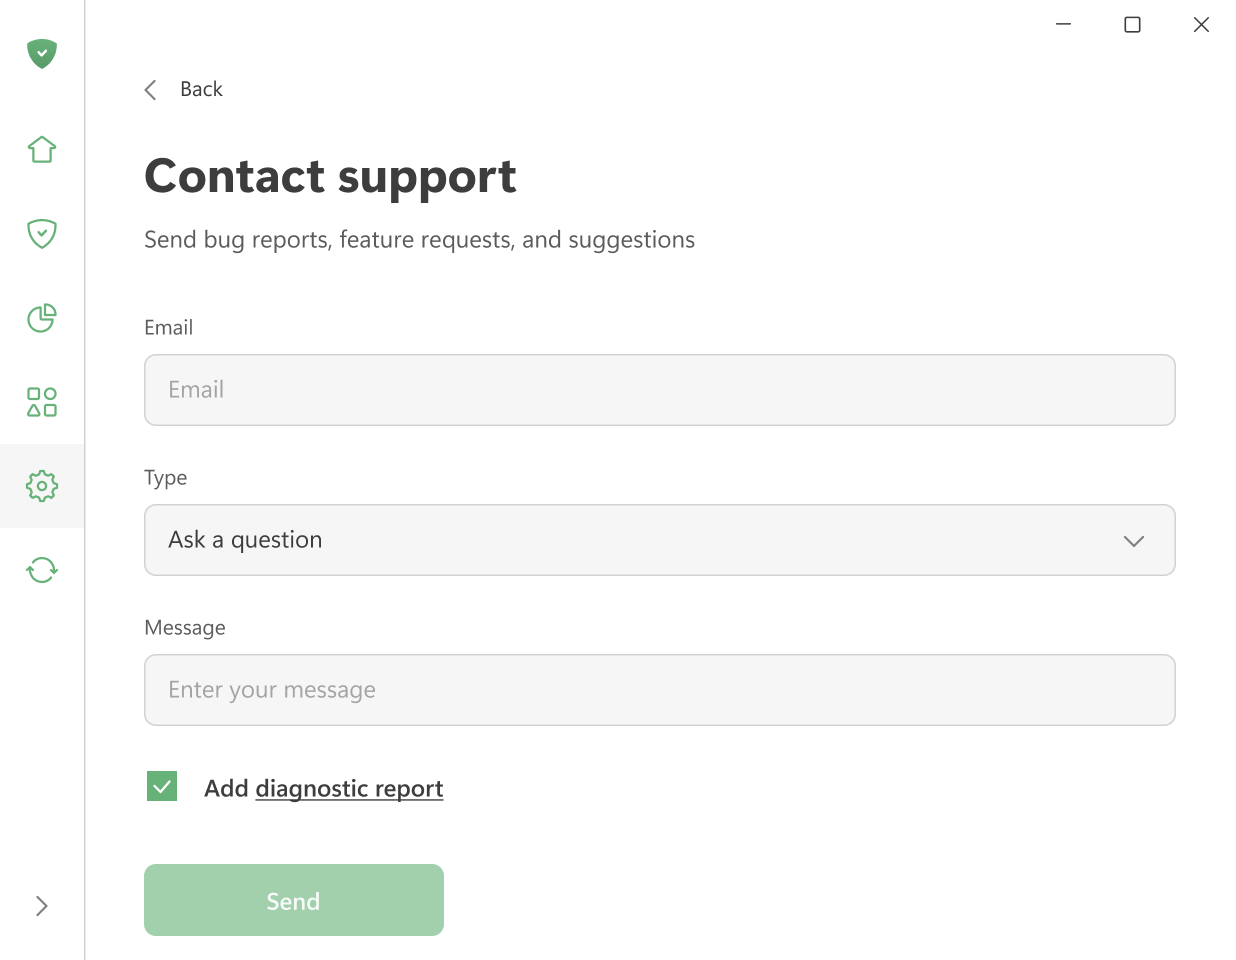
When contacting support through the form in Settings → Support, you can include a diagnostic report that automatically attaches application logs together with other system information.
The diagnostic report includes:
- Information about the system
- A list of running processes
- Details about AdGuard settings, including enabled filters and installed extensions
- Application logs
To use this option, check the Add diagnostic report checkbox before sending your message.
AdGuard стремится защищать вашу конфиденциальность. Мы строго следуем нашей Политике конфиденциальности и не собираем никакой личной информации о пользователях. Перед отправкой логов в поддержку проверьте, не содержит ли файл дополнительную информацию, которую вы не хотите передавать. Если в файле осталась личная информация, рекомендуем удалить её.