How to set up your own proxy and use it with AdGuard

In our day and age, it is becoming increasingly important to have access to any online resources that you need, at any time. This is not always convenient or even possible at all — take such example as using a network with overly restrictive firewall. What will help you be 100% sure you can access any website is setting up your own proxy. Not to mention proxy will hide your IP and let you access geo-blocked websites.

In this article, we will walk together all the way from renting our own server to configuring proxy on a mobile device or in a browser.

Renting your own server

For starters, we'll need to rent a server. You can choose any web hosting service you prefer, I will be using Vultr as an example.

I emphasize that I don't try to advertise or distinguish this service, it was only chosen as an example. Among other possible solutions are HostGator, 1&1, Cloudways, Bytemark, Digital Ocean and many, many more.

Alright, let's get to it. I start by opening vultr.com and signing up there ("Create Account" button in the top right corner).
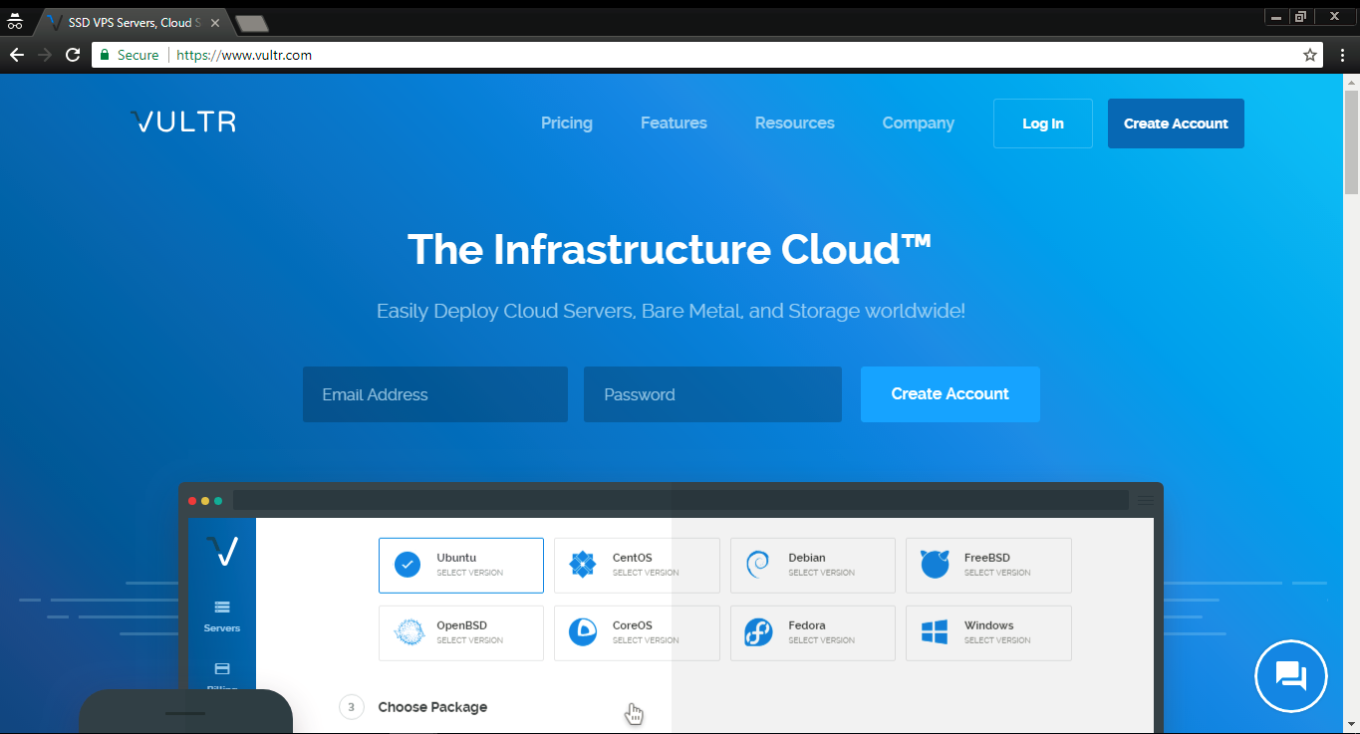
If you did the same, you'll receive an email with a link to confirm your registration. Once you do it and log in, you'll be asked to choose a payment method. I selected Credit card, but you are free to use any other, obviously.
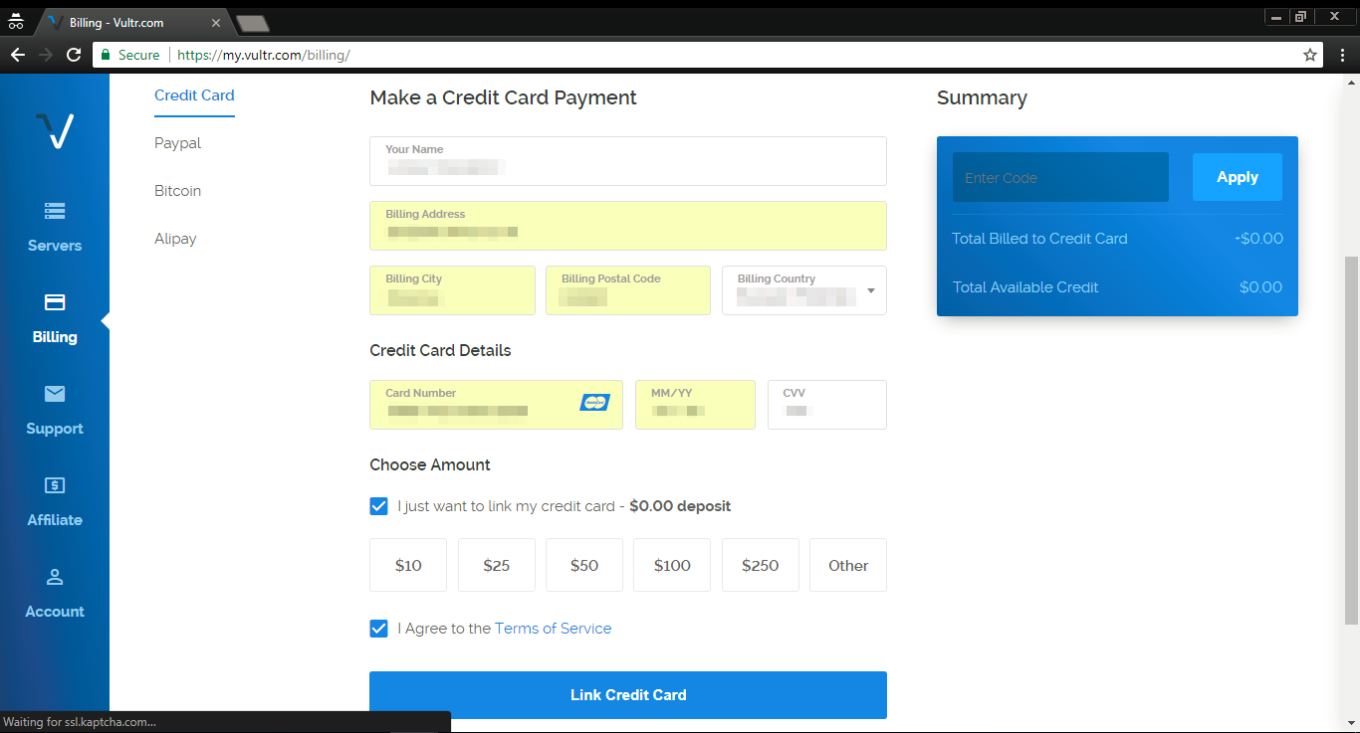
Important — if you are choosing credit card as your payment method, tick the "I just want to link my credit card" checkbox, otherwise, you will be charged immediately.

After you've linked your card, click on the "Servers" tab on the left, and then choose "Deploy New Server" (a button with a "plus" symbol).
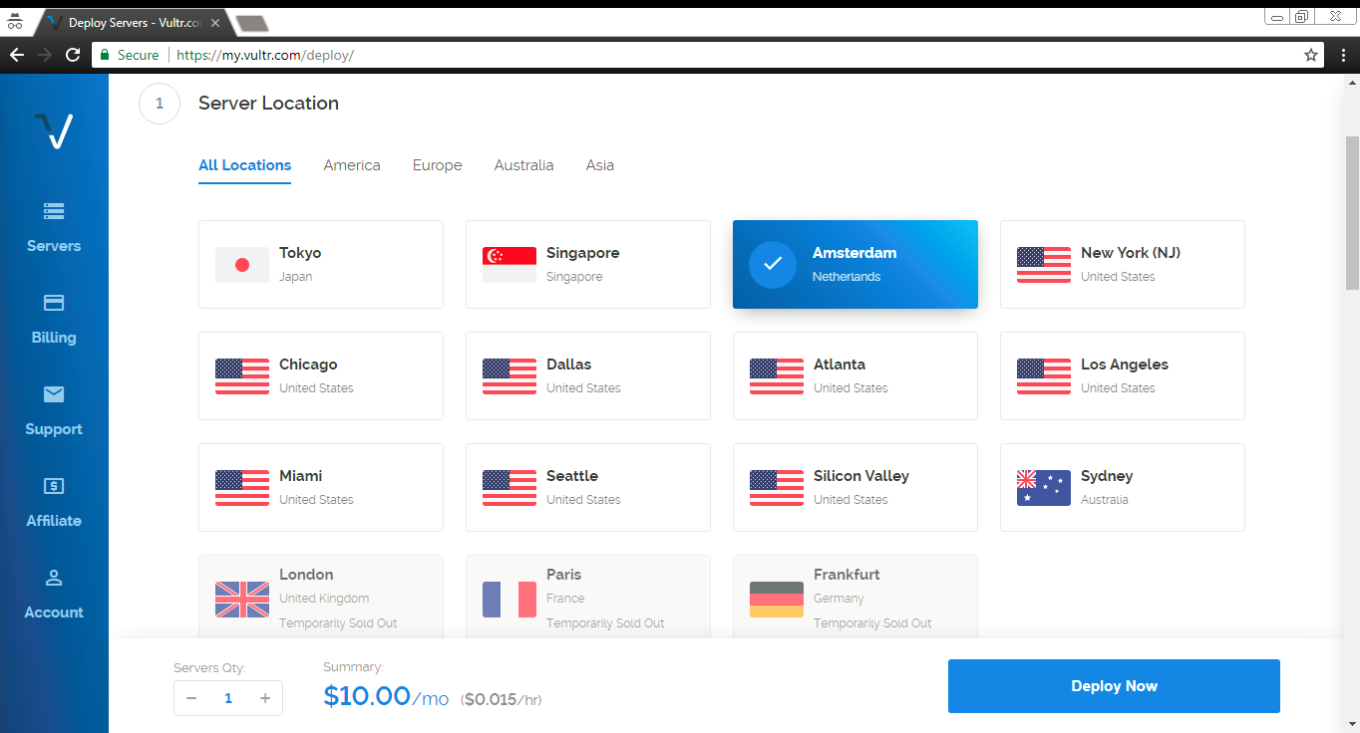
Ok, time to make a decision where our new server will be located. I've chosen one in Amsterdam, you can (and probably should, unless you have a specific reason) choose something relatively close to your geographical location.
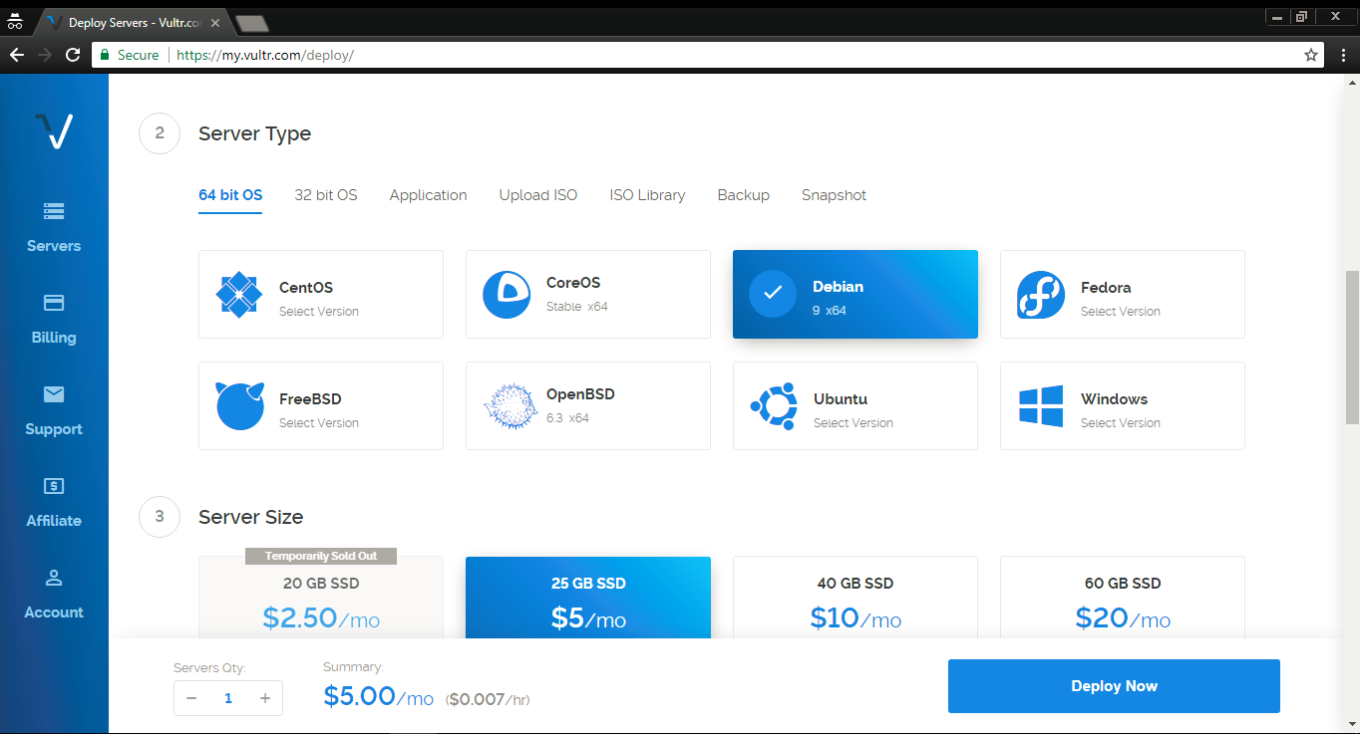
In the "Server type" tab select Debian 9 (x64) — this is very important!
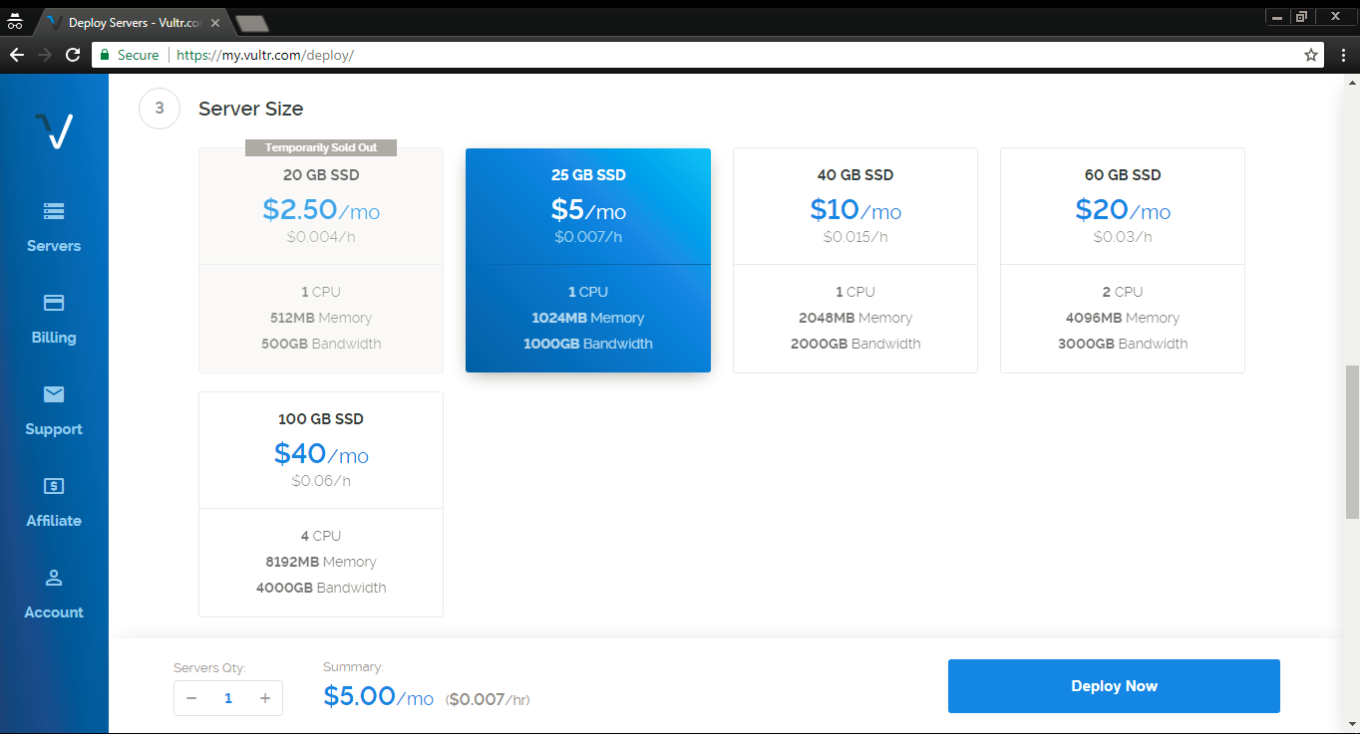
The third step is to select the server size, it depends solely on your needs and your budget. Most users will find 1 TB for $5/mo or 500 GB for $2.5/mo sufficient.
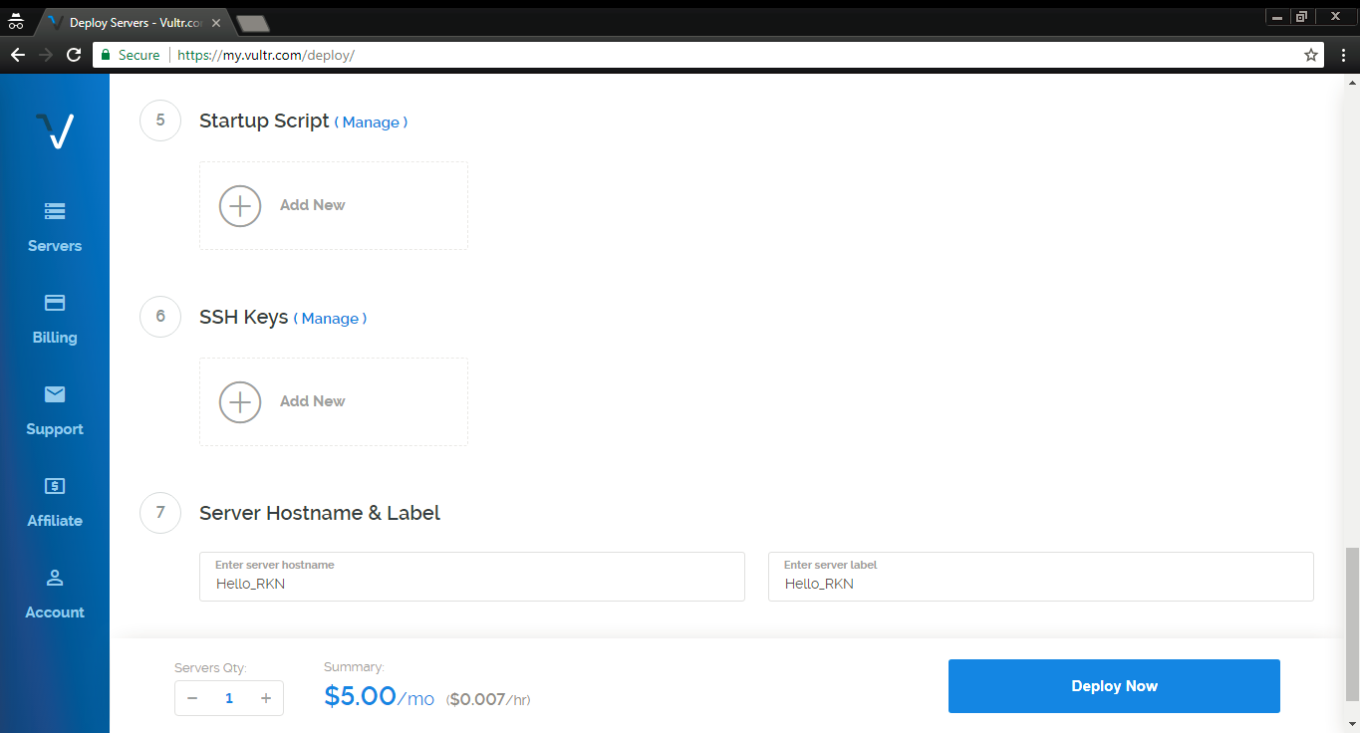
At steps 5 and 6 there's no need to change anything. At step 7 choose a hostname and a label for your server, any will do.

Aaaaand done! Smash the Deploy Now button to finish the process. You'll get another email to confirm that the server has been deployed — you'll need it later.

Installing PuTTY (for Windows users)

Now we have to install and set up a proxy on our freshly acquired server. Windows users can use the PuTTY tool, which can be downloaded here. Click on the .msi build under the "MSI (Windows Installer)" section. Mind if your OS is 32-bit or 64-bit when downloading the installer (if you are not sure, this article will help you determine it).
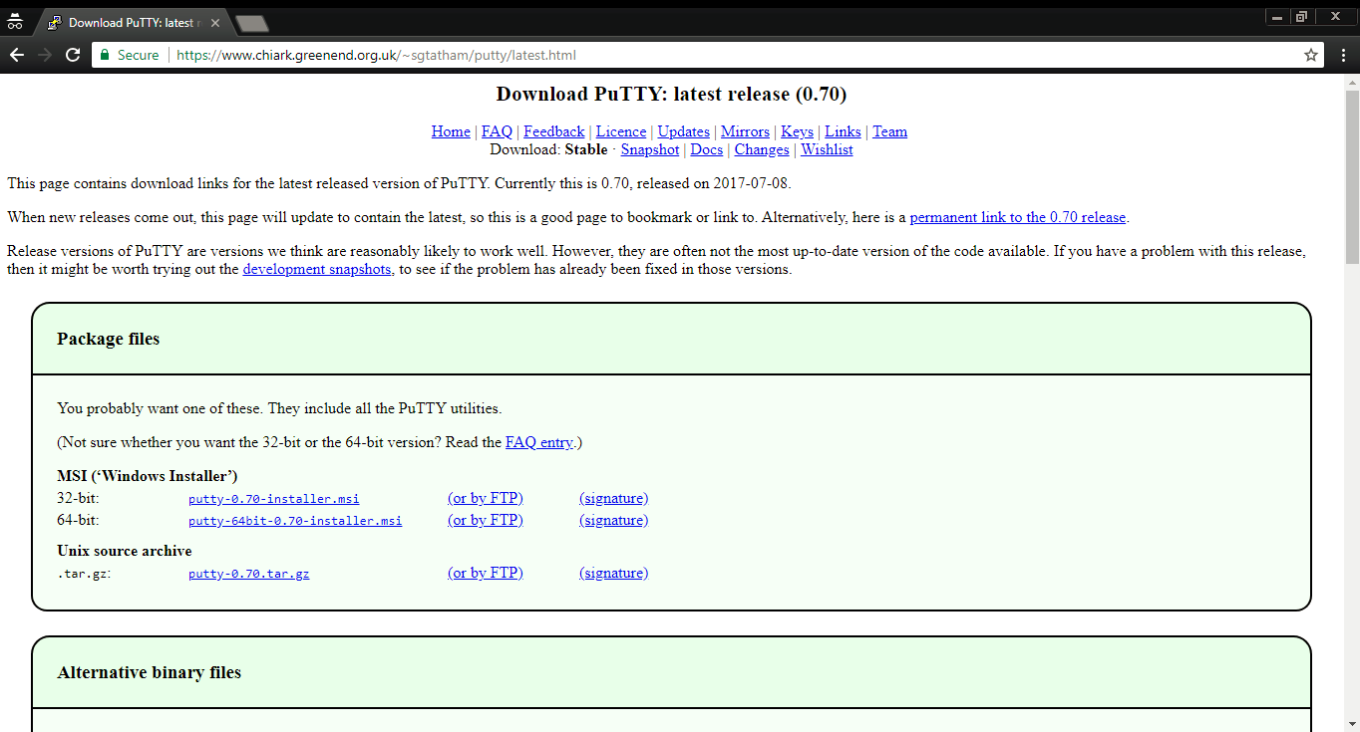
Open the .msi file and install PuTTY by following the wizard's instructions, and then run the tool.
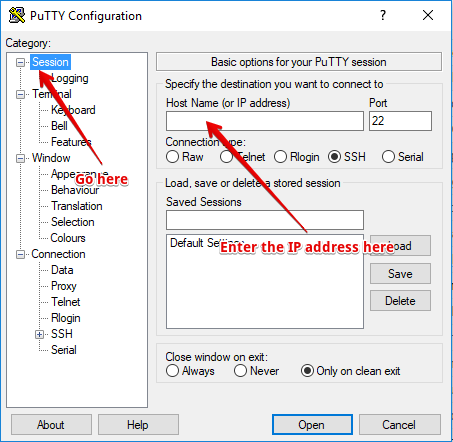
This is what you'll be faced with — don't get scared at the number of tabs and settings there, we'll basically only need one. Open the very first tab (Session) and enter the IP address you got in that confirmation email from Vultr.

Done? Then click the "Open" button located at the bottom. You'll see the console asking you to enter login and password (during the first launch there will be a warning pop-up — don't worry, it's fine, just press OK).
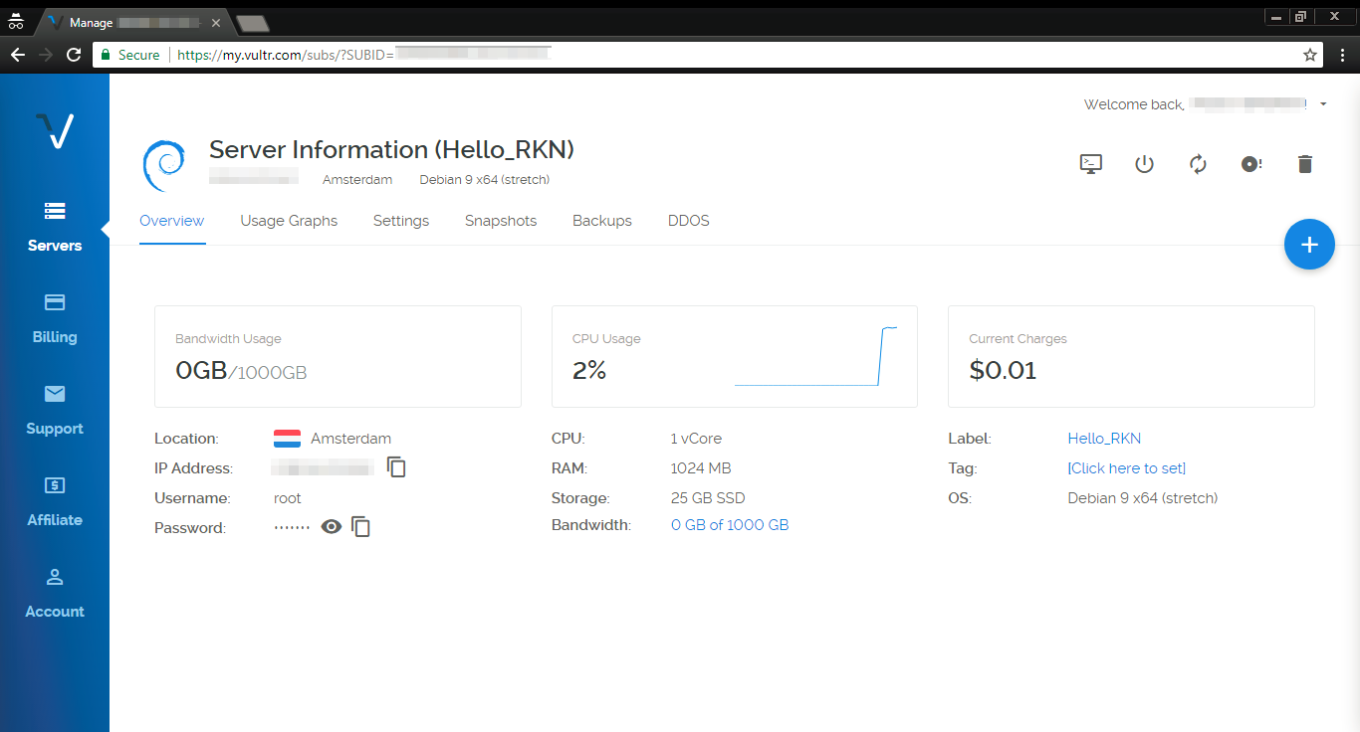
This data can be found in the Overview tab of your Vultr servers screen. The username will be root by default, and the password, of course, randomized (you can change it while you are at it). Ok, you've successfully entered login and password, which takes us to the next step — installing a proxy.

If you are a Mac user, you don't need to install putty or any other utility. All you have to do is open the Terminal and proceed to install and configure a proxy.

Setting up and configuring a proxy

For this purpose, we will use a special script by AdGuard that will perform all required actions. If everything has been going well so far, you should be seeing PuTTY console on your screen.
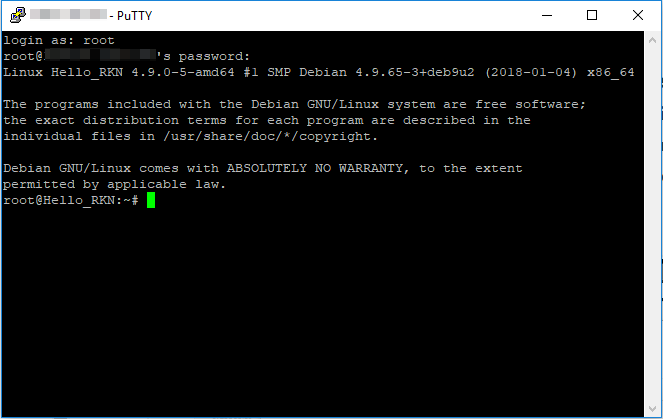
Subsequently execute the following commands in there (press Enter after each command):

apt-get update

The console should look somewhat like this:
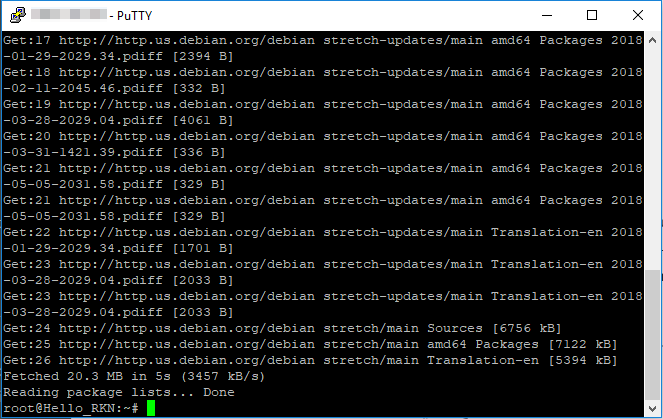
apt-get install curl -y

This is what you'll be seeing after executing this command:
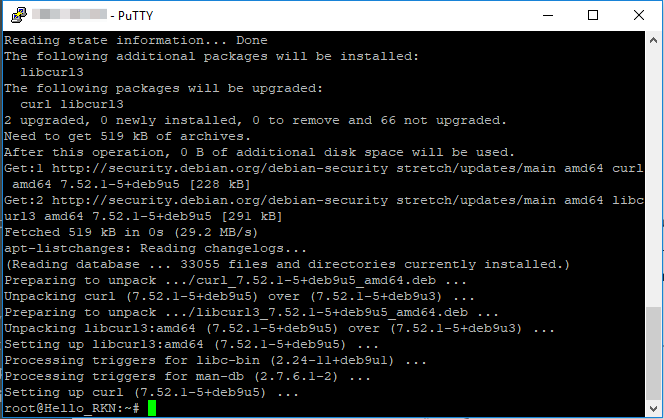
bash <(curl -s "https://raw.githubusercontent.com/AdguardTeam/ProxiesSetup/master/setup.sh")

At the 3rd step, the script will ask you for a username/password pair for your future proxy. You are free to choose any, but make sure to remember them, or even write them down. What it will look like:
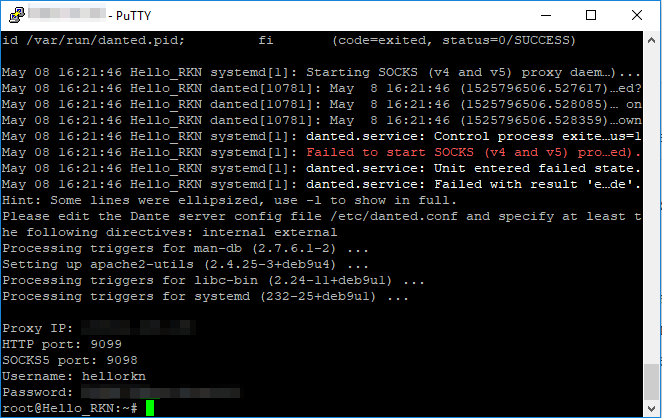
In the console, you will see the IP address of your proxy, HTTP port, SOCKS5 port, username and password. This information has to be entered whenever you want to configure your device/browser to use this proxy. Let's now have a look at a couple of specific examples.

Very important! SOCKS5 is not ideal in terms of security. Try not to use SOCKS5 proxy in public and unprotected networks. In one of the next articles, we'll tell about more secure solutions like Shadowsocks.

In case your server has restarted, you will need to reenable the danted service. To do so, run this command line in the console:

systemctl enable danted.service

Configuring proxy in AdGuard for Mac

Setting up a SOCKS5 proxy in AdGuard for Mac is pretty easy, especially since the proxy settings have been moved from the Advanced settings to the Network tab. Click the gear icon and select Preferences.
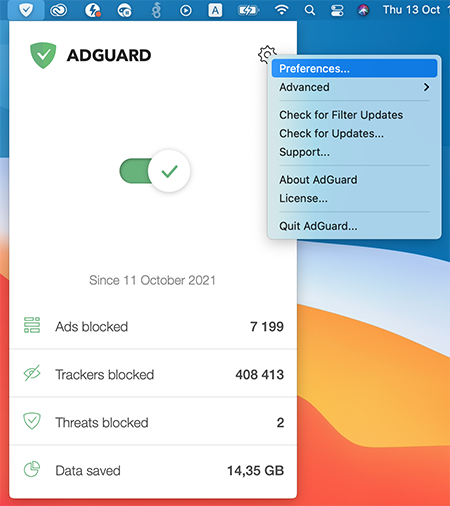
Settings_1

Now go to the Network tab, and then to the Outbound proxy tab. In the drop-down menu on the right, select SOCKS5. Fill in all the fields, using the data you have just seen in Terminal. To complete the setup, check the Outbound proxy box.
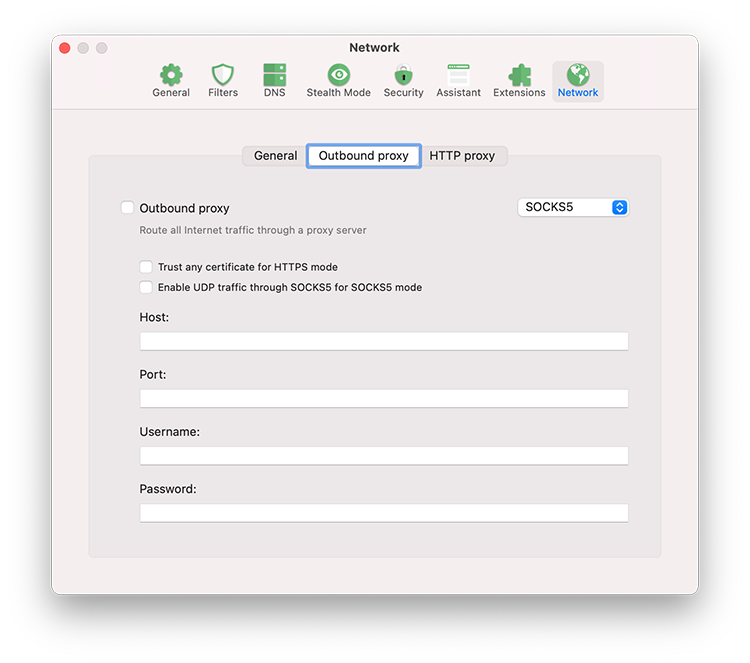
Settings_2

If you want to use AdGuard for Mac as an HTTP proxy to filter traffic on devices in your local network, go to the HTTP proxy tab and check the box Use AdGuard as an HTTP proxy.
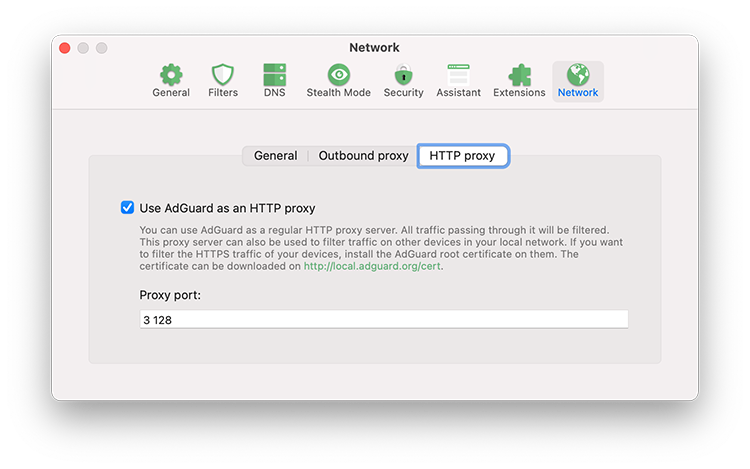
Settings_3

Configuring proxy in AdGuard for Android

There's no trickery here, we will be configuring our SOCKS5 proxy (since we need the authorization) just like we would configure any other proxy. Open the side menu of AdGuard app, go to "Settings - Proxy settings".
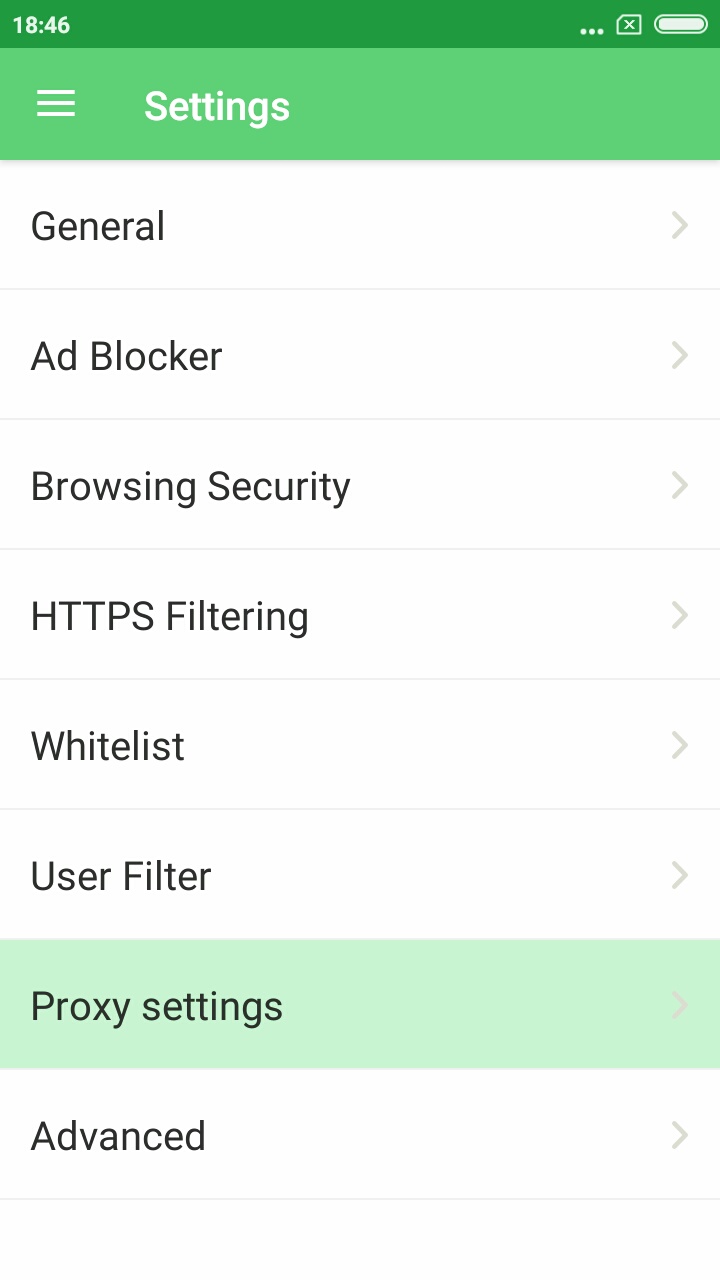
Don't forget to toggle the main switch in the top right corner on, then tap the "Add proxy" button.
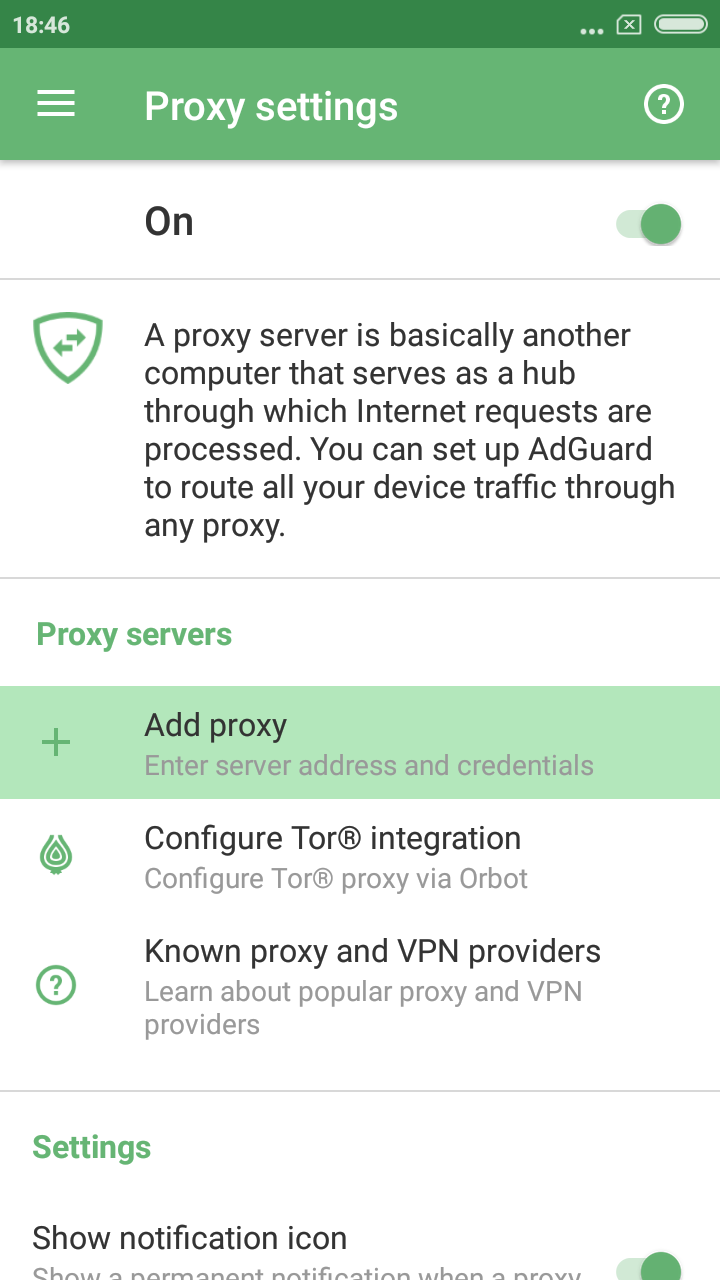
Fill out all the fields using data from PuTTY console. You can enter anything under "Proxy name". Also, enable the "Default proxy" option if you plan to mainly use this proxy.
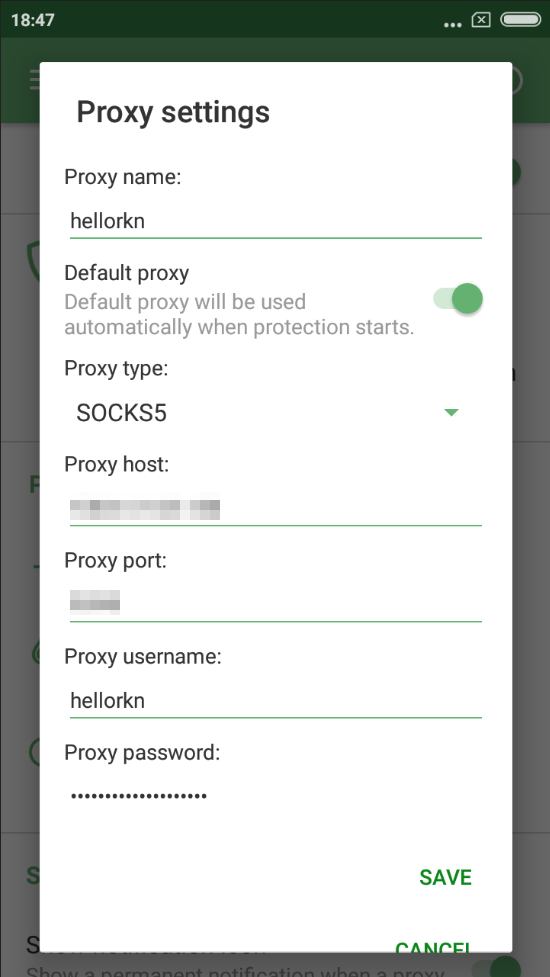
Excellent! Tap Save, now all traffic filtered by AdGuard will be routed through your proxy. And by the way, you can still disable AdGuard filtering for any app(s) via "Apps management", it will prevent its traffic from being routed through the proxy.
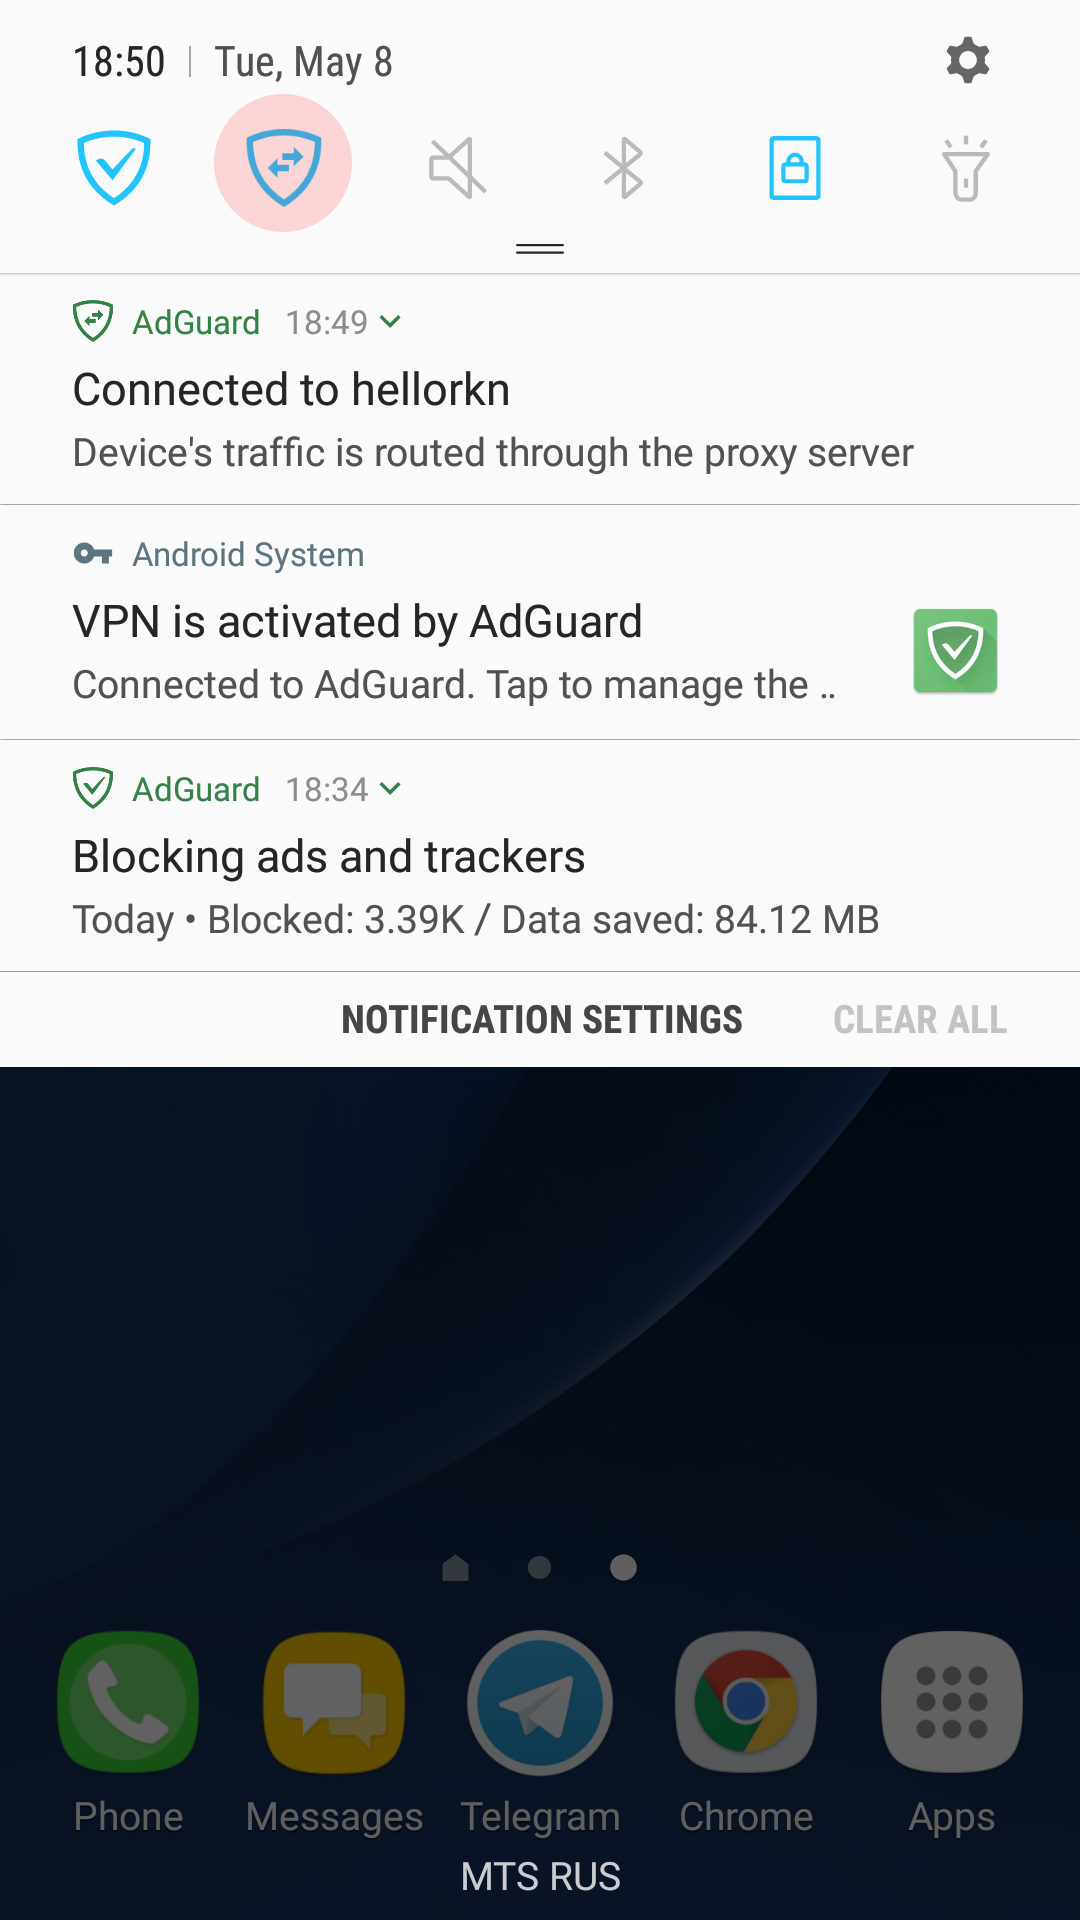
There's one trick that will allow you to instantly switch between enabling and disabling the proxy — you can add a specific tile to the quick access panel. Note there's a new notification in the notification bar, telling that your traffic is routed through the proxy server. Tapping on it will also take you to the "Proxy settings" screen in AdGuard.

Configuring proxy in Chrome/Firefox browsers

For this purpose, we advise using the SwitchyOmega browser extension. I use Chrome, so I'll be downloading it from the Chrome Store, Firefox users will find it among Firefox add-ons. Its unique trait is that it allows you to set up a proxy to be used on specific domains only, or, vice versa, to exclude specific domains.
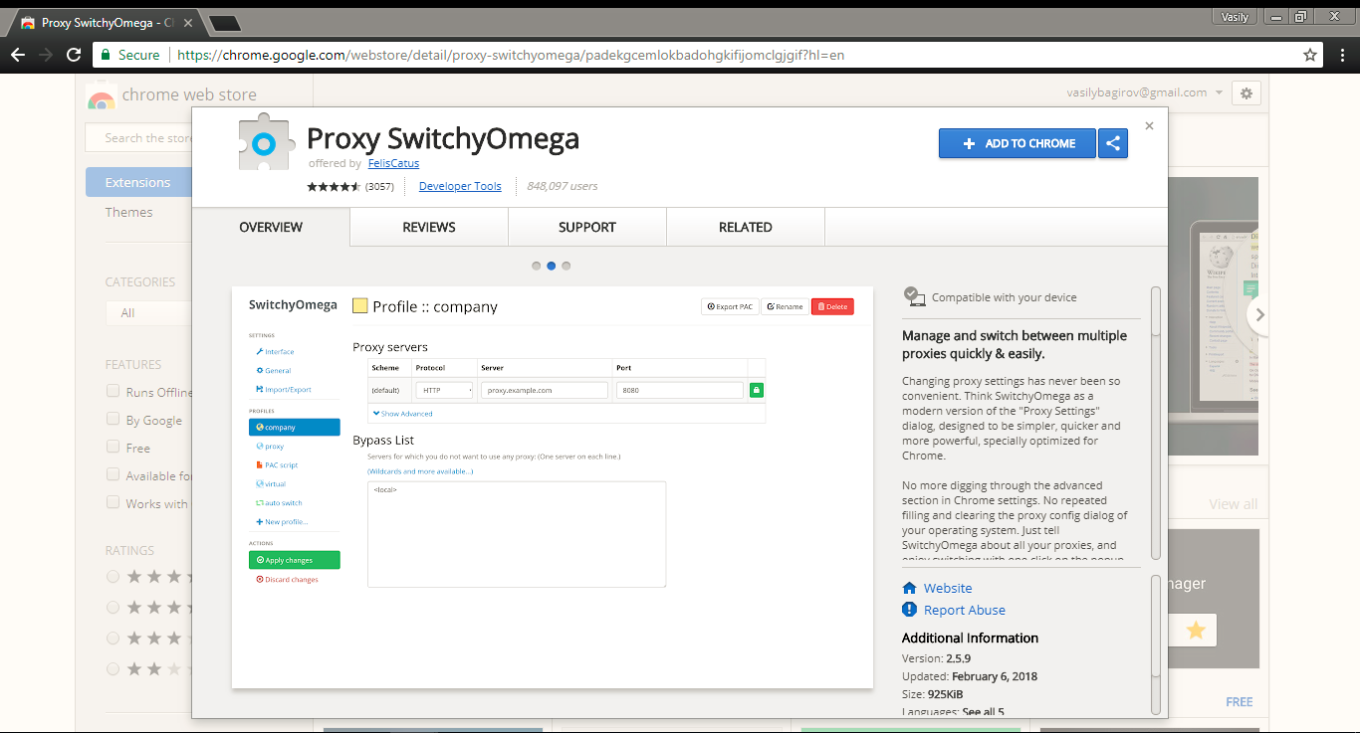
Configuring SwitchyOmega is very simple. Add a new profile ("+New profile") in the Profiles tab on the left. We need to choose HTTP protocol, since SOCKS5 does not support authorization here. Again, fill out the fields according to previously received information. Remember to apply changes by clicking the button on the left!

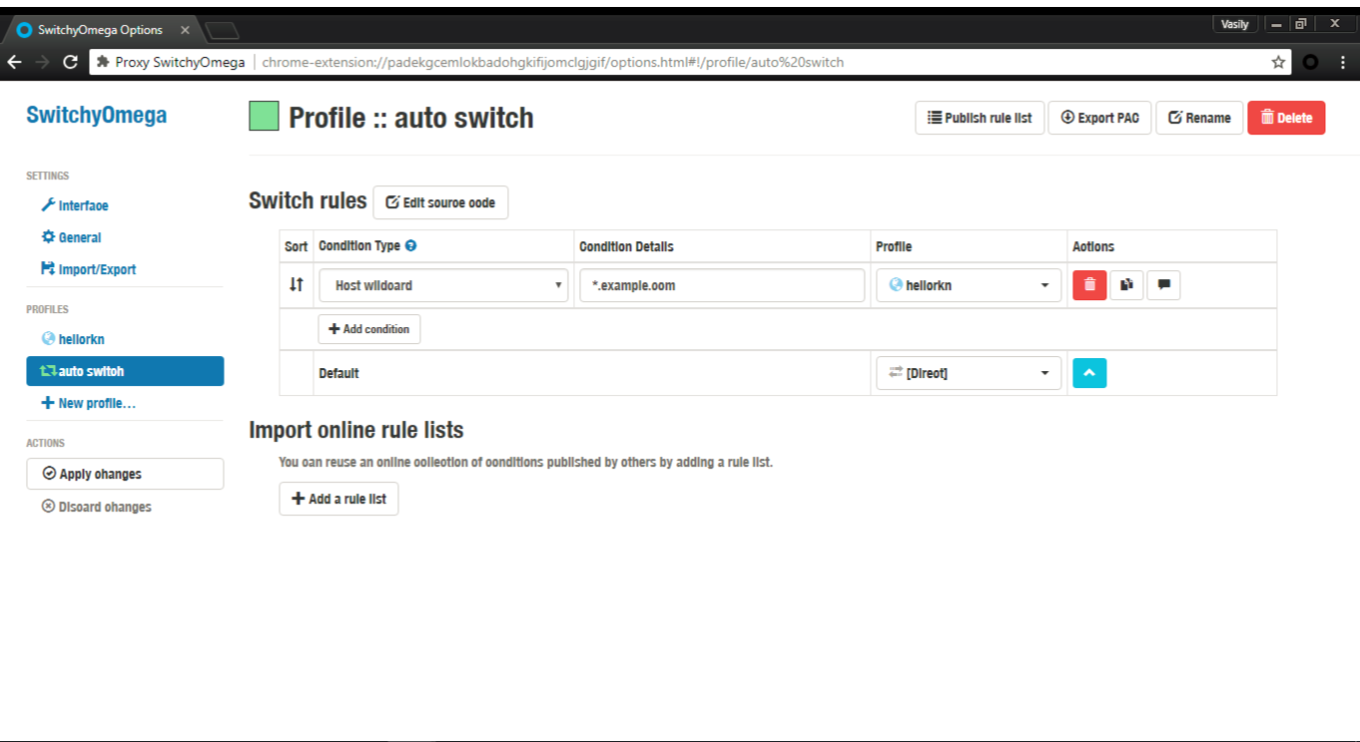
To make your browser use this proxy by default, in the "Auto switch" tab select the freshly added proxy in the Default drop-down menu.

In case you want your proxy to be used for specific websites or IP addresses only, set up respective switch rules. A tooltip will help you with the syntax.
And here's one small "lifehack" (please don't kill me for using this word): on any page you can quickly access proxy settings by clicking the SwitchyOmega extension icon. Manage proxy in respect to the current website, or change global proxy settings — everything is within a couple of clicks.
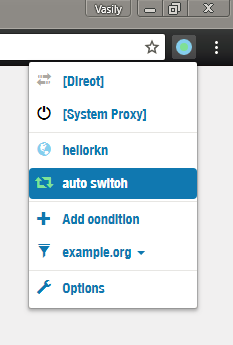
Color indicator also helps determining if the proxy is being used currently or not.

Summarizing

We've done it! If everything went according to plan, you should have your own server with a working proxy installed there, and respective settings on your phone/browser. Not so bad for 10 minutes spent on reading this article :)

Should you encounter any difficulties along the way, or if you just have any questions — let me know in the comments, and I (or some other team member) will help you get through! Good luck!


Tetszett ez a bejegyzés?
AdGuard VPN AdGuard DNS AdGuard Mail AdGuard Wallet
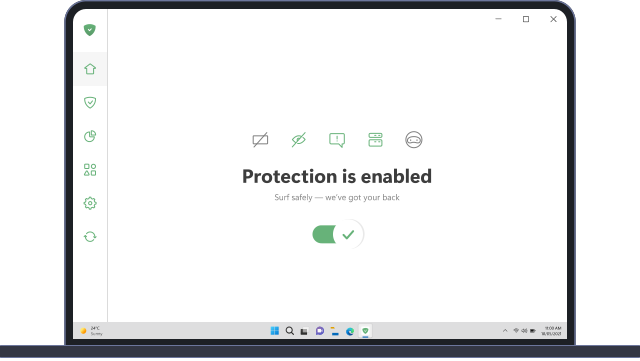
Az AdGuard for Windows főképernyője
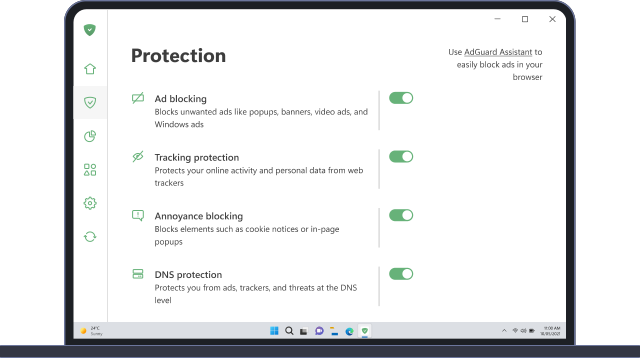
Az AdGuard for Windows Védelem képernyője, amely a védelem funkcióit és beállításait mutatja
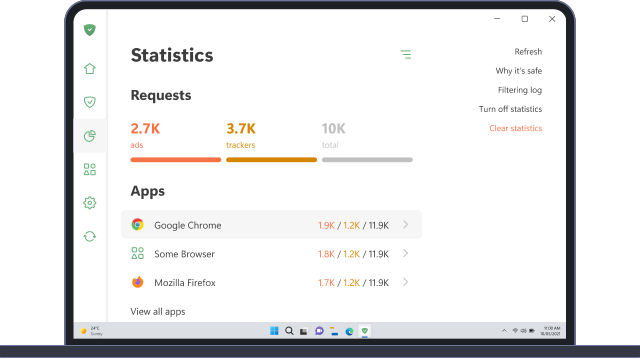
Az AdGuard for Windows Statisztikák képernyője, amely a letiltott hirdetések és nyomkövetők statisztikáit mutatja
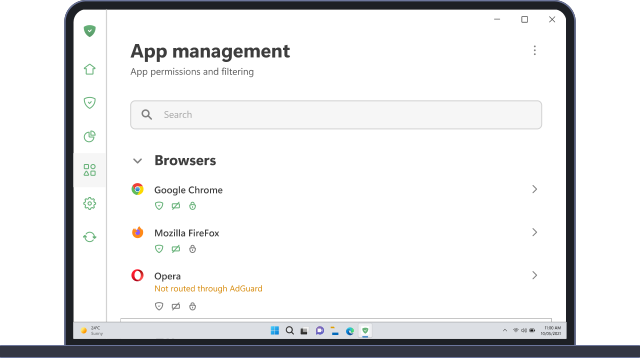
Az AdGuard for Windows Alkalmazáskezelés képernyője, amely az eszközre telepített alkalmazások védelemkezelési beállításait mutatja
20 409 20409 értékelések
Kiváló!
AdGuard: hirdetésblokkoló Windowshoz

Az AdGuard Windowsra több mint egy reklámblokkoló. Ez egy többcélú eszköz, amely blokkolja a hirdetéseket, szabályozza a hozzáférést a veszélyes webhelyekhez, felgyorsítja az oldalak betöltését, és megvédi a gyermekeket a nem megfelelő tartalmaktól
A program letöltésével elfogadja a licencszerződés feltételeit
Microsoft Store
A program letöltésével elfogadja a licencszerződés feltételeit
AdGuard Windowsra v8.0, 14-napos próbaidőszak
Az AdGuard for Mac főképernyője
Az AdGuard Mac-hez Lopakodó mód képernyője
20 409 20409 értékelések
Kiváló!

AdGuard: hirdetésblokkoló Mac-hez

Az AdGuard for Mac egy egyedi reklámblokkoló, amelyet kifejezetten a macOS-hez terveztek. Amellett, hogy megvéd a zavaró hirdetésektől a böngészőkben és az alkalmazásokban, védelmet nyújt a követés, az adathalászat és a csalás ellen
A program letöltésével elfogadja a licencszerződés feltételeit
Olvasson tovább
AdGuard Macre v2.19, 14-napos próbaidőszak
Az AdGuard for Android főképernyője
Az AdGuard for Android Követés elleni védelem képernyője
Az AdGuard for Android Alkalmazáskezelés képernyője, amely az eszközre telepített alkalmazások védelemkezelési beállításait mutatja
Az AdGuard for Android Statisztikák képernyője, amely a letiltott hirdetések és nyomkövetők statisztikáit mutatja
Az AdGuard privát böngészőjének főképernyője Androidon
QR-kód az AdGuard for Android letöltéséhez
20 409 20409 értékelések
Kiváló!

AdGuard: hirdetésblokkoló Androidra

Blokkolja a hirdetéseket és a nyomkövetőket minden böngészőben, játékban és egyéb alkalmazásban. Védi a magánszféráját, és lehetővé teszi, hogy szabályozza, hogyan használják az alkalmazásai az Internetet. APK-n keresztül telepítve
A program letöltésével elfogadja a licencszerződés feltételeit
Olvasson tovább
Letöltésre szolgáló szkennelés
Használjon a készüléken elérhető QR-kódolvasót
AdGuard Androidra v4.14, 14-napos próbaidőszak
Az AdGuard for iOS főképernyője
Az AdGuard for iOS Védelem képernyője, amely a védelem funkcióit és beállításait mutatja
Az AdGuard for iOS Statisztikák képernyője, amely a letiltott hirdetések és nyomkövetők statisztikáit mutatja
QR-kód az AdGuard for iOS letöltéséhez
20 409 20409 értékelések
Kiváló!

AdGuard: hirdetésblokkoló az iOS-hez

A legjobb iOS-es reklámblokkoló iPhone-hoz és iPadhez. Az AdGuard mindenféle hirdetést és követőt eltávolít a Safariban, és DNS-szinten védi az adatvédelmedet az összes alkalmazásban
A program letöltésével elfogadja a licencszerződés feltételeit
Olvasson tovább
Letöltésre szolgáló szkennelés
Használjon a készüléken elérhető QR-kódolvasót
AdGuard iOS-re v4.5
Az AdGuard Content Blocker főképernyője
Az AdGuard Content Blocker Szűrők képernyője
Az AdGuard Content Blocker Beállítások képernyője
20 409 20409 értékelések
Kiváló!

AdGuard Tartalomblokkoló

Az AdGuard Content Blocker kiküszöböli a mobilböngészők minden olyan hirdetését, amely támogatja a tartalomblokkoló technológiát — nevezetesen a Samsung Internet és a Yandex böngésző. Funkciói korlátozottak az AdGuard for Androidhoz képest, de ingyenes, könnyen telepíthető és hatékony
A program letöltésével elfogadja a licencszerződés feltételeit
Olvasson tovább
AdGuard Tartalomblokkoló v2.8
Az AdGuard Browser Extension főképernyője
Az AdGuard Browser Extension Követés elleni védelem képernyője
20 409 20409 értékelések
Kiváló!

AdGuard Böngészőkiegészítő

Az AdGuard a leggyorsabb és a legkönnyedebb hirdetésblokkoló bővítmény, amely hatékonyan blokkolja az összes hirdetéstípust az bármelyik weboldalon! Válassza az AdGuard lehetőséget az Ön által használt böngészőhöz, hogy hirdetésektől mentesen, gyorsan és biztonságosan böngészhessen.
Telepítés
A program letöltésével elfogadja a licencszerződés feltételeit
Telepítés
A program letöltésével elfogadja a licencszerződés feltételeit
Telepítés
A program letöltésével elfogadja a licencszerződés feltételeit
Telepítés
A program letöltésével elfogadja a licencszerződés feltételeit
Telepítés
A program letöltésével elfogadja a licencszerződés feltételeit
Olvasson tovább
AdGuard Böngészőkiegészítő v5.5
Az AdGuard Assistant főképernyője
20 409 20409 értékelések
Kiváló!

AdGuard Asszisztens

A [AdGuard asztali alkalmazások] böngészőbővítménye(https://adguard.com/products.html?_plc=hu). Lehetővé teszi a webhelyek egyéni elemeinek blokkolását, webhelyek hozzáadását az engedélyezési listához, és jelentések küldését közvetlenül a böngészőből
AdGuard Asszisztens v1.4
20 409 20409 értékelések
Kiváló!

AdGuard Home

Az AdGuard Home egy hálózati alapú megoldás a hirdetések és nyomkövetők blokkolására. Telepítse egyszer az útválasztóra, hogy lefedje az otthoni hálózat összes eszközét – nincs szükség további kliensszoftverre. Ez különösen fontos a különféle IoT-eszközök esetében, amelyek gyakran veszélyt jelentenek az Ön magánéletére
AdGuard Home v0.107
Az AdGuard Pro for iOS főképernyője
Az AdGuard Pro for iOS Védelem képernyője, amely a védelem funkcióit és beállításait mutatja
Az AdGuard Pro for iOS Statisztikák képernyője, amely a letiltott hirdetések és nyomkövetők statisztikáit mutatja
20 409 20409 értékelések
Kiváló!

AdGuard Pro iOS-re

Az AdGuard Pro iOS-hez verziója minden fejlett hirdetésblokkoló védelmi funkcióval rendelkezik. Ugyanazokat az eszközöket kínálja, mint az AdGuard iOS fizetős verziója. Kiválóan blokkolja a hirdetéseket a Safariban, és lehetővé teszi a DNS-beállítások testreszabását a védelem személyre szabásához. Blokkolja a hirdetéseket a böngészőkben és alkalmazásokban, megvédi gyermekeit a nem megfelelő tartalmaktól, és biztonságban tartja személyes adatait.
A program letöltésével elfogadja a licencszerződés feltételeit
Olvasson tovább
AdGuard Pro iOS-re v4.5
Az AdGuard Mini for Mac főképernyője
Az AdGuard Mini for Mac Safari védelem képernyője
Az AdGuard Mini for Mac Szabály létrehozása képernyője
20 409 20409 értékelések
Kiváló!

AdGuard Mini Mac-hez — Safari hirdetésblokkoló

Az AdGuard Mini Mac-re egy hatékony Safari hirdetésblokkoló. Ez a könnyű alkalmazás eltávolítja a hirdetéseket, blokkolja a nyomkövetőket, és felgyorsítja az oldalak betöltését. Segít zavaró tényezők nélkül böngészni a webet Safariban, és megőrzi az adataid privát jellegét
AdGuard Mini Mac-hez v2.3
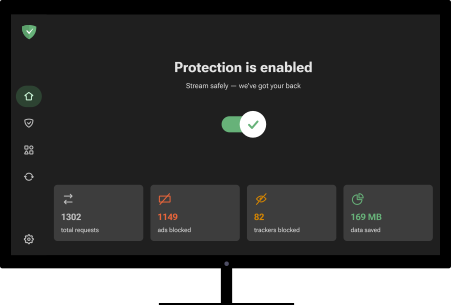
Az AdGuard for Android TV főképernyője engedélyezett védelemmel
Az AdGuard for Android TV hirdetésblokkolás képernyője, amely a funkciókat és beállításokat mutatja
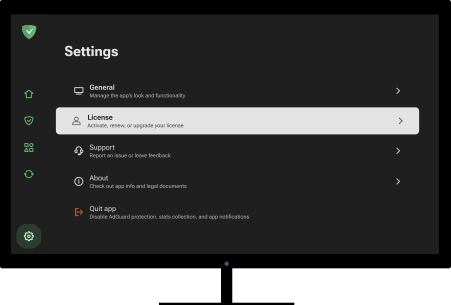
Az AdGuard for Android TV Beállítások képernyője
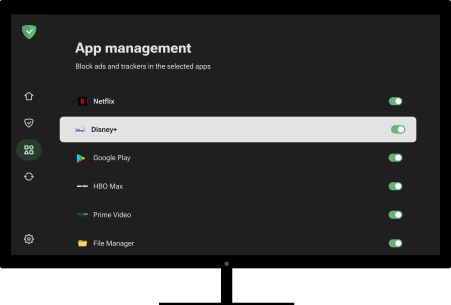
Az AdGuard for Android TV Alkalmazáskezelés képernyője, amely azokat az alkalmazásokat mutatja, ahol a hirdetések és nyomkövetők le vannak tiltva
20 409 20409 értékelések
Kiváló!

AdGuard Android TV-hez

Az Android TV-hez készült AdGuard az egyetlen alkalmazás, amely blokkolja a hirdetéseket, védi az Ön adatait, és tűzfalként működik a Smart TV-ben. Figyelmeztetéseket kaphat a webes fenyegetésekről, használjon biztonságos DNS-t, és élvezze a titkosított forgalom előnyeit. Pihenjen, és merüljön el kedvenc műsoraiban a csúcsminőségű biztonság és  zero  hirdetés!
AdGuard Android TV-hez v4.14, 14-napos próbaidőszak
Az AdGuard kabalája, Agnar, aki a Linux pingvint tartja
20 409 20409 értékelések
Kiváló!

AdGuard Linuxhoz

Az AdGuard for Linux a világ első rendszerszintű Linux-hirdetésblokkolója. Blokkolja a hirdetéseket és a nyomkövetőket eszközszinten, válasszon az előre telepített szűrők közül, vagy adja hozzá sajátját – mindezt a parancssori felületen keresztül
AdGuard Linuxhoz v1.4
20 409 20409 értékelések
Kiváló!

AdGuard Temp Mail

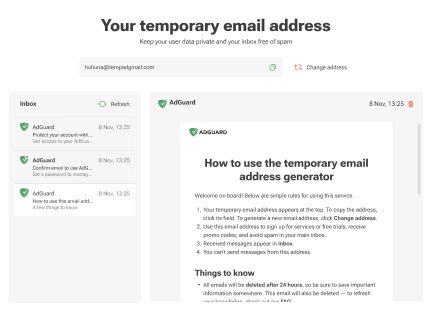
Ingyenes ideiglenes email címgenerátor, amely névtelenül tartja és védi magánéletét. Nincs spam a fő postaládájában!
20 409 20409 értékelések
Kiváló!

AdGuard VPN

75 végpont világszerte

Hozzáférés bármilyen tartalomhoz

Erős titkosítás

Nincs naplózás

Gyorsabb kapcsolódás

0-24 támogatás

20 409 20409 értékelések
Kiváló!

AdGuard DNS

Az AdGuard DNS egy bolondbiztos módszer az internetes hirdetések blokkolására, amely nem igényel alkalmazásokat. Könnyen használható, teljesen ingyenes, könnyen beállítható bármilyen eszközön, és csak minimálisan szükséges funkciókat biztosít a hirdetések, számlálók, rosszindulatú webhelyek és felnőtteknek szóló tartalmak blokkolásához.
20 409 20409 értékelések
Kiváló!

AdGuard Mail

Védje személyazonosságát, kerülje a kéretlen leveleket, és tartsa biztonságban postafiókját álneveinkkel és ideiglenes email címeinkkel. Élvezze ingyenes email továbbító szolgáltatásunk és alkalmazásaink előnyeit minden operációs rendszerre.
20 409 20409 értékelések
Kiváló!

AdGuard Wallet

Biztonságos és privát kriptopénztárca, amely teljes ellenőrzést biztosít eszközei felett. Kezeljen több pénztárcát, és fedezzen fel több ezer kriptovalutát tárolásra, küldésre és cserére
Az AdGuard letöltése megkezdődött Kattintson a nyíllal jelzett gombra a telepítés elindításához. Válassza a "Megnyitás" lehetőséget, és kattintson az "OK" gombra, majd várja meg a fájl letöltését. A megnyílt ablakban húzza az AdGuard ikont az "Alkalmazások" mappába. Köszönjük, hogy az AdGuardot választotta! Válassza a "Megnyitás" lehetőséget, és kattintson az "OK" gombra, majd várja meg a fájl letöltését. A megnyílt ablakban kattintson az "Telepítés" gombra. Köszönjük, hogy az AdGuardot választotta!
Telepítse az AdGuardot mobileszközökre is: