How to setup AdGuard Home on a public server
- Introduction
- Setup options
- Registering a domain name
- Renting a cloud server
- Connect to your server
- Installing AdGuard Home
- Initial setup
- Obtaining a TLS certificate
- Configuring encryption in AdGuard Home
- Configuring devices
- Configuring clients
- Questions or suggestions?
Introduction
Let’s start with a short introduction of what AdGuard Home is and why we made it. AdGuard Home is not a traditional content blocker that works in your browser. It’s also not a system-wide blocker like AdGuard premium apps. Instead, this is a network-wide blocker, and its purpose is to protect all your devices.
Disclaimer: in the current state, AdGuard Home is supposed to be used by power users and technical geeks who know what Linux is and how to use it. If you are not among them, probably this post is not for you. But stay tuned; we’re preparing a network-wide blocking solution suitable for everyone just as we speak.
Setup options
There are two “base” ways to set up AdGuard Home. The first one is to install it at home on some device like Raspberry Pi. In this case, it will control all devices in your home network. However, once your device leaves the home network (for instance, you take the phone with you and go out), it won’t be protected anymore. I won’t cover this setup in this post, but you can read this instruction.
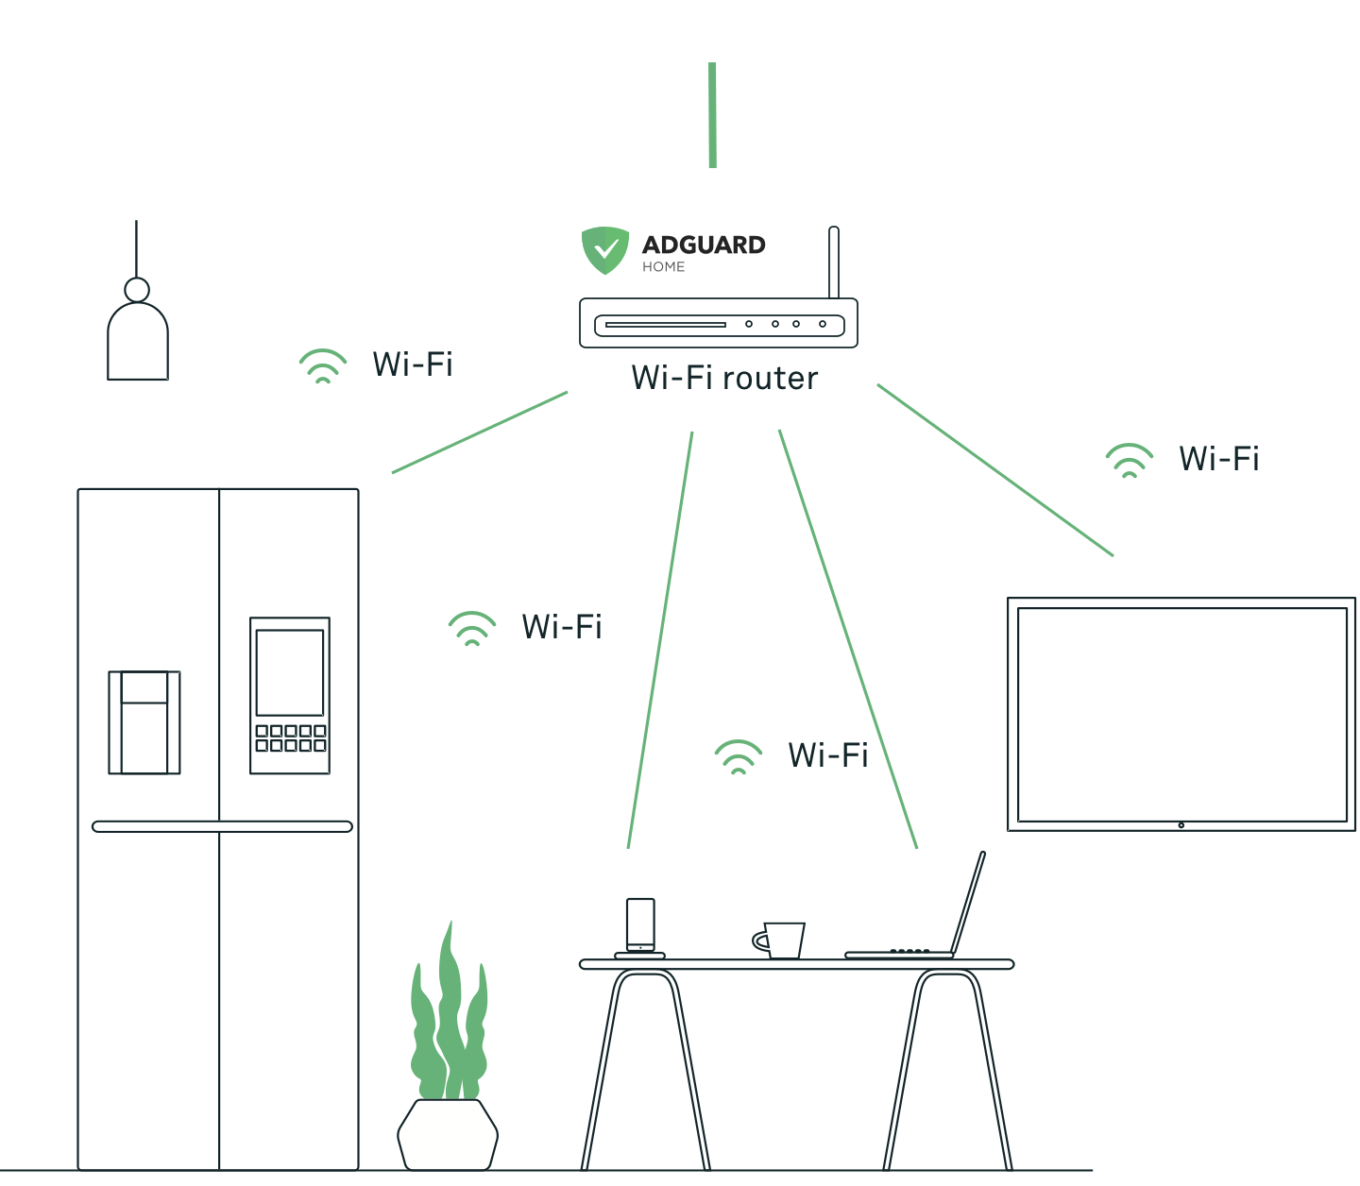
The second way is to install AdGuard Home on a public cloud server, set up encryption (this is a crucial step!), and configure your devices to use your new server. Of course, you have to pay for the server (~$5/mo) and the domain name (~$5-10/yr), but now wherever you go, AdGuard Home will continue to do its job. And since this is your server, you’ll be in control of your data.
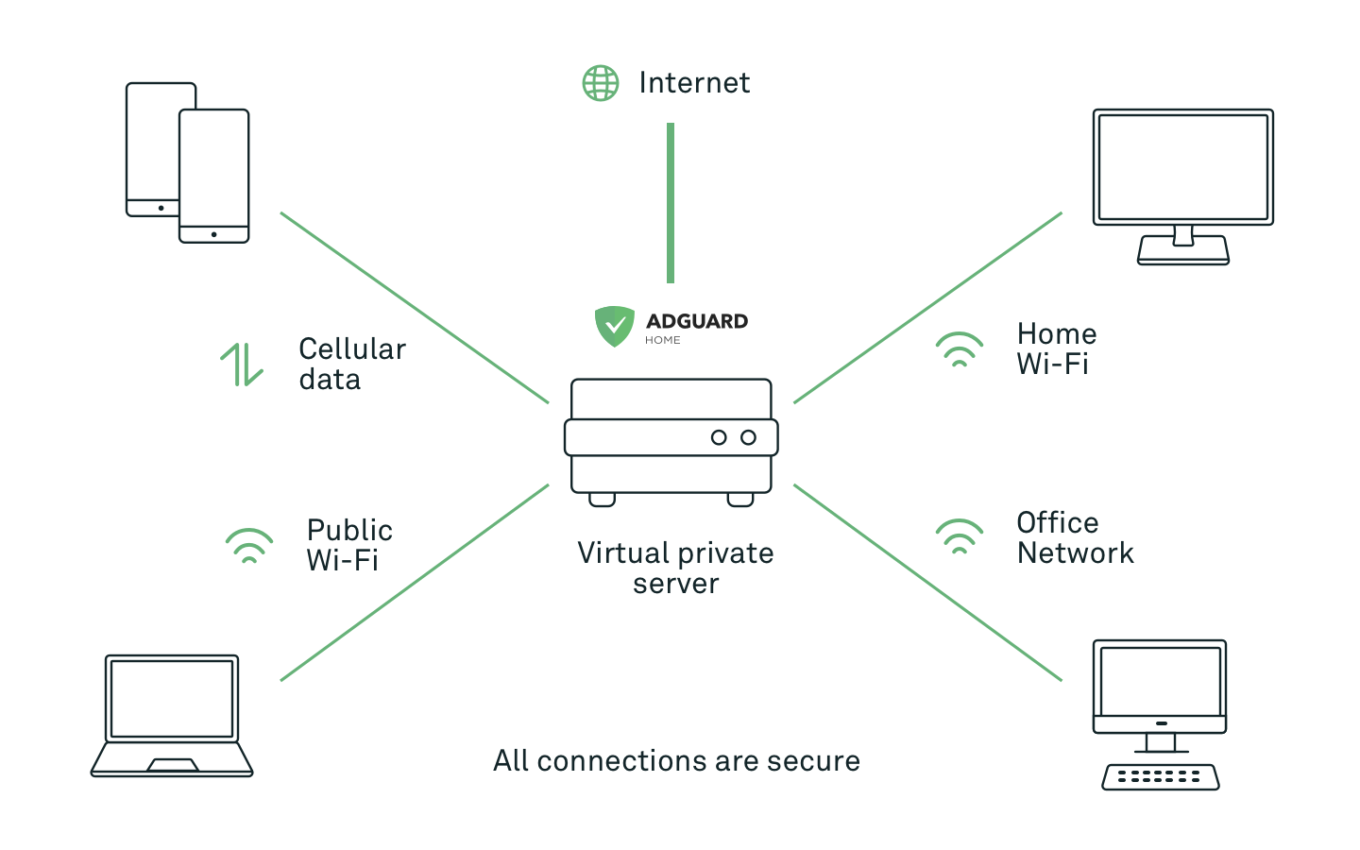
In this post, we’ll focus on the second way. Setting up AdGuard Home in your home network will be a topic for some future articles.
Disclaimer: most of the steps in this instruction and services that I use can be replaced with alternatives. I am describing my own setup, your preferences may differ, and that’s completely okay.
Registering a domain name
The very first step would be to register a domain name. For this, I prefer to use GoDaddy, but there are many more. To name a few: Name.com, Google Domains, Namecheap.
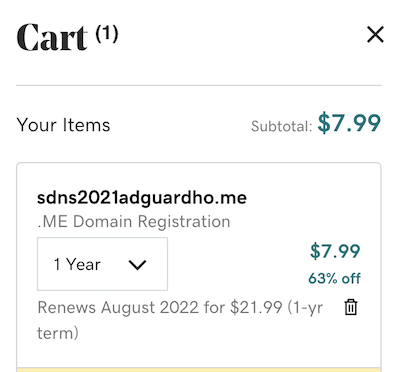
Take some time to find a name that you like, and you’re good to go!
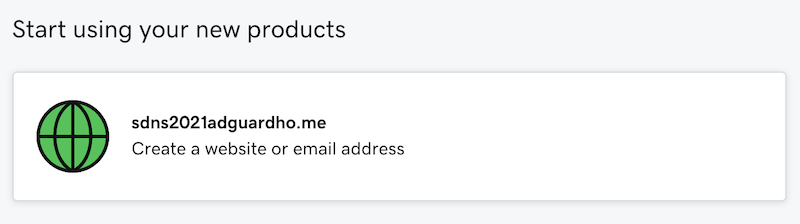
Once you have a domain name, we’re ready to get to the next step — rent a public cloud server.
Renting a cloud server
A cloud server is basically a virtual machine that runs on some hosting company infrastructure. It has a public static IP address, and you can connect to it from anywhere. Now, for my small personal side-projects, I prefer to use either DigitalOcean or Vultr, but you can choose whichever hosting provider you prefer.
Now, let’s proceed and finally rent a server. DigitalOcean calls servers “Droplets”, so just click “Create Droplets”, and let’s get to it.
First, choose the OS. I prefer Debian 10, but generally, AdGuard Home can run on anything.
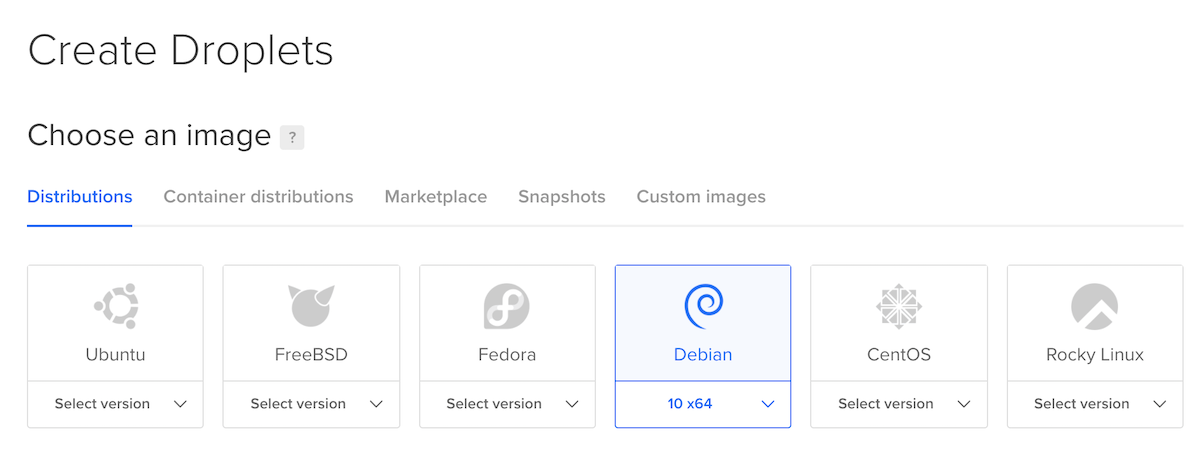
You won’t need a powerful server for your private AdGuard Home, so choose the cheapest tariff available.
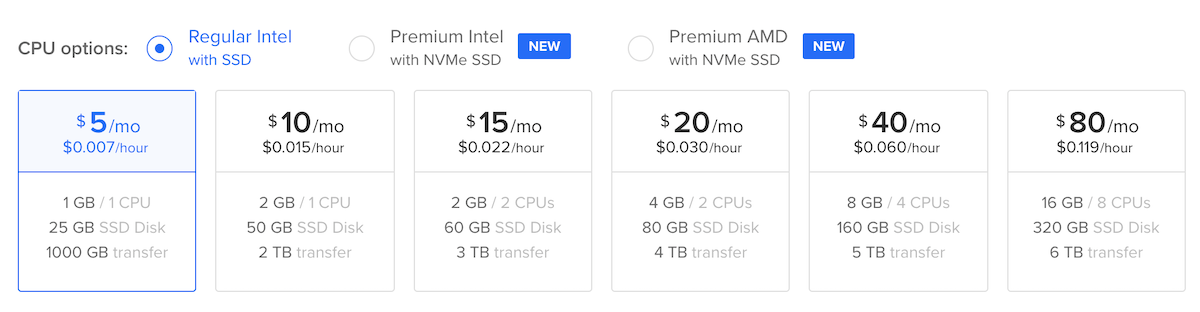
The last step is to configure authentication. Password authentication is available, but I strongly suggest using SSH key authentication.
It will take 30 seconds for the server to be created, and it’s ready to be used!
Connect to your server
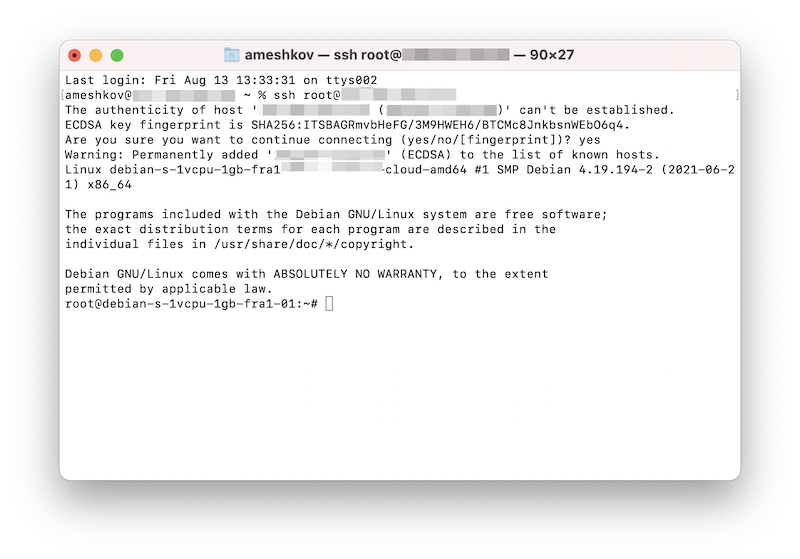
If you’re a Linux or a macOS user, just open the Terminal and print ssh root@ipaddress (replace ipaddress with the IP address of your new server) to connect to your new server.
If you’re a Windows user, you may need to install additional software (for instance, Putty) for that or use WSL.
Once you’ve successfully connected to your server, you’ll see a command line like this.
Finally, we’re ready to install AdGuard Home!
Installing AdGuard Home
There are multiple options of installing AdGuard Home. You can use Docker, SnapStore, download and run it manually. In this post, I’ll use the automated installation script.
Run the following command first:
apt update
apt install curl
apt install dnsutils
You’re ready to run the installation script:
curl -s -S -L https://raw.githubusercontent.com/AdguardTeam/AdGuardHome/master/scripts/install.sh | sh -s -- -v
Now AdGuard Home is installed, and you can open its web interface (the installation script prints its address).
Initial setup
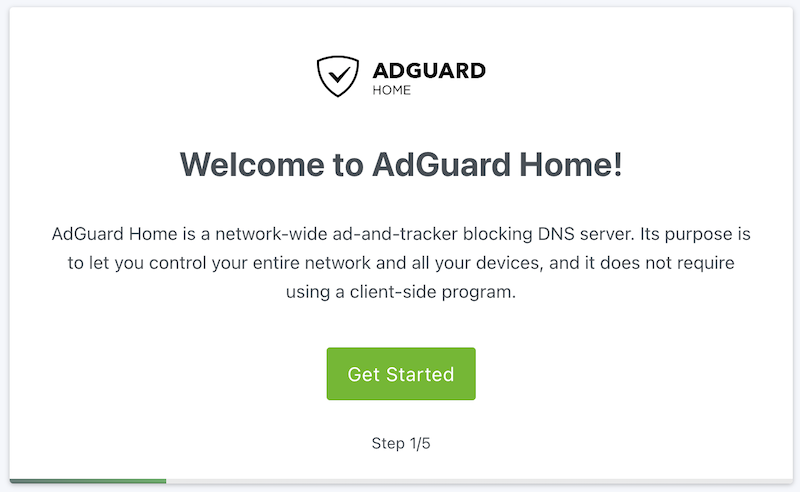
The initial setup will allow you to configure general settings, choose network interfaces AGH should listen to, and enter the admin user credentials.
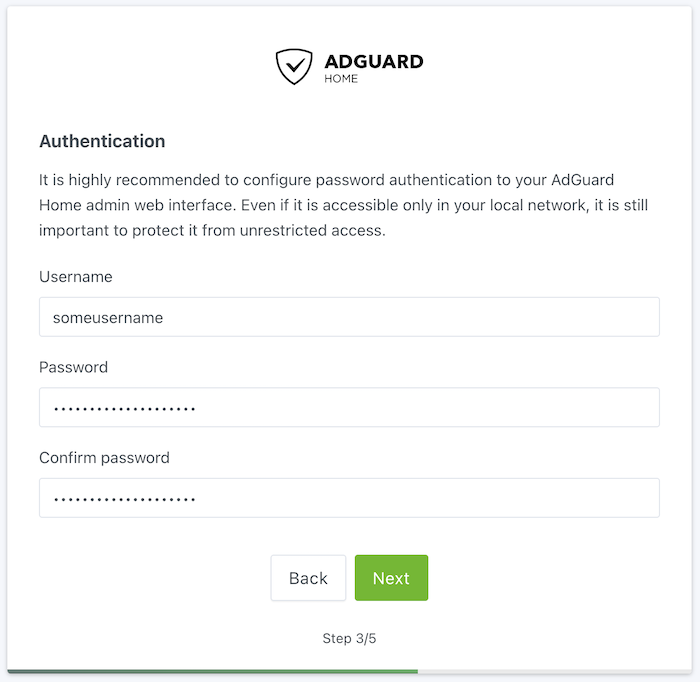
Choose a strong password! This is a public server, and it’s important to be very careful there. Check your password on Haveibeenpwned to make sure that it’s not compromised.
Congratulations, you now have installed your own AdGuard Home server! In addition, you can check if it works by sending a DNS query to it:
nslookup example.org ipaddress
(replace ipaddress with the IP address of your server).
Here’s how the AdGuard Home dashboard will look like:
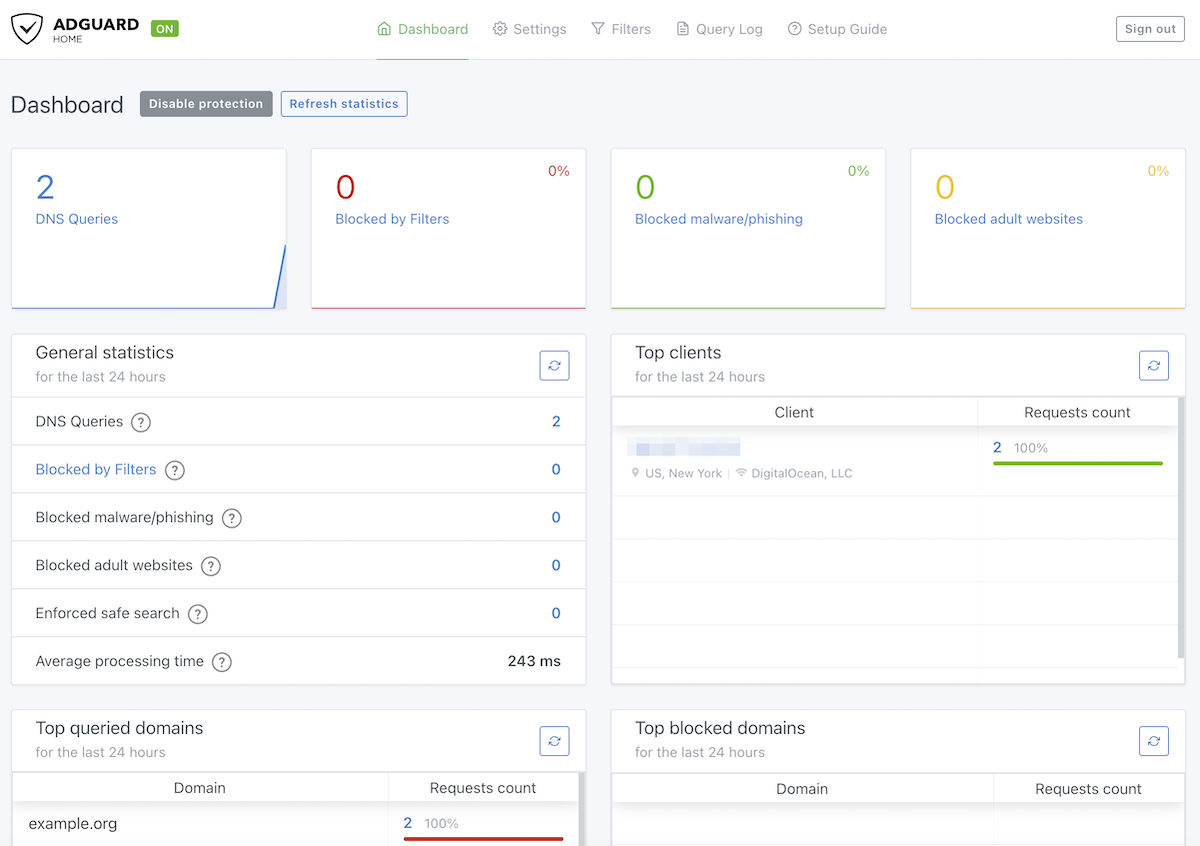
Let’s get to know better some of the important AdGuard Home features.
Blocklists
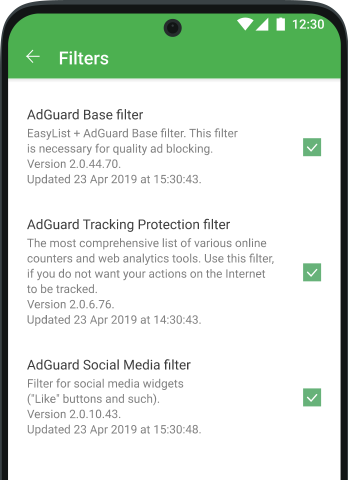
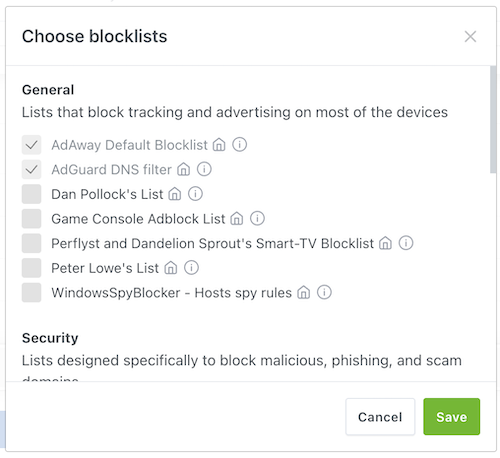
By default, AdGuard Home uses a single blocklist called AdGuard DNS filter. This is the same list we use in AdGuard DNS, and I’d say it is rather friendly to casual users. The policy of this list is to avoid blocking domains if blocking breaks too many things.
However, with AdGuard Home, you are in control, and you can choose the blocklists that suit you better.
Query Log
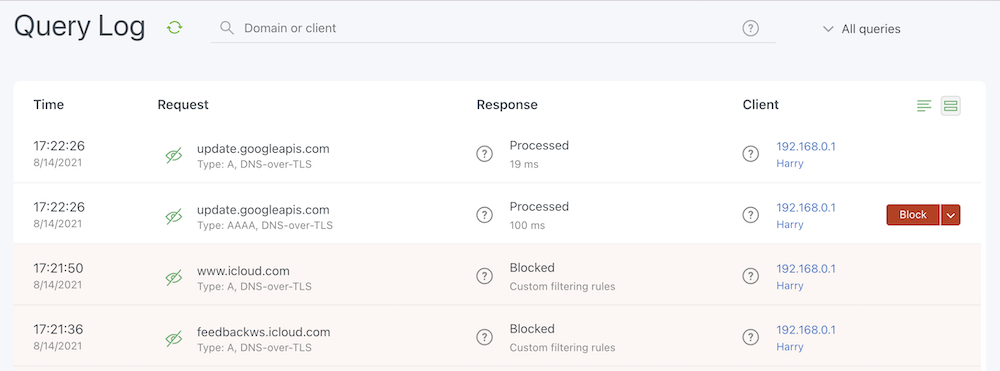
Here you can observe the network activity and decide what needs to be blocked or unblocked.
Additional security settings
This is important if you’re running a public server. Many people scan the Internet for public DNS servers and try to exploit them for DNS amplification attacks. While AdGuard Home comes with a reasonable default rate limit, preventing severe issues, you might still want to restrict access to avoid unrelated IP addresses appearing in the statistics. It’s advisable to set up a firewall for added protection, particularly if you have older devices that lack support for encrypted DNS. If all of your devices are able to use encrypted DNS protocols, we recommend disabling plain DNS altogether. For more details on this matter, refer to our Knowledge base.
More features
There are many more knobs in there, but I hope you now feel comfortable with it and explore it independently. Here’s a very detailed guide that can help you with it.
The problem is that currently, you only got a plain DNS server. And since this is a public server and all your DNS queries will go through the Internet, you want them to be encrypted. So our next step would be to configure encryption.
Obtaining a TLS certificate
Encryption is based on TLS certificates which you can obtain for free, but only if you have a domain name. This is exactly why we needed to register a domain name in the beginning. So the first step would be to point your domain name to the IP address of your new server.
Head to GoDaddy or whatever domain registrar you used. Then, go to DNS → Manage Zones, find your domain there and change the “A” record’s value to the IP address of your server.
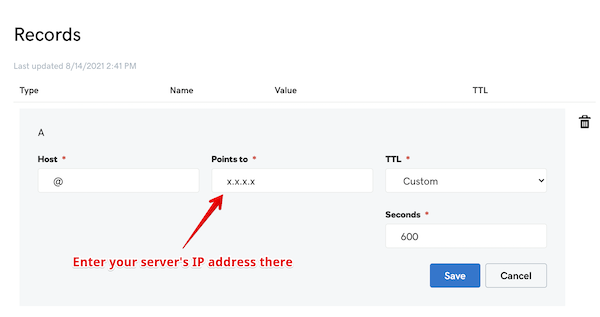
Also, add a new “A” record for * , since we want all subdomains to point to AdGuard Home as well. We need this for a more flexible clients configuration, and I’ll talk about this later. Alternatively, you can add a CNAME record for * that points to your main domain name.
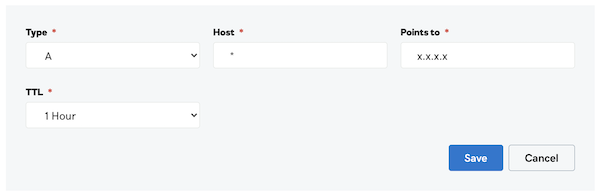
Now you can navigate to your AdGuard Home using the domain name instead of the IP address.
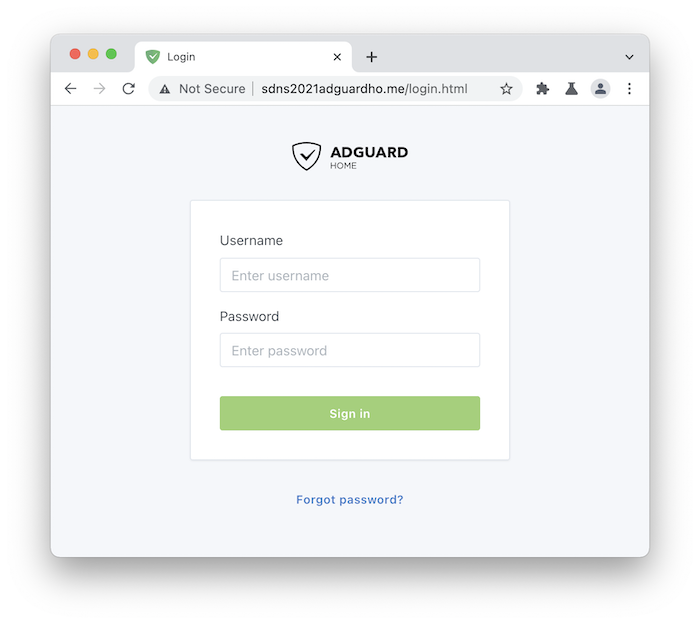
The problem is that it is still marked “Not Secure” by the browser. So to make it secure and encrypted, we need to obtain a certificate, and the easiest way to do that for free is to use Let’s Encrypt.
Let’s Encrypt is a non-profit that provides TLS certificates at no charge. You just need to confirm that you’re the owner of the domain. To do that, you need to use a client tool. The most popular option is CertBot, but I personally prefer to use Lego. We’ll need to obtain a Wildcard certificate so that we could not only encrypt your main domain, but also its subdomains.
First of all, we need to create API keys for GoDaddy. Choose “production” there. You’ll get a “key” and a “secret”, you’ll need them both.
If you’re not using GoDaddy, check out lego docs on how to use it with a different DNS provider.
Now you have everything. We’ve also prepared a simple script that would make it easier to obtain the certificate. Run the following commands:
mkdir /opt/lego
cd /opt/lego
curl -s "https://raw.githubusercontent.com/ameshkov/legoagh/master/lego.sh" --output lego.sh
chmod +x lego.sh
Now to obtain the certificates, you just need to run the following command. Don’t forget to fill your data there (domain name, email, the key, and the secret).
DOMAIN_NAME="example.org" \
    EMAIL="you@email" \
    DNS_PROVIDER="godaddy" \
    GODADDY_API_KEY="yourapikey" \
    GODADDY_API_SECRET="yourapisecret" \
    ./lego.sh
Once the script finishes its work, it will put your certificate and key in the same directory.
Configuring encryption in AdGuard Home
Now that you have a TLS certificate, it is time to use it in AdGuard Home. Head to Settings → Encryption.
Enable encryption and configure your server name:
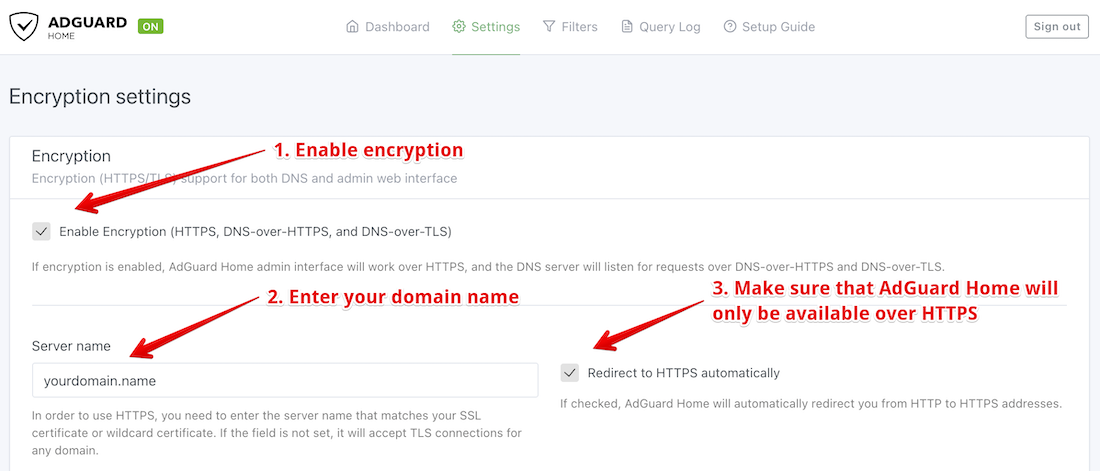
Configure AdGuard Home to use the certificate you just obtained:
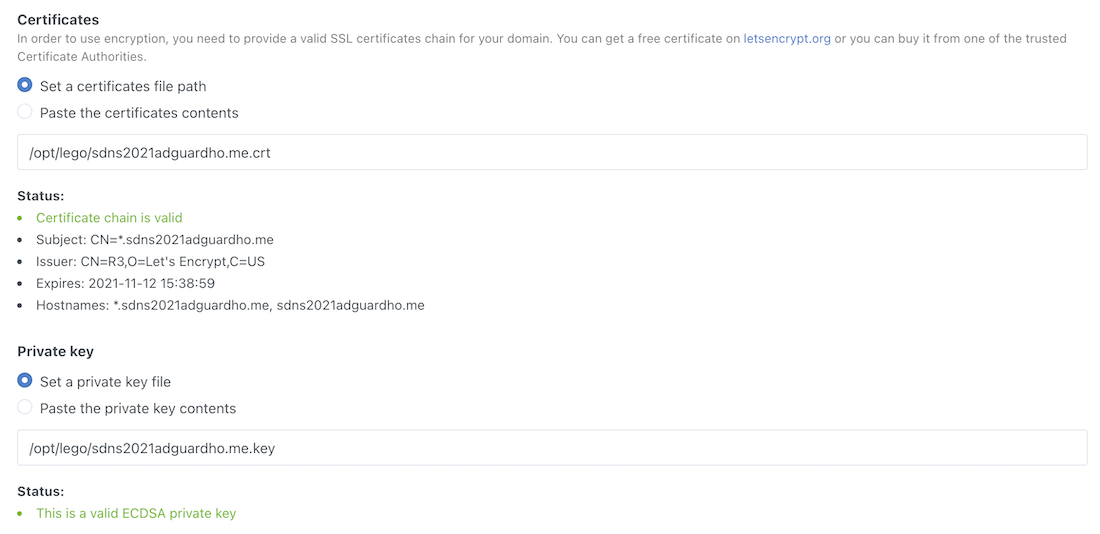
Done, AdGuard Home can now work over the encrypted protocols: DNS-over-HTTPS, DNS-over-TLS, and DNS-over-QUIC!
Time to make your devices use it.
Configuring devices
Actually, there’s a “Setup Guide” page in AdGuard Home that explains how you can configure all your devices.
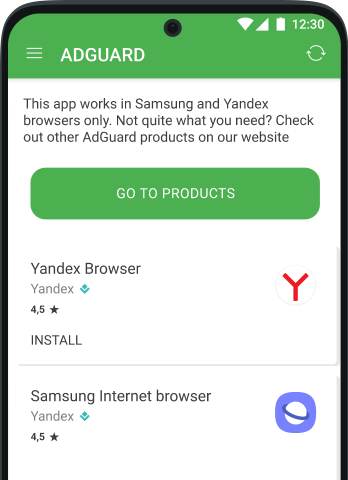
Of course, the preferred way is to use AdGuard apps that support DNS filtering:
- AdGuard for Windows
- AdGuard for Android
- AdGuard for iOS
- AdGuard for Mac
- Also, you can change DNS settings in your router so that your home devices used AdGuard Home
Alternatively, you can use encrypted DNS natively on most of the modern Operation Systems. Let’s take Android for instance.
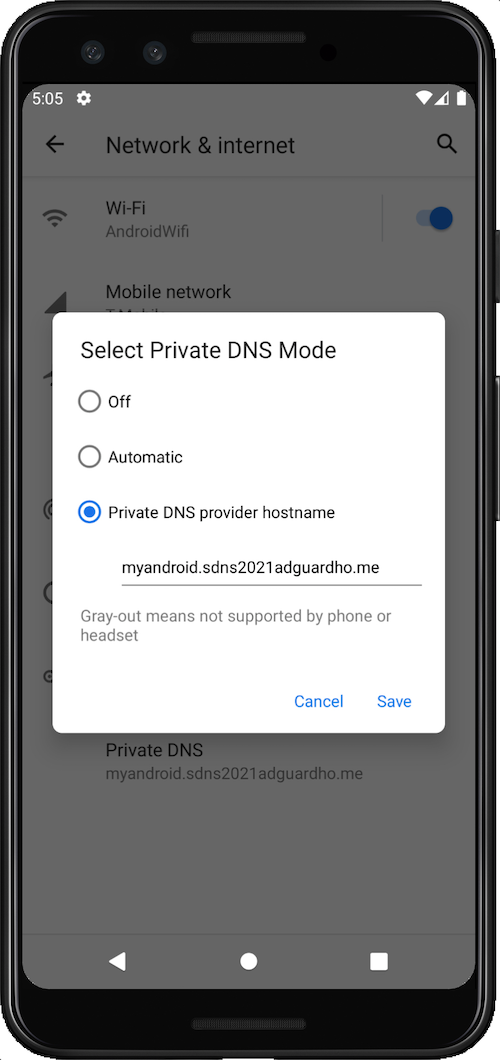
- Head to Settings → Network → Advanced → Private DNS
- Here’s one trick I’d like to focus on. Instead of just entering your domain name, come up with some subdomain, i.e. instead of
example.org, entermyandroid.example.org(that’s why we obtained a wildcard certificate). This way AdGuard Home will be able to identify that device.
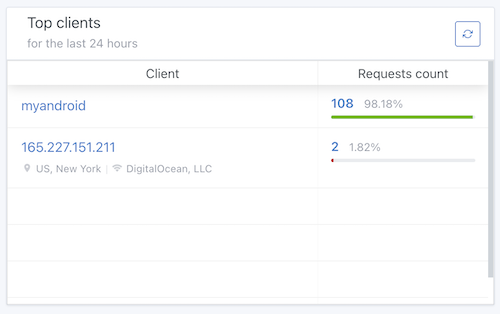
Now you can see statistics for that device in AdGuard Home.
But what if you want to have different settings for different devices? For instance, you may want to have stricter settings for your kids’ devices. No problem with that!
Configuring clients
Open AdGuard Home and go to Settings → Client settings. Let’s create a client for our Android device.
You need to enter the device name (let’s call it Harry) and its identifier (it would be “myandroid" in this case).
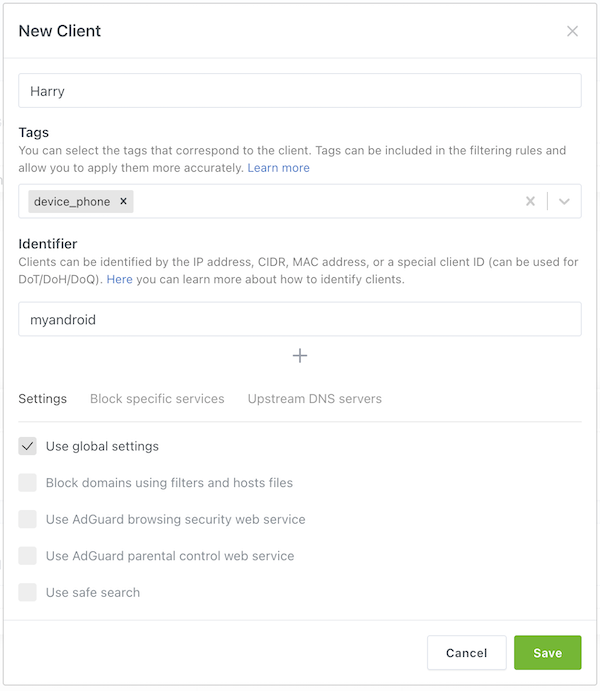
So, what can we do with Harry?
- Select whether we should use global blocklists for Harry’s traffic.
- Enable anti-phishing and anti-malware lists.
- Block adult websites and enforce safe search on major search engines.
- Forbit Harry to access specific services (for instance, Reddit or TikTok).
- Forward Harry’s traffic to a different upstream DNS server.
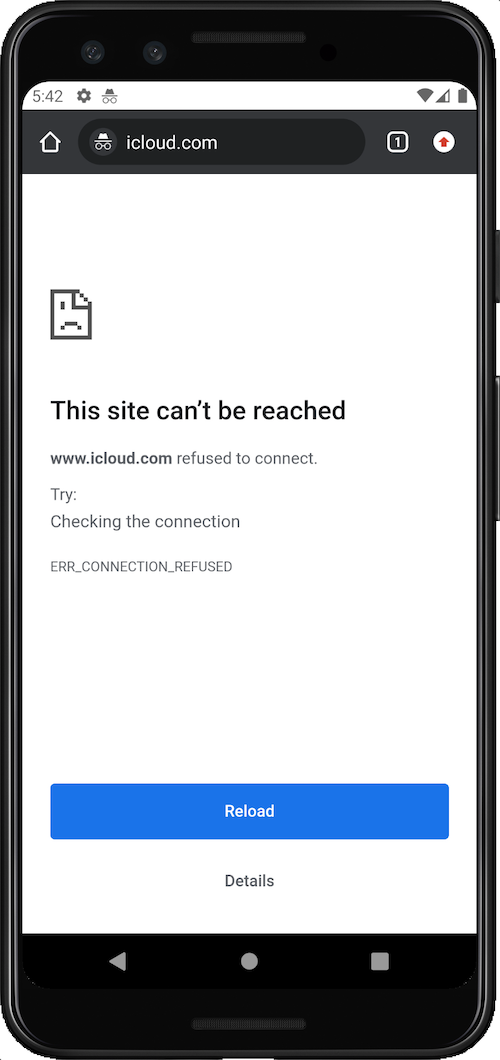
In AdGuard Home you can create custom filtering rules that change DNS traffic. You can choose to block something, unblock, modify, rewrite, etc. These custom filtering rules scope can be limited to specific clients. Let’s take an example, here’s a rule that you need to add if you want to prevent Harry from visiting icloud.com:
||icloud.com^$client=Harry
Check it from the device and voila, the website cannot be reached.
Questions or suggestions?
AdGuard Home is completely open source and available on Github. If you have any questions or suggestions, you are welcome to go there and start a new discussion.
And if you want to contribute to the development, there are several ways to do that. You can test “beta” and “edge” versions, help with translations or even open a pull request and contribute new code.