How to create a minidump file to fix the BSoD error
Almost all Windows users are familiar with the Blue Screen of Death (BSoD) error unfortunately. BSoD occurs when the Windows system encounters problems that can affect safe system operation, such as problems with third-party driver code, hardware, or Microsoft code. To solve the blue screen error, users can use a minidump file.
What is Minidump file?
A minidump file is a file that contains the information about the nature of the system crash. It is created just before the blue screen appears and it has the minimum amount of useful information that can be used to solve the problem. The minidump file usually has a .dmp extension.
On Windows 10, the blue screen shows a stop code and a QR code. The user can use this information and search the Web for the specific problem.
The option to create the minidump file is disabled by default, so before we go into more detail on how to use the file, let’s take a closer look at how to enable it.
Set up Windows to create the Minidump file
Even if you don’t experience any BSoD crash errors, you can still set this option — this is a general recommendation, not necessarily related to AdGuard products. Please follow the instructions below to automatically create the minidump file.
-
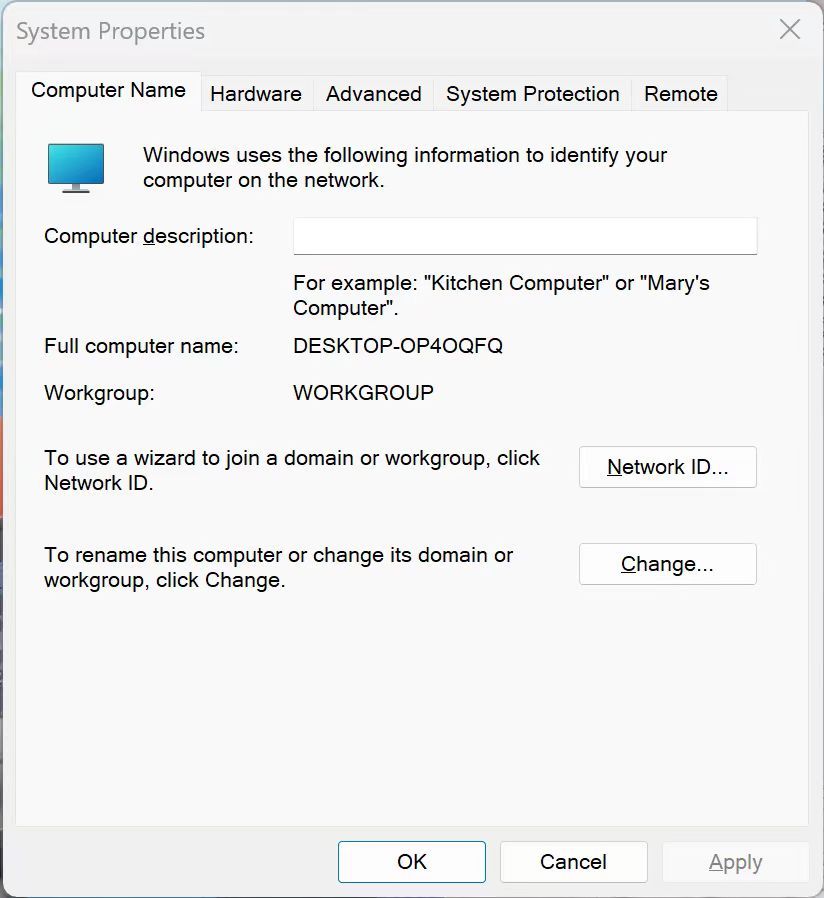
Type sysdm.cpl in the Windows search bar and click Open. The System Properties Control Panel Menu window will appear on the screen.
tipAlternatively, click Settings → System → About → Advanced system settings.
-
Go to the Advanced tab.
-
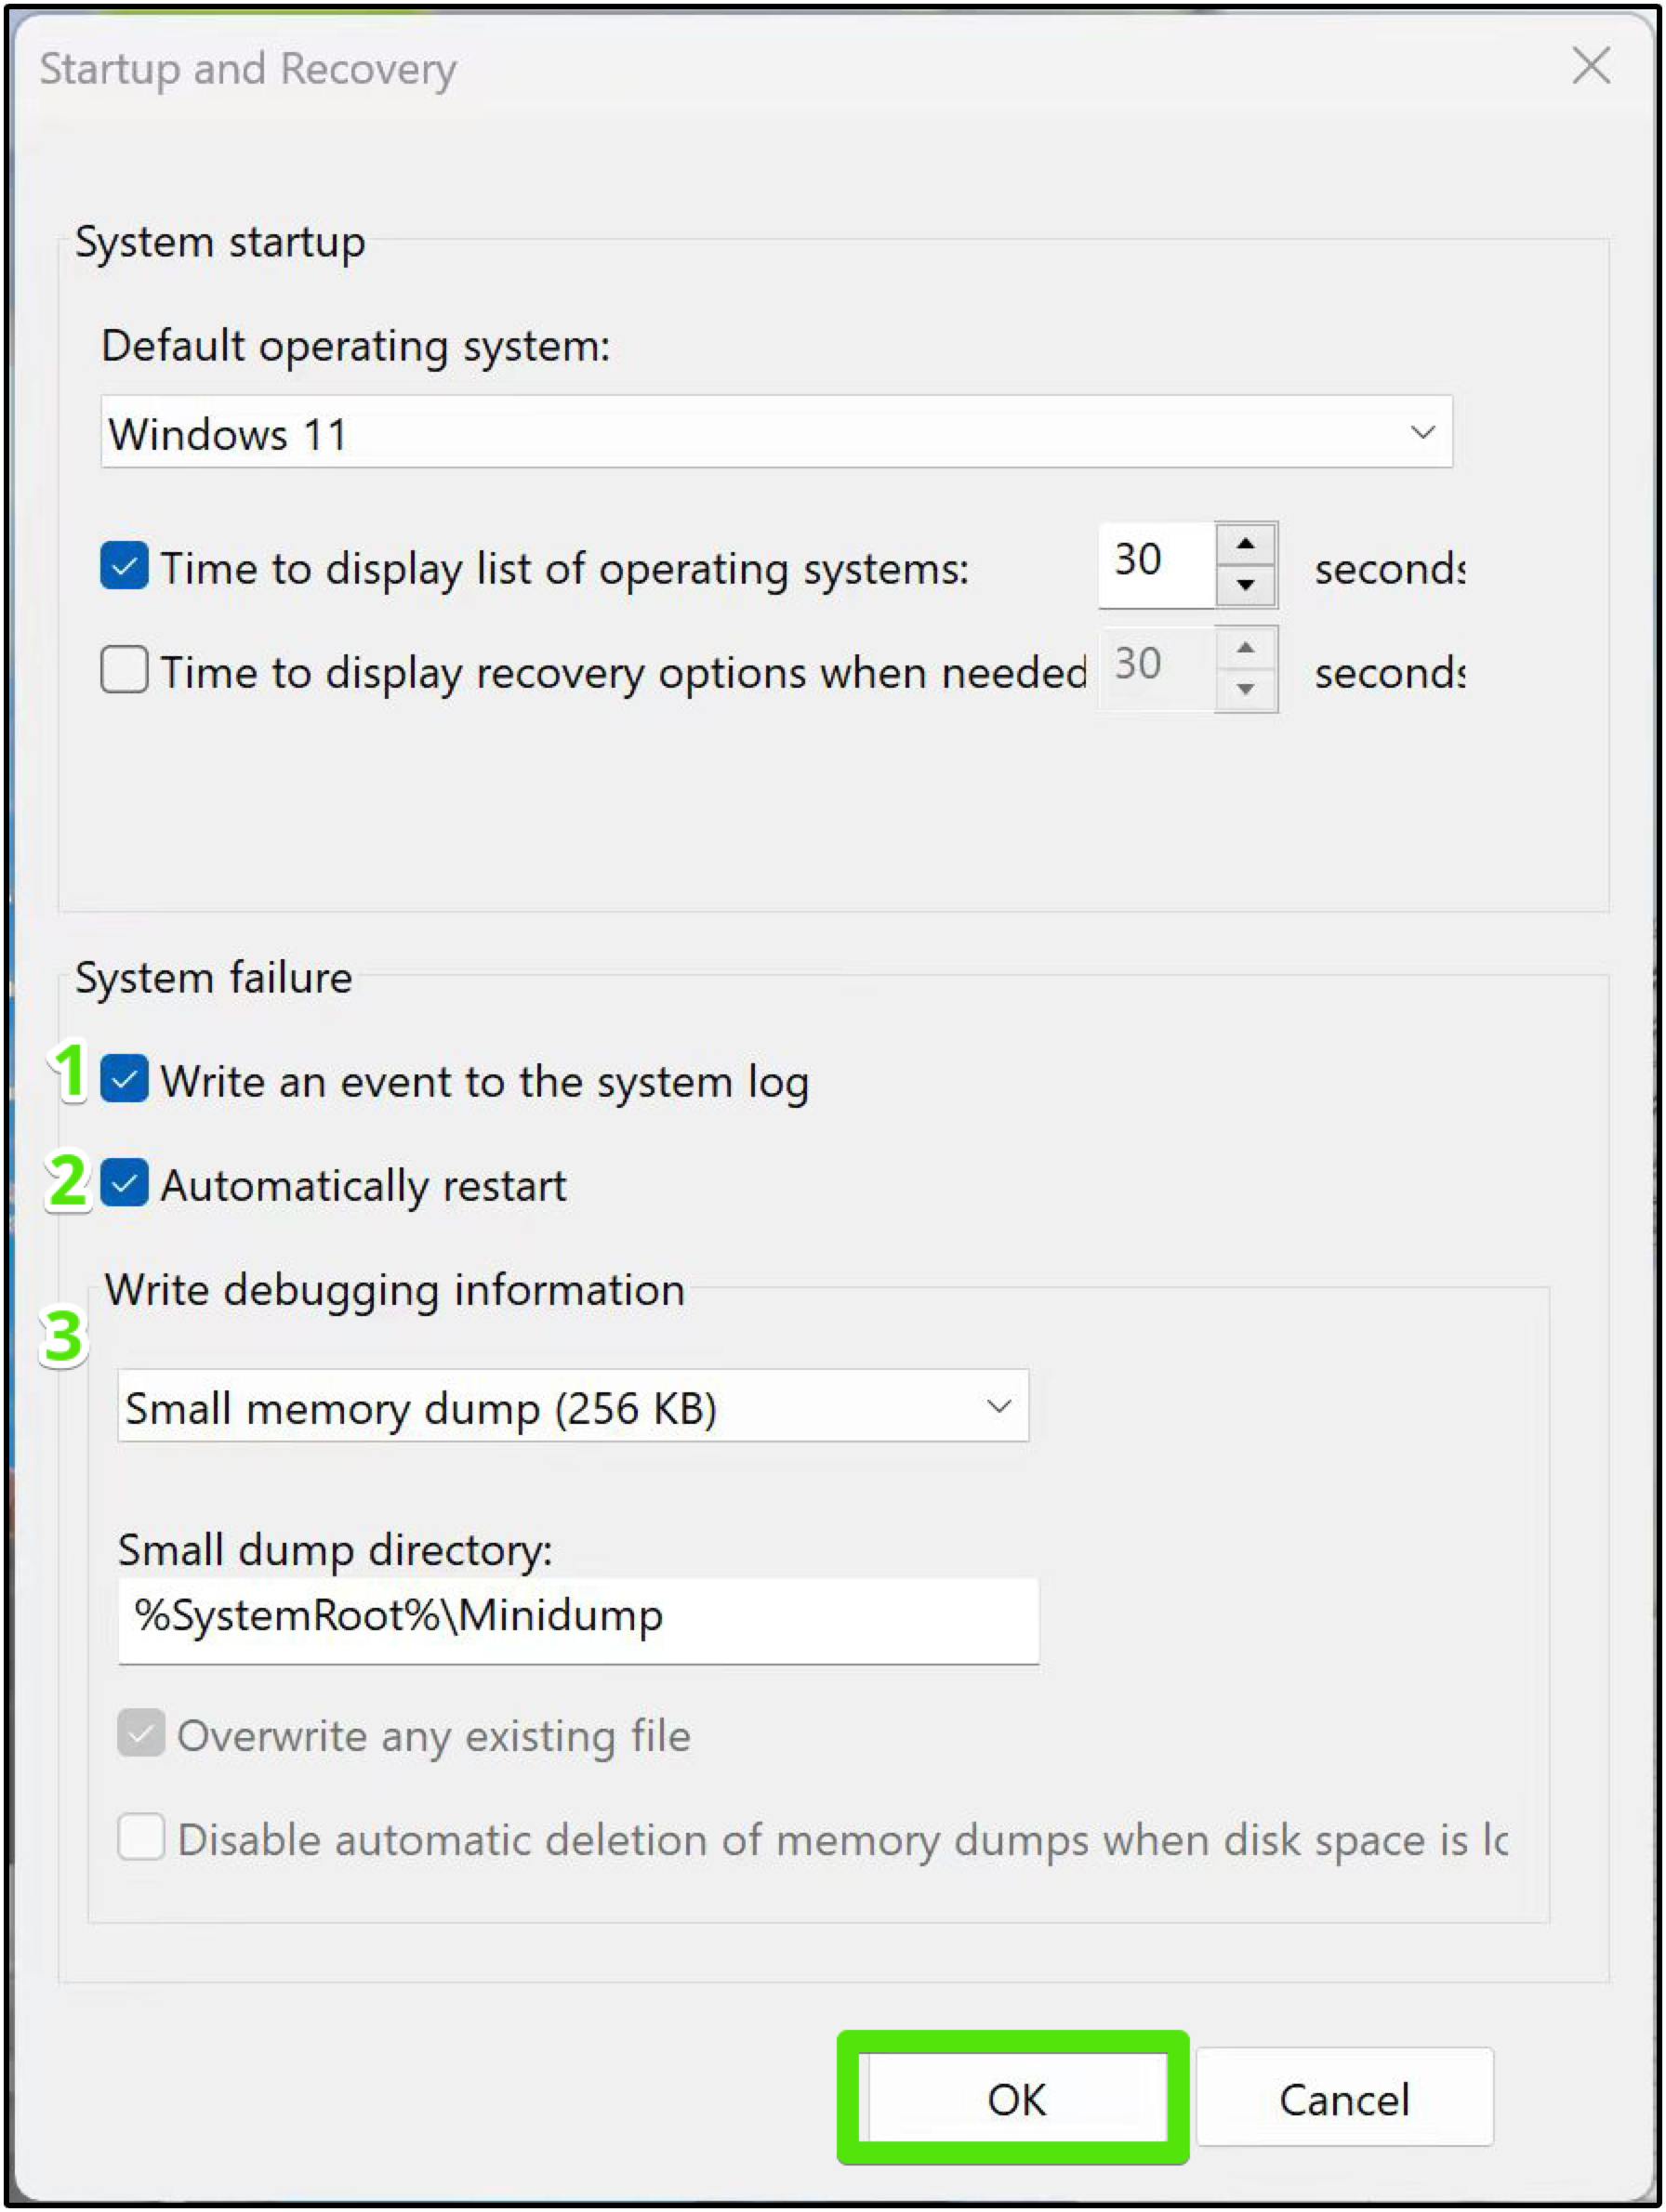
In the Startup and Recovery section, click Settings.

-
Enable the following three options:
- Write an event to the system log
- Automatically restart
- Writing debugging information → Small memory dump (256 kb)
-
Click OK to apply the settings.
-
Restart the computer.
You've successfully enabled the minidump file. Now it will be created automatically when the system crashes.
By default the minidump file is stored in the %SystemRoot%\Minidump folder. You can change the directory location to whatever you like, but please remember that a lot of programs are set to look for this location by default, so we recommend that you do not change the location.
Collecting wfpdiag.cab file
Our support team may request a wfpdiag.cab file, along with a minidump file, to analyze system logs more thoroughly and diagnose issues. To collect the file, please follow these steps:
-
Enable AdGuard protection.
-
Click Start and type
cmdto open Command Prompt -
Right-click Command Prompt and choose Run as administrator
noteA wfpdiag.cab file is created in your current directory. You can change the location by typing
cd <folder_name>. -
To start logging, enter the following command:
netsh wfp capture start -
Visit any website to route traffic through AdGuard and log the filtering process
-
To stop logging, enter
netsh wfp capture stop