Jak shromažďovat minidump BSOD
Tento článek popisuje AdGuard pro Windows, multifunkční blokátor reklam, který chrání vaše zařízení na úrovni systému. Chcete-li se podívat, jak to funguje, stáhněte si AdGuard pro Android.
Údaje a soubory poskytnuté v souborech minidump jsou zpracovávány v souladu se Zásadami ochrany osobních údajů AdGuardu.
Při používání AdGuardu může občas dojít k chybám modré obrazovky smrti (BSOD). V takovém případě si náš tým podpory může vyžádat soubor minidump, který pomůže diagnostikovat problém. Tyto soubory obsahují technické údaje o pádech, které nám pomáhají identifikovat a vyřešit problém.
Kontrola existujícího souboru minidump
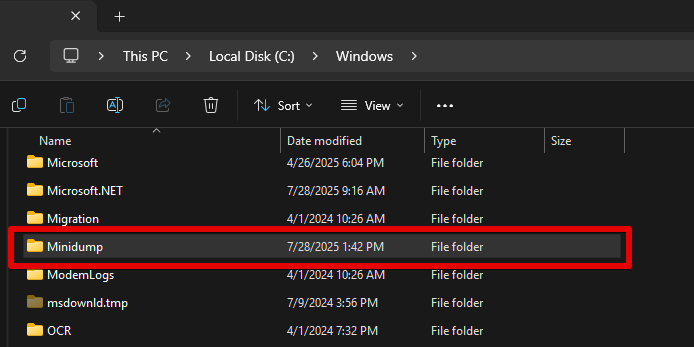
Chcete-li shromáždit soubory minidump, potřebujete v počítači přístup správce. Ve výchozím nastavení ukládá systém Windows tyto soubory do složky C:\Windows\Minidump\. Hledané soubory budou pojmenovány buď MEMORY.DMP, nebo podle vzoru Mini(ddmmmyy-xxx).dmp, kde písmena a čísla představují data a pořadová čísla.
Pokud tyto soubory nemůžete najít, je možné, že váš systém není nakonfigurován na automatické vytváření souborů minidump.
Konfigurace nastavení minidump
Pokud se minidump nevytváří automaticky, postupujte podle následujících kroků a povolte Small Memory Dump:
Stisknutím kláves Windows + R otevřete dialogové okno Run.
Zadejte
sysdm.cpla klikněte na Enter. Otevře se okno System properties.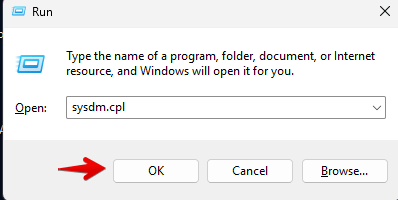
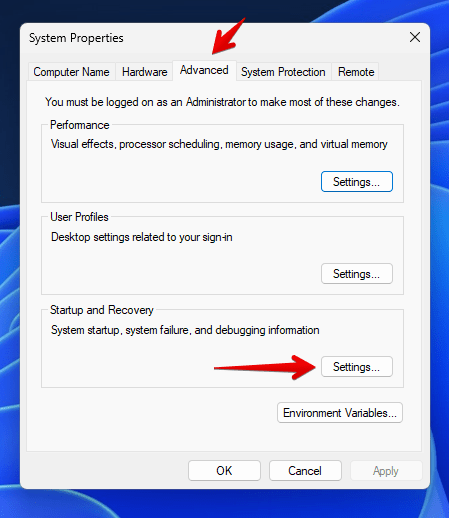
Přejděte na kartu Advanced → Startup and Recovery → Settings.
Zde najdete možnost s názvem Write debugging information. Ujistěte se, že je nastaven na Small Memory Dump (256 KB) a že cesta ukazuje
%SystemRoot%\Minidump. Tato nastavení zajistí, že systém Windows při výskytu BSOD vytvoří potřebné soubory minidump.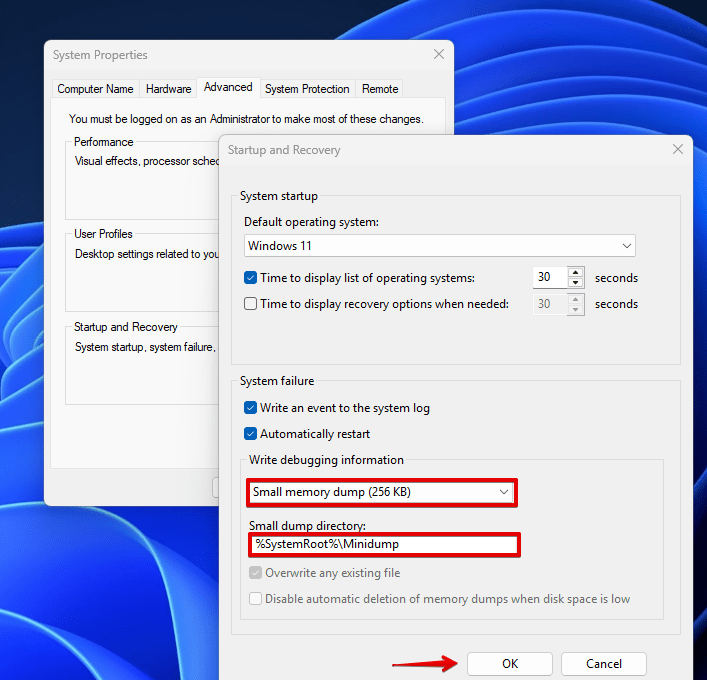
Klikněte na OK pro uložení změn.
Po vzniku pádu aplikace
Po výskytu BSOD a restartování počítače najdete vygenerované soubory minidump ve složce C:\Windows\Minidump\. Seřazení souborů podle data změny usnadňuje nalezení nejnovějšího souboru odpovídajícího vašemu pádu aplikace.
Pokud jste nastavení minidump nakonfigurovali až po pádu, budete muset problém reprodukovat a vygenerovat nový soubor minidumpu.
Shromažďování souboru wfpdiag.cab
Náš tým podpory si může vyžádat soubor wfpdiag.cab spolu se souborem minidump, aby mohl důkladněji analyzovat systémové protokoly a diagnostikovat problémy. Chcete-li soubor shromáždit, postupujte podle následujících kroků:
Zapněte AdGuard ochranu.
Klikněte na Start a napište
cmdpro otevření příkazového řádku.Klikněte pravým tlačítkem myši na příkazový řádek a vyberte možnost Spustit jako správce.
Zakazuje prohlížeči Google Chrome odesílat informace o verzi a modifikaci s požadavky na domény Google (včetně DoubleClick a Google Analytics).
V aktuálním adresáři se vytvoří soubor wfpdiag.cab. Umístění můžete změnit zadáním
cd <folder_name>.:::
Chcete-li spustit protokolování, zadejte následující příkaz:
netsh wfp capture start.Navštivte libovolnou webovou stránku, abyste přesměrovali provoz skrze AdGuard a zaznamenali proces filtrování.
Chcete-li zastavit protokolování, zadejte
netsh wfp capture stop.