How to configure system-wide blocking with AdGuard for iOS
System-wide blocking means blocking ads and trackers beyond the Safari browser, i.e. in other apps and browsers, on network level — most ad blockers can't do it, but AdGuard can. In this article we'll tell you how to set it up on your iOS device.

Basically, if your purpose is to block ads and trackers system-wide, you have two options:
- Add a DNS filter, e.g. AdGuard DNS filter.
- Enable AdGuard DNS server (Settings —> DNS protection —> DNS server —> AdGuard DNS).
The first option is better because it offers variability of actions: once Advanced mode is enabled, you'll be able to use different DNS servers and block all ads with the help of DNS filterlists, but more on this later.
How to enable and configure DNS protection
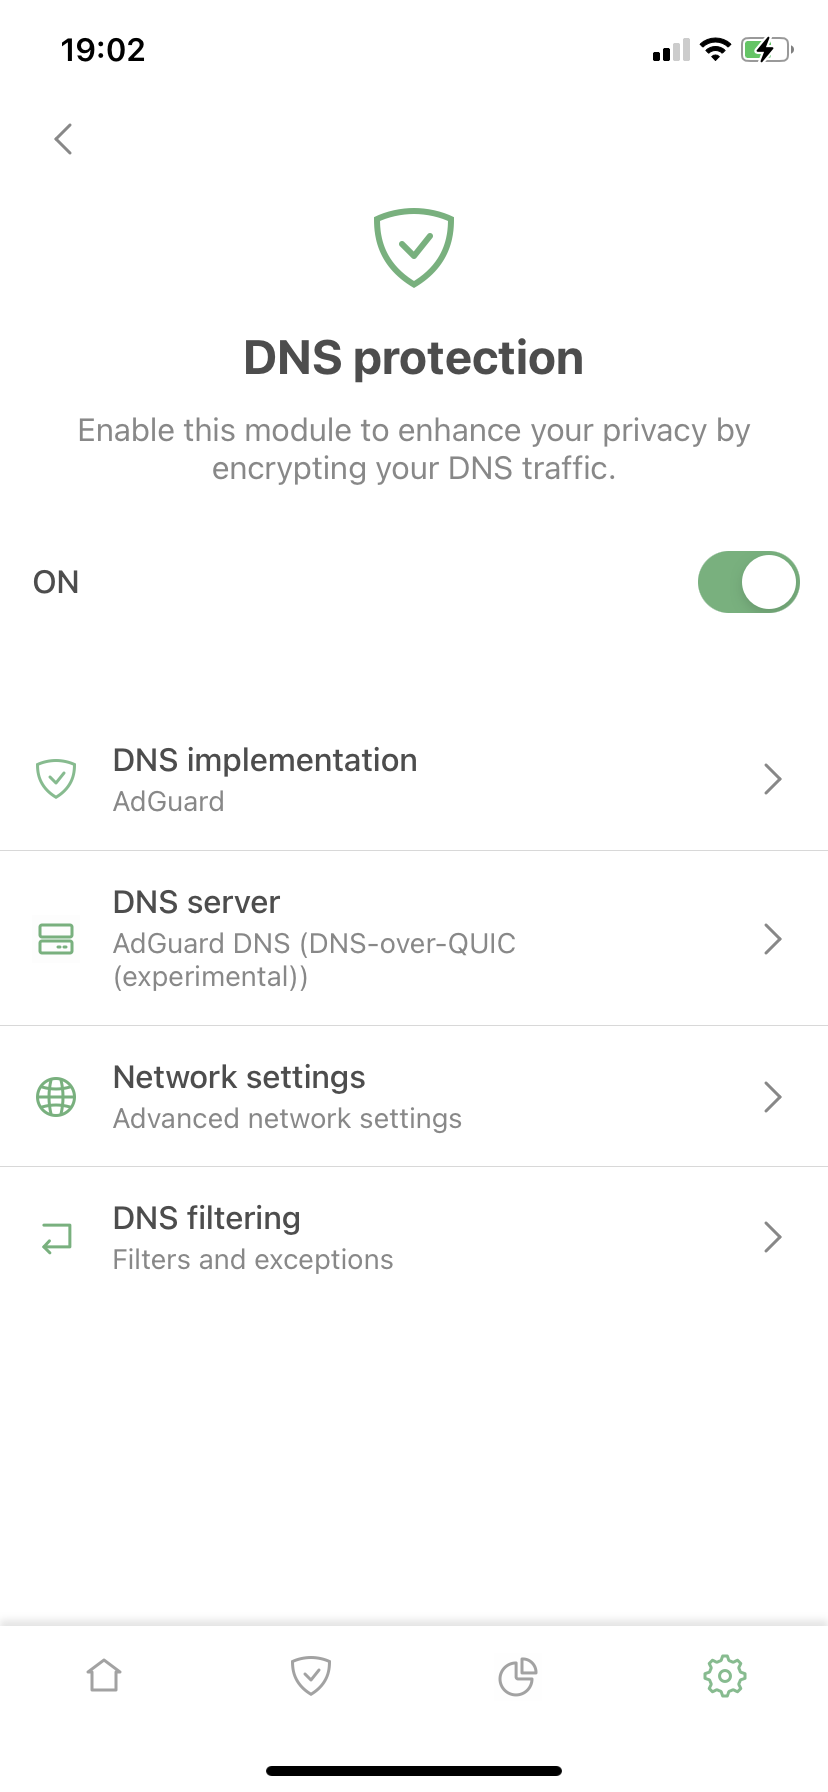
Actually, DNS protection is the same thing as system-wide protection, these terms are synonymous and interchangeable. To enable it, open AdGuard for iOS settings —> DNS protection. Switch it on. And that's it!

Here you can choose DNS implementation, DNS server, enable Network settings and configure DNS filtering (the last one is available when Advanced mode is enabled).
How to enable Advanced mode
It's no secret that AdGuard for iOS has advanced settings. Usually we don't suggest that you mess with those, but if you want to block ads outside of Safari, you need to know how to do it without making a hash. Yet, don't be scared, the setup below is not a big deal.
The two-step instruction on how to enable Advanced mode itself is plain and simple:
- Open AdGuard for iOS settings —> General.
- Enable Advanced mode. The 'Advanced settings' tab will appear.

Note: We don't recommend you turn on every setting you'll find in the 'Advanced settings' tab without thinking, especially when it comes to low-level settings. Some of them might break the Internet connection or compromise your privacy and security, so it's better to be careful. The text below describes the exact actions required to configure system-wide blocking.
How to add AdGuard DNS filter
AdGuard DNS filter is composed of several other filters (AdGuard Base filter, Social Media filter, Tracking Protection filter, Mobile Ads filter, EasyList, EasyPrivacy, etc.). It is simplified specifically to be better compatible with DNS-level ad blocking. Learn more about DNS filtering from this article.
Tip: If you are using the AdGuard DNS or AdGuard DNS Family servers anyway, there is no need to add the AdGuard DNS filter because it is already built into these servers.

To add AdGuard DNS filter on your device, do the following:
1. Copy this link: https://adguardteam.github.io/AdGuardSDNSFilter/Filters/filter.txt.
2. Open AdGuard for iOS settings —> DNS protection —> DNS filtering (available when Advanced mode is enabled) —> DNS filters.
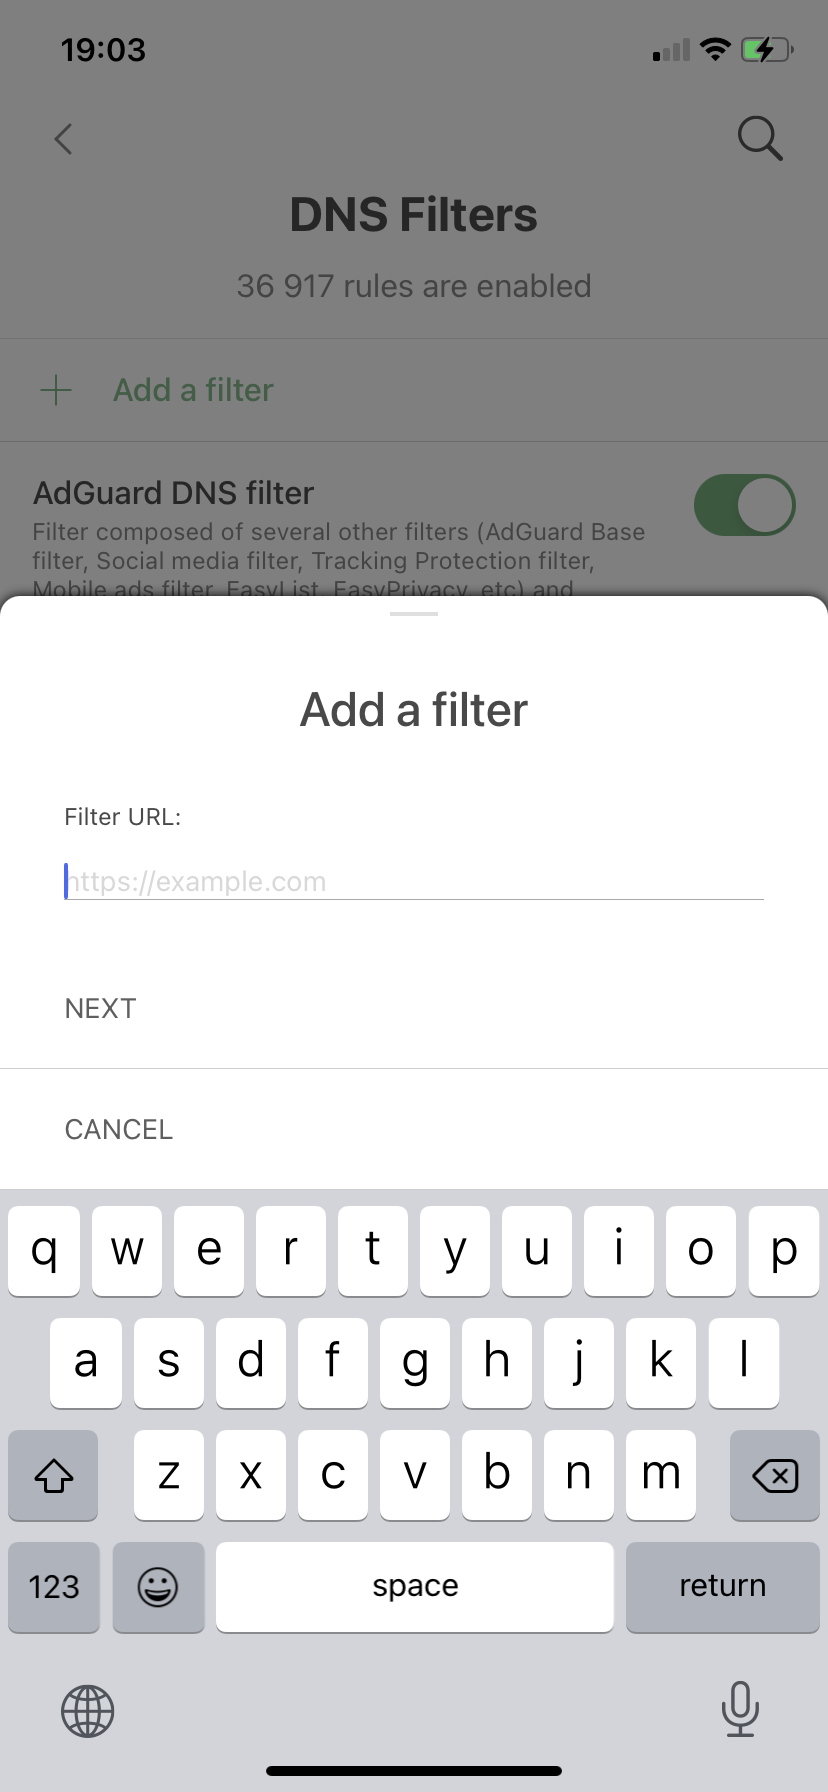
3. Click on 'Add a filter', paste the link into the filter URL field, and click 'Next'.
Ready. Now you have 36K+ rules enabled!
In the same way, you can add other DNS filterlists. There are plenty of them, you can see the list here.
Why you need to do it
Enabling Advanced mode, configuring DNS protection and adding AdGuard DNS filter is definitely worth it. This requires small effort but leads the overall level of protection to a new level. AdGuard will filter traffic locally and you'll be able to use any DNS server that you like.
AdGuard DNS filter contains a wide list of ad domains and, when it is enabled, they will be blocked everywhere, not only in Safari, but in other browsers and third-party apps as well. Besides, system-wide protection shields you against tracking that Google, Facebook and other web analytics companies are notorious of.


