Getting to know AdGuard v4.0 for Android: Old features reimagined
This is the first article in the series “Getting to know AdGuard v4.0 for Android”. We’ll discuss what has changed compared to v3.6 and share tips on how to get more benefits from our app. Read other articles about AdGuard v4.0
Recently, AdGuard for Android underwent a complete update. We reevaluated how the app should look and function, rewrote the code, and changed the design. You can see the results of our work by downloading the app.
This article will be useful for those who have already used AdGuard for Android. We explain what has changed and where some features have been moved to make it easier to get used to the changes.
Main screen: Quickly manage core features
One of the new things you'll notice right away is the icons on the main screen. Each icon corresponds to a specific feature — Ad blocking, Tracking protection, Annoyance blocking, DNS protection, and Integration with AdGuard VPN. To enable one of these features, tap its icon. To open its settings, tap and hold it.
![]()
More on each feature below.
The Protection screen: Everything about filtering
You probably know that AdGuard has always blocked ads, trackers, and annoyances. It has also allowed you to manage DNS filtering and app traffic. But all these features were spread out over different places: some in Settings, some in Apps management. And to block annoyances, you had to go to Filters.
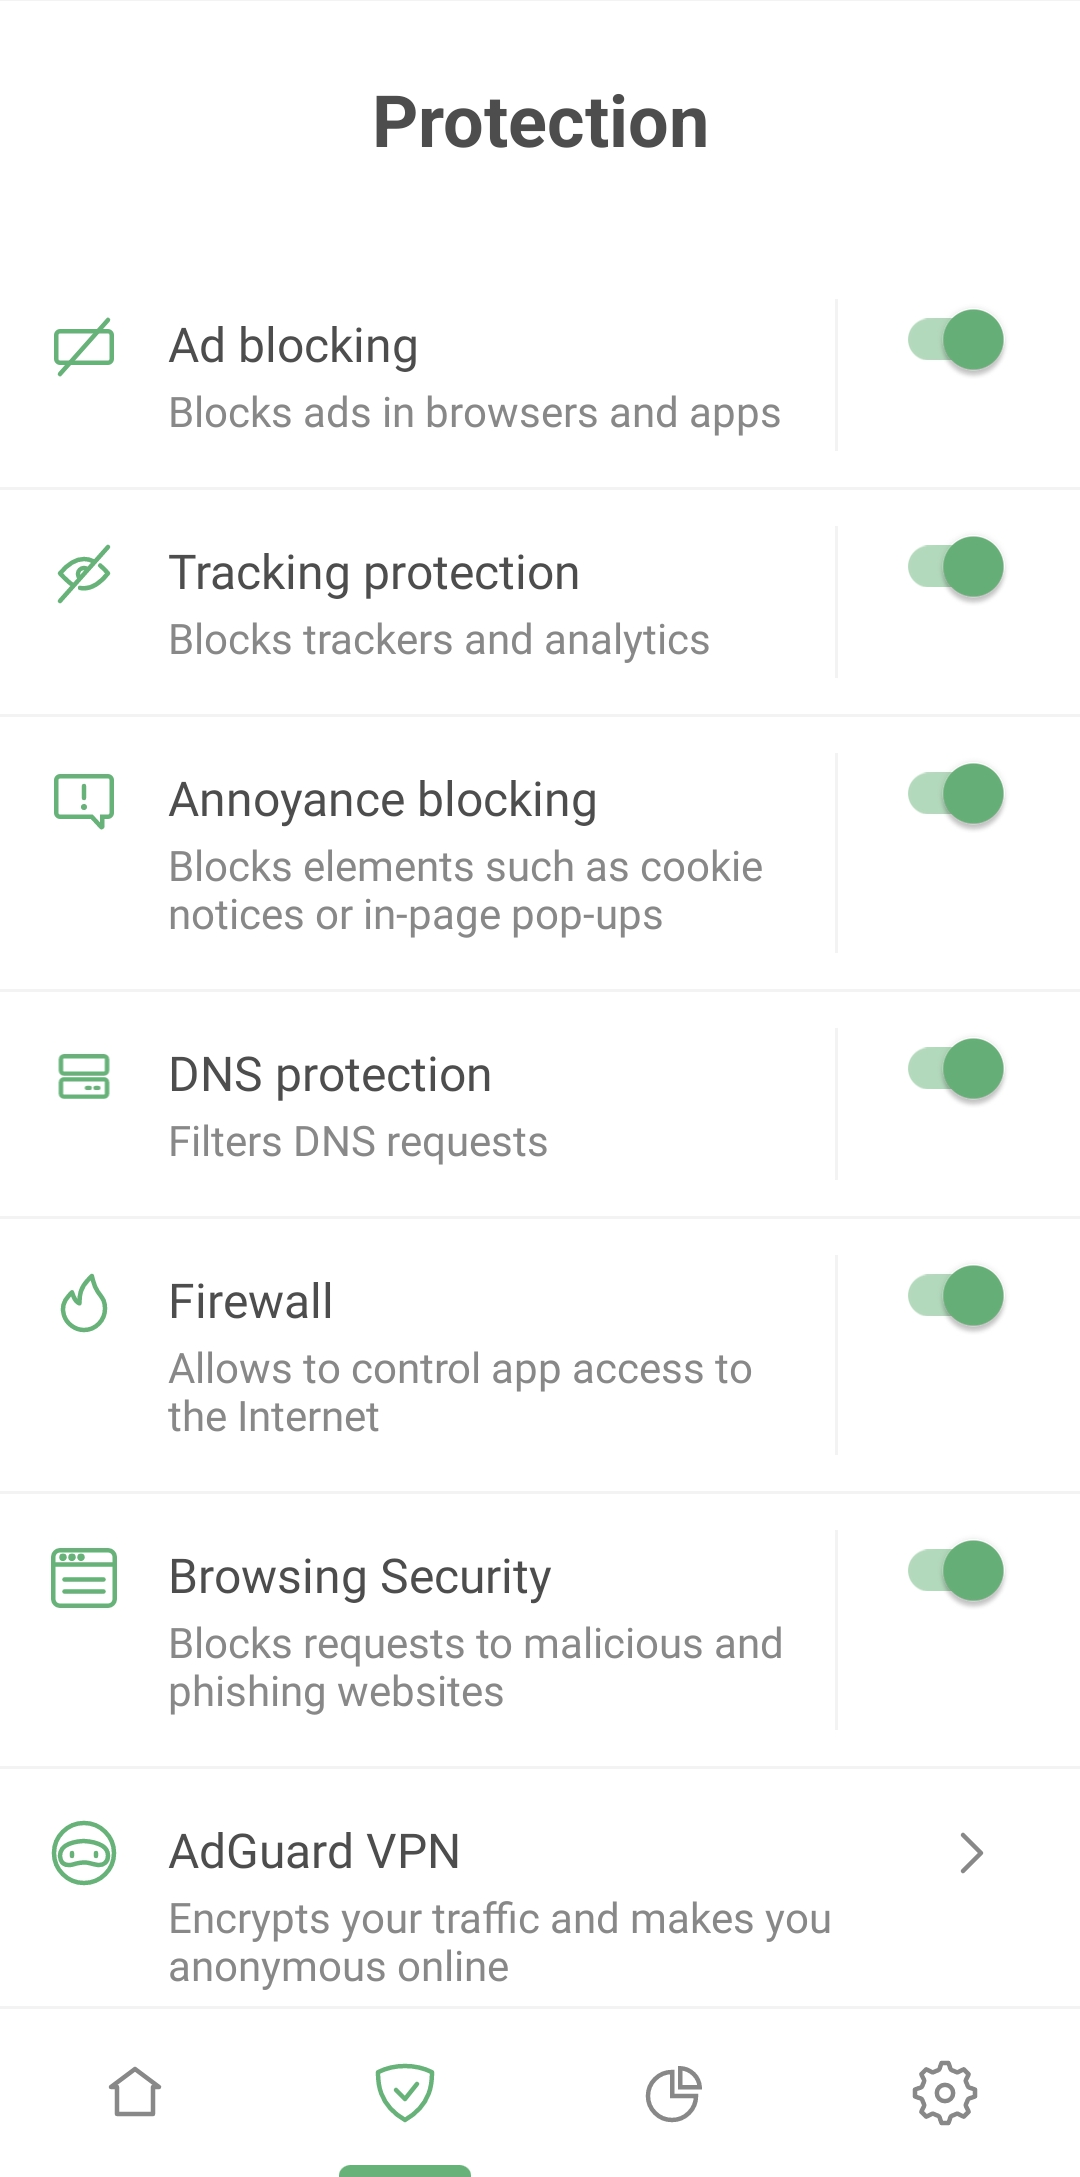
Now we've put all of these features on one screen, making it easier to find and manage each of them. It only takes two taps to enable a feature and three taps to configure it. This also makes it simpler for new users to understand what they’ve got by downloading the ad blocker.

Tap the area around a feature name to open its settings
Let’s make a quick overview of the features on this screen.
Ad blocking
Formerly known as Content blocking. We’ve simplified the descriptions, but in fact, Basic protection represents the AdGuard Base filter, and Language-specific ad blocking refers to language-specific filters.
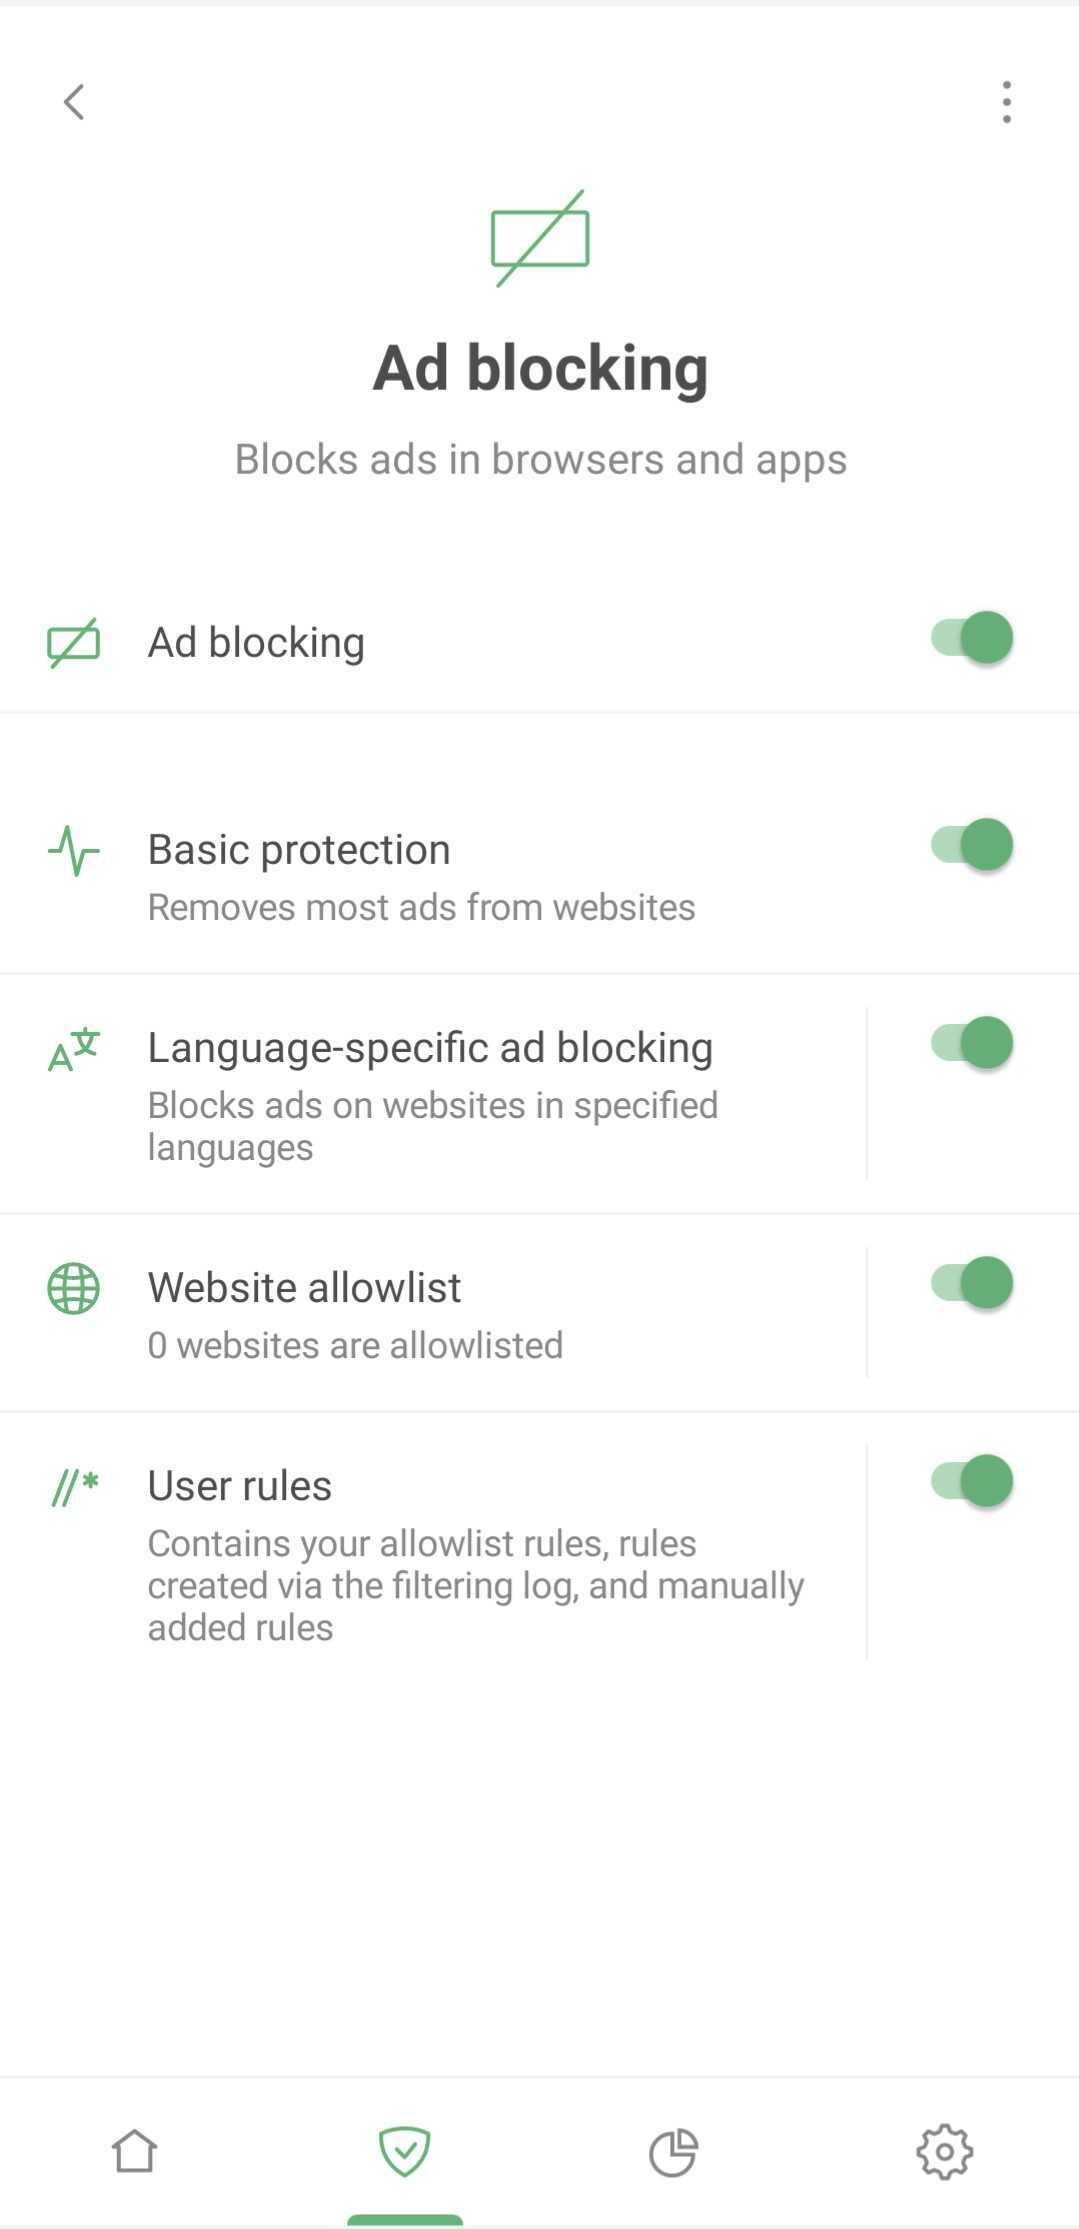
Read below where to find other filters.
Tracking protection
Formerly Stealth Mode. It deals with cookies, tracking scripts, UTM tags, and more.
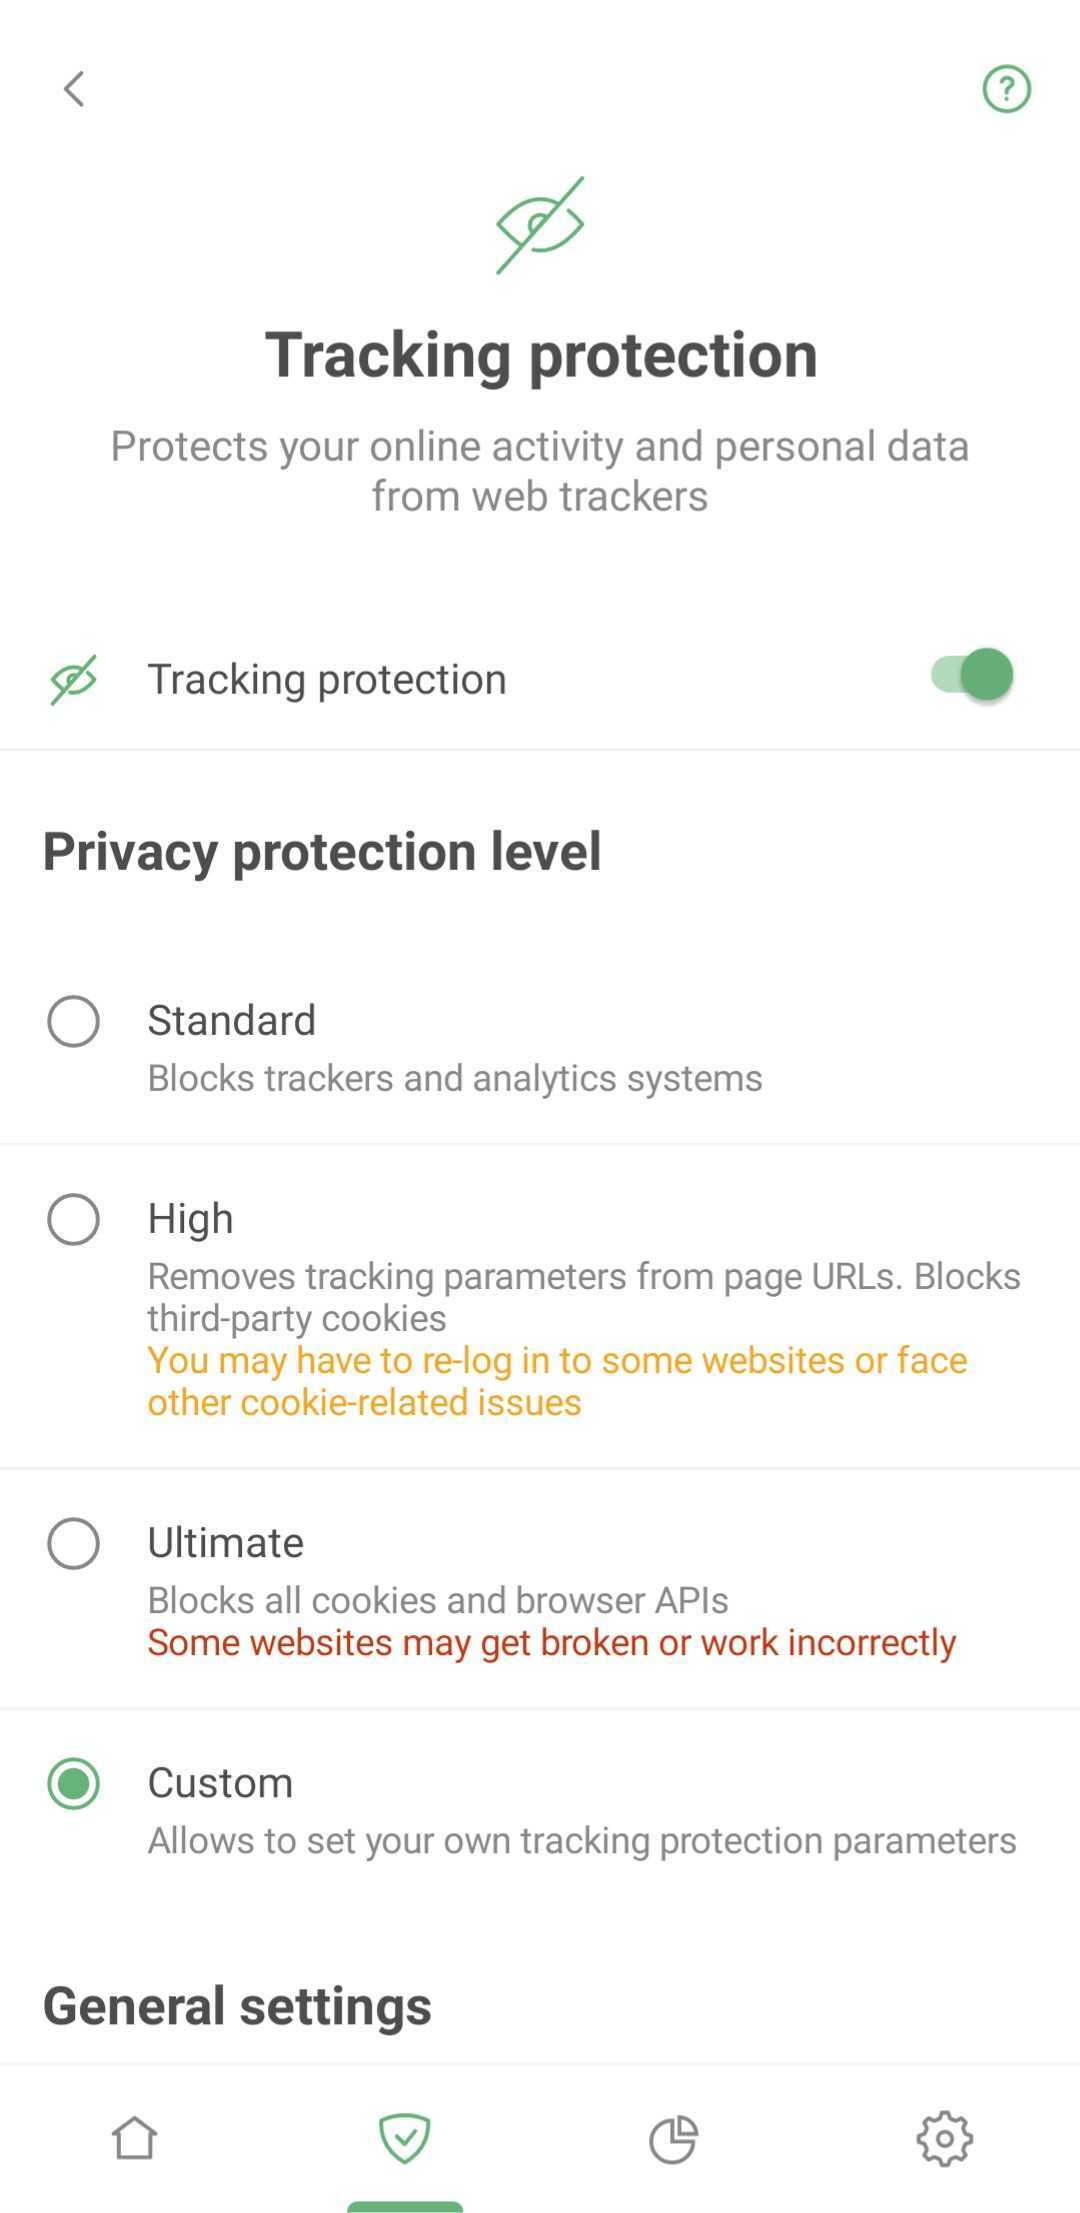
We’ve added an additional pre-configured level of protection which is enabled by default and ensures that websites don’t get broken. However, the ability to customize everything yourself is still available — if you want to delve deep into anti-tracking settings, there are indeed many options.
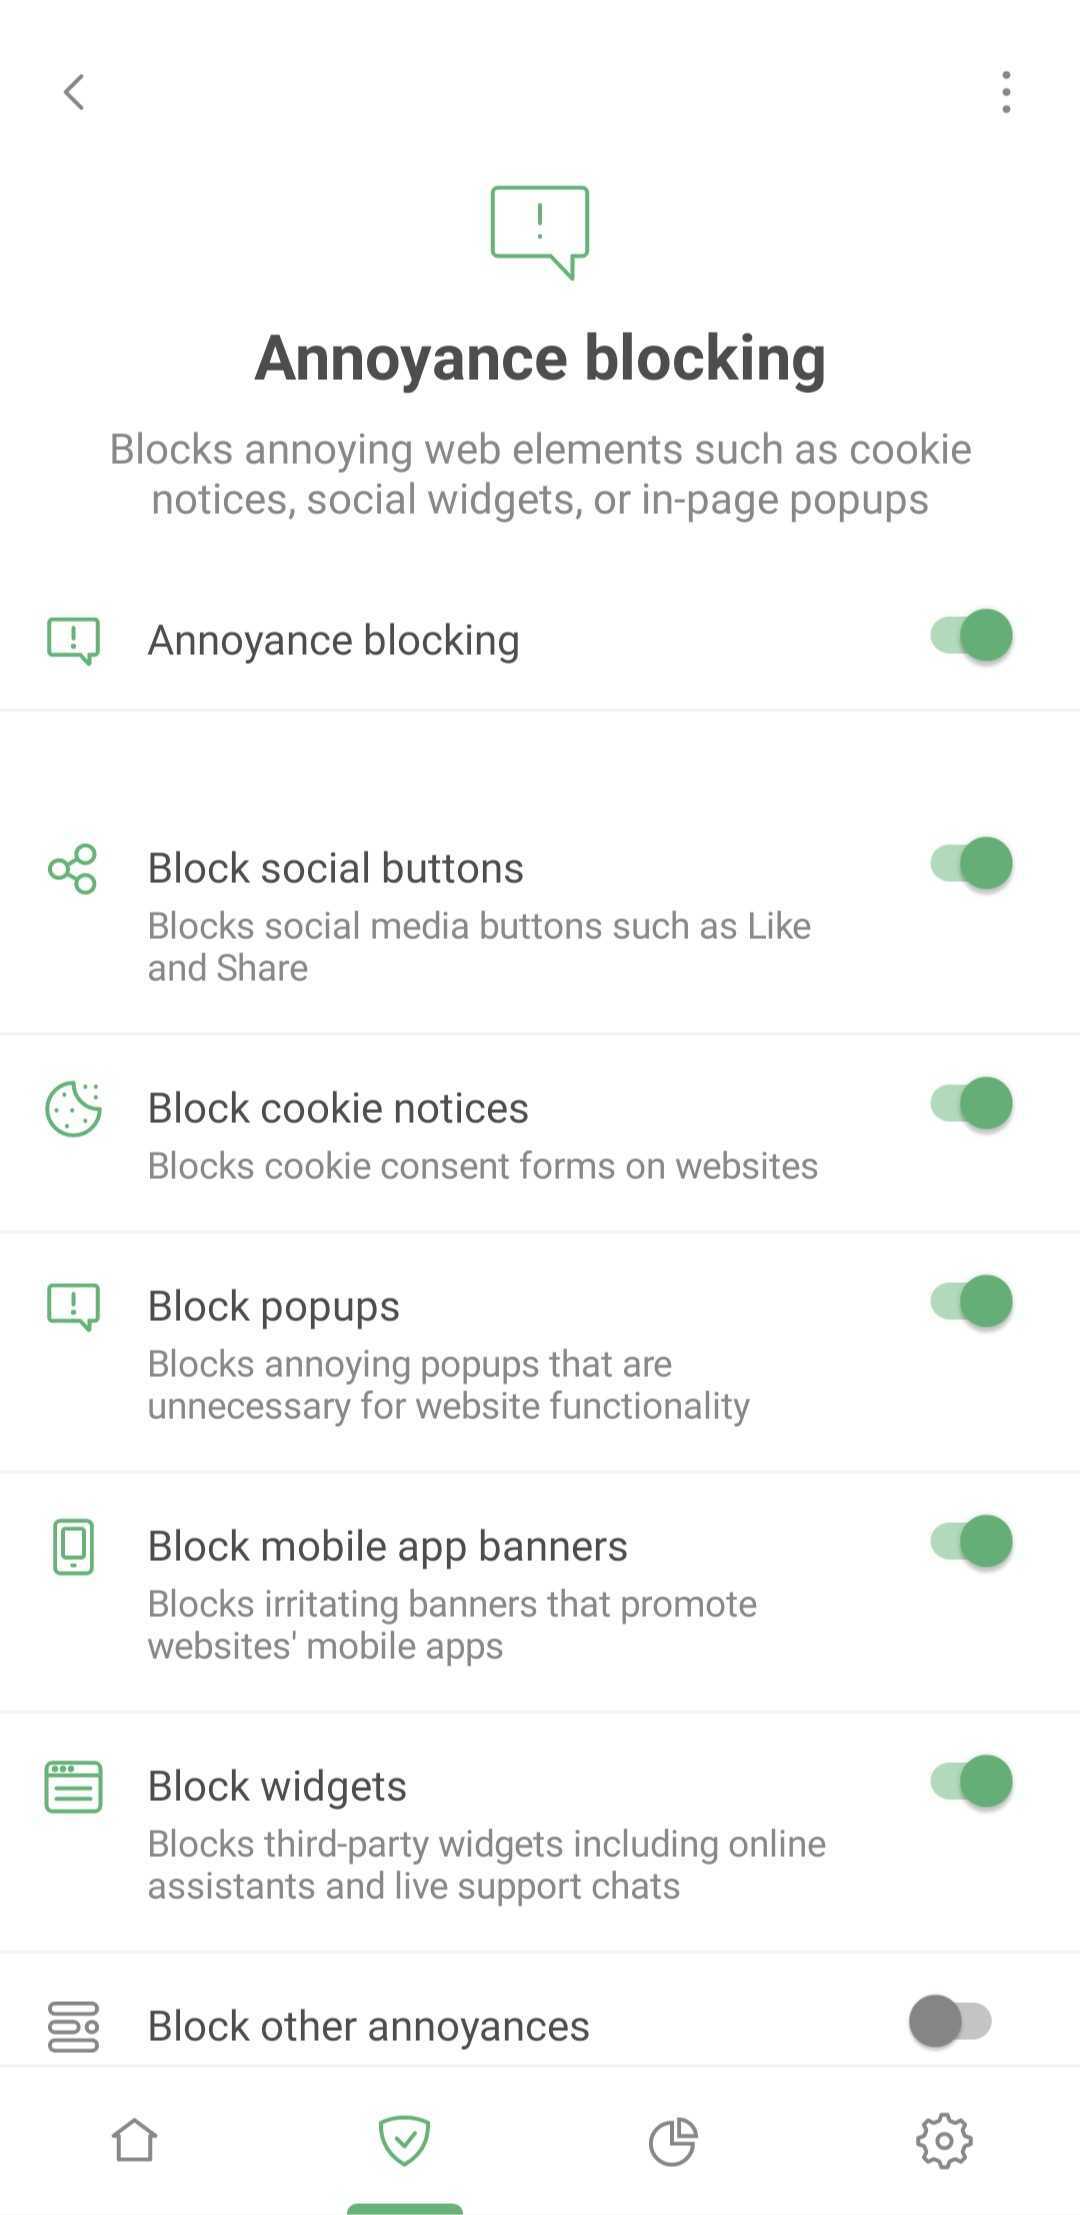
Annoyance blocking
Previously located in Filters. It handles popups, online assistant windows, cookie notifications, prompts to download mobile apps, and similar annoyances. Nothing complicated: simply checkmark what you want to block.
DNS protection and Browsing Security
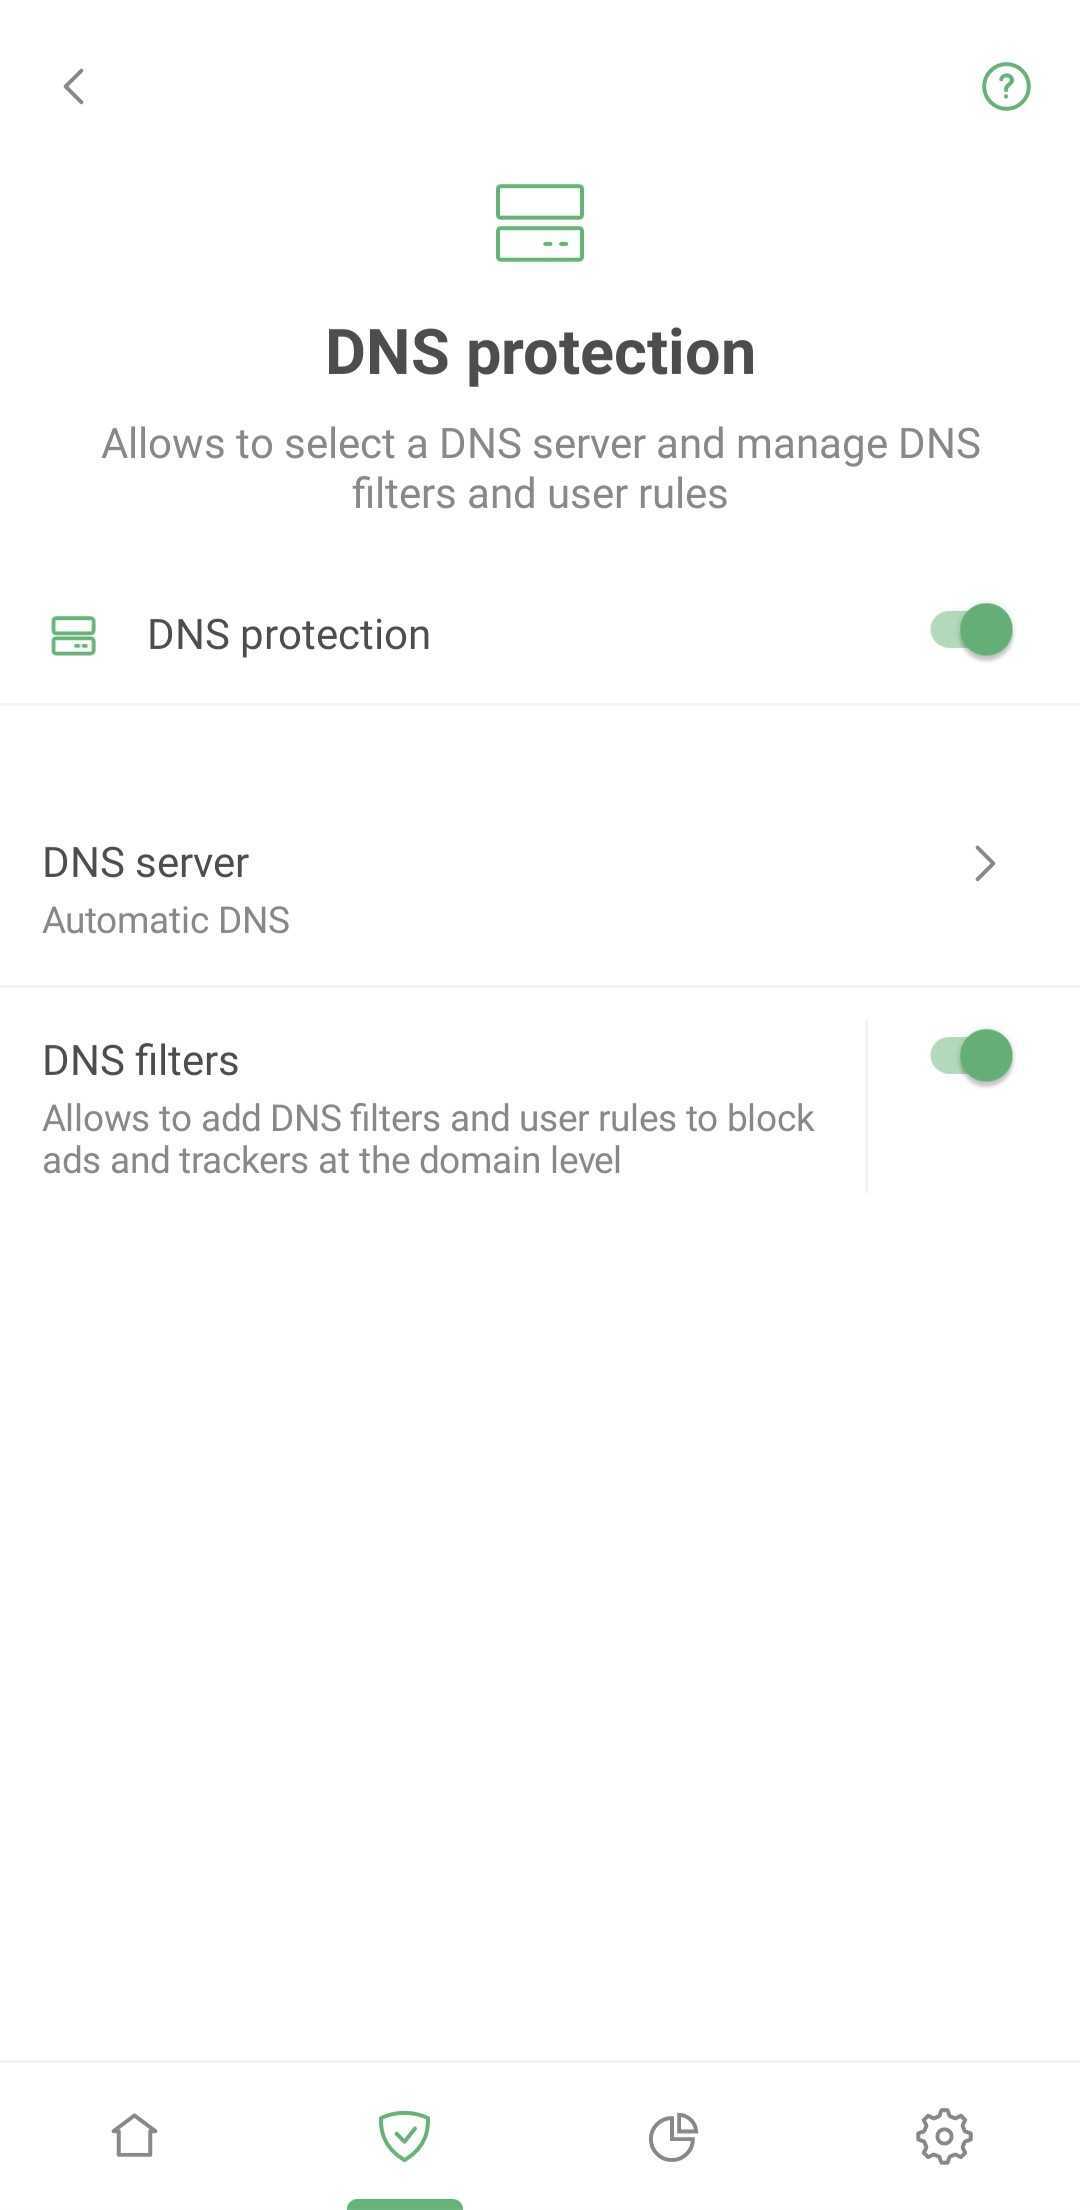
There’ve been almost no changes here. The only difference is that now Automatic DNS is selected by default in DNS protection. If you have integration with AdGuard VPN or another SOCKS5 proxy enabled, it will connect to AdGuard DNS Non-filtering or any other server you specify. In all other cases, it will still connect to the system server as before.
Firewall: Manage your apps
In v3.6, it was possible to manage each app individually. In Apps management, you could select an app and set specific rules for it, such as blocking mobile connections or routing traffic through AdGuard.
Now, Firewall has partially taken on this role. However, unlike the previous version, you can now configure Internet access not only for specific apps, but also for the entire device — in Custom firewall rules and in Global firewall rules respectively.
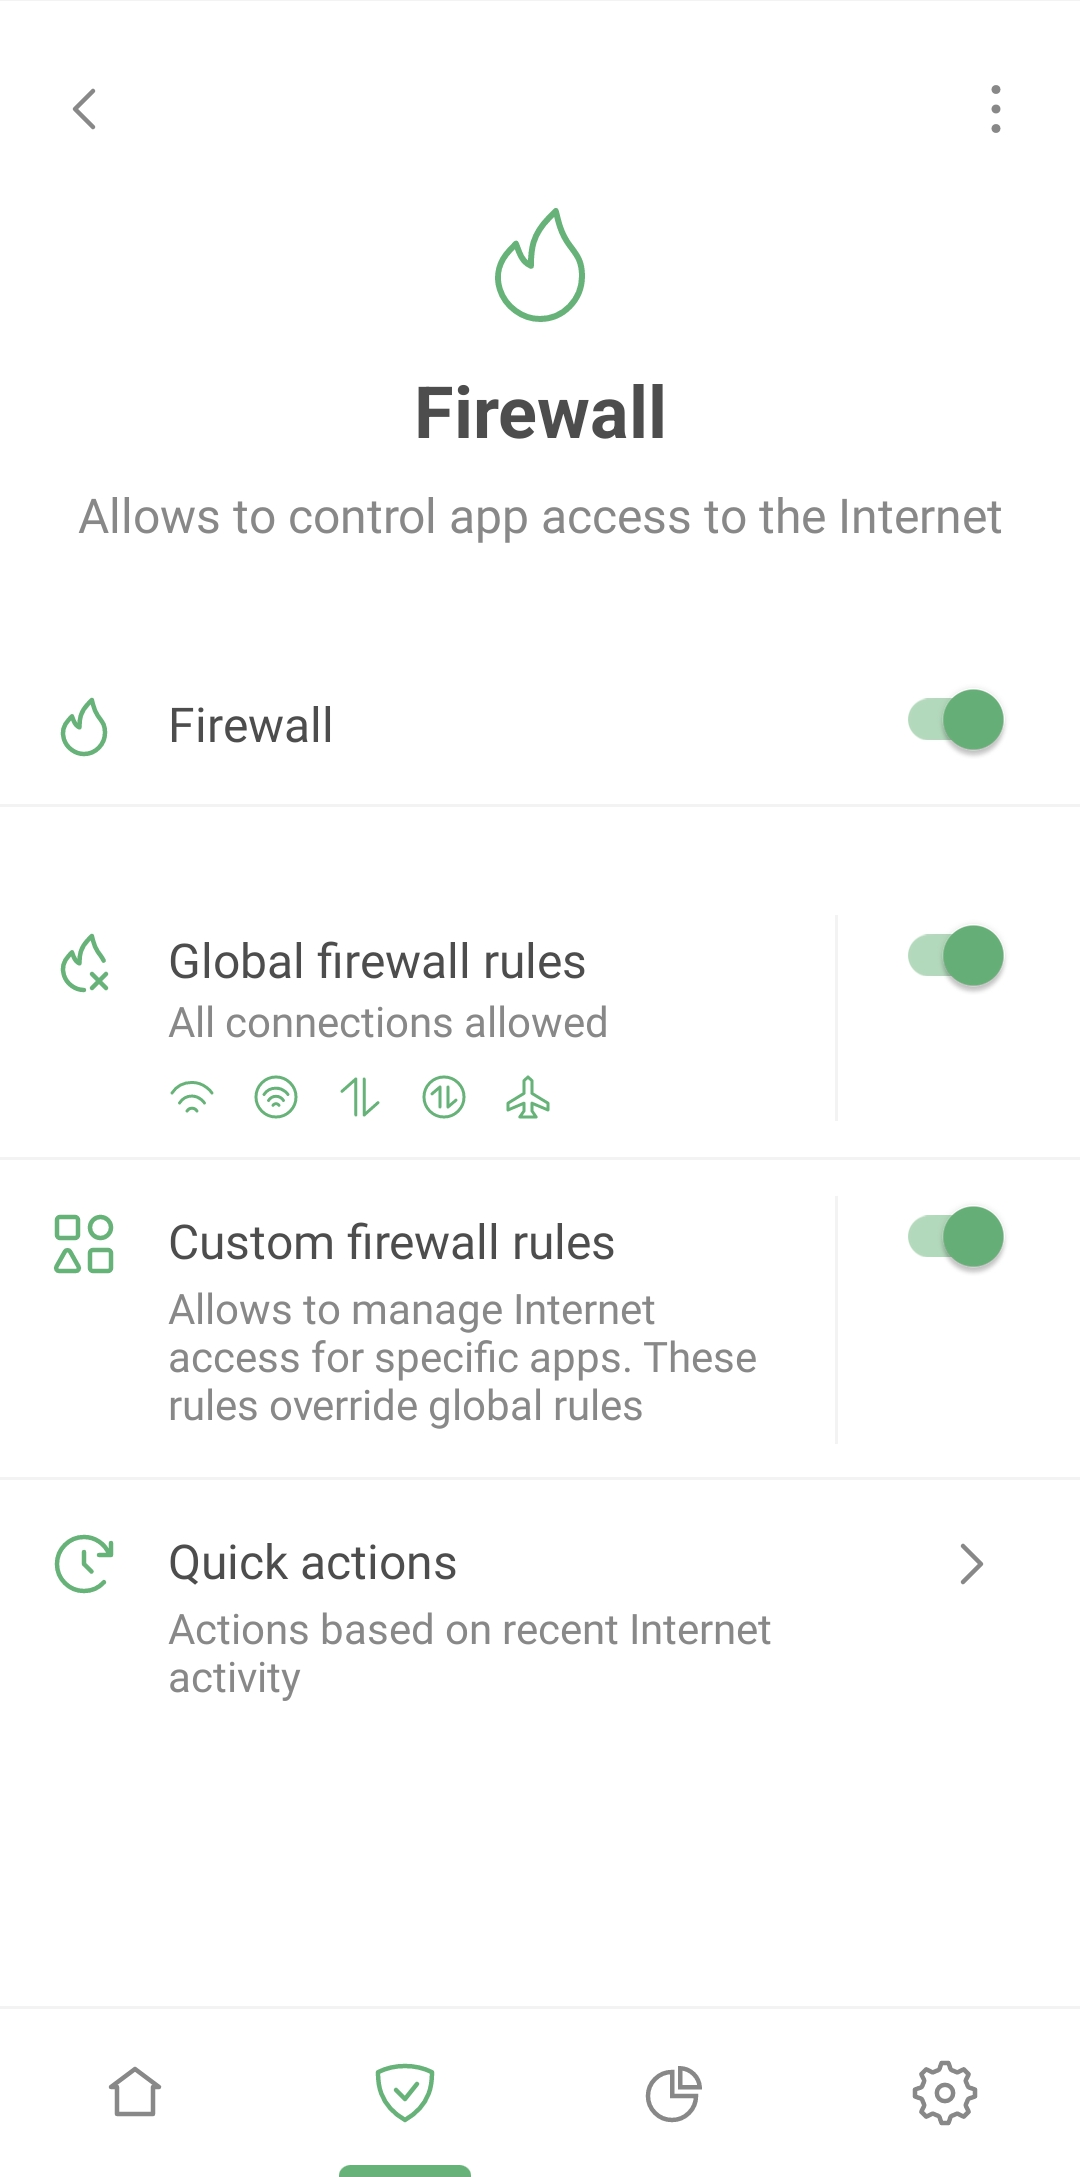
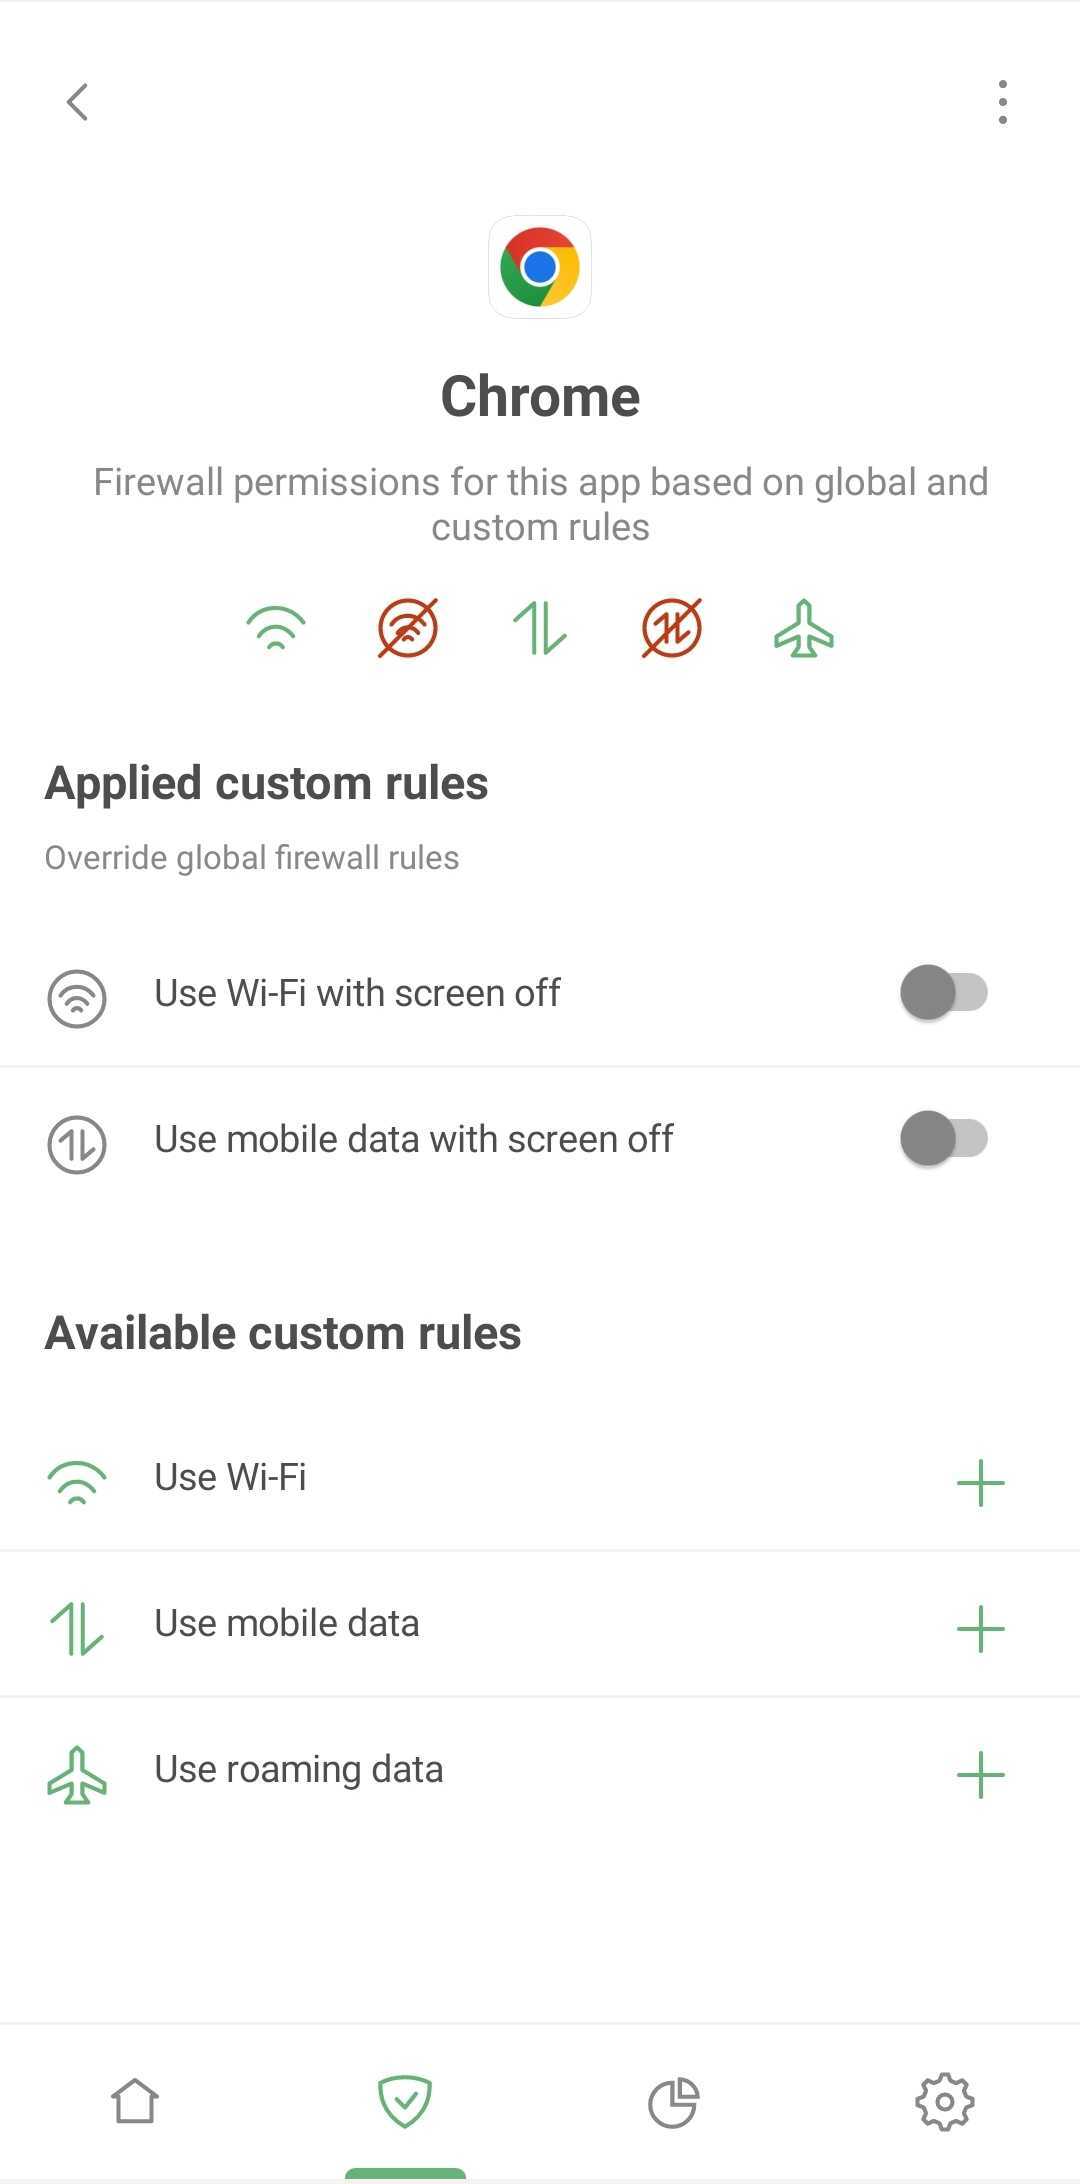
We will provide more detailed information on how to use Firewall in one of the upcoming articles. Subscribe to our newsletter to stay in the know.
What about the rest of the settings? Where should you go if you want to enable filtering for a specific app or, conversely, stop routing traffic through AdGuard? You can find it in App management.
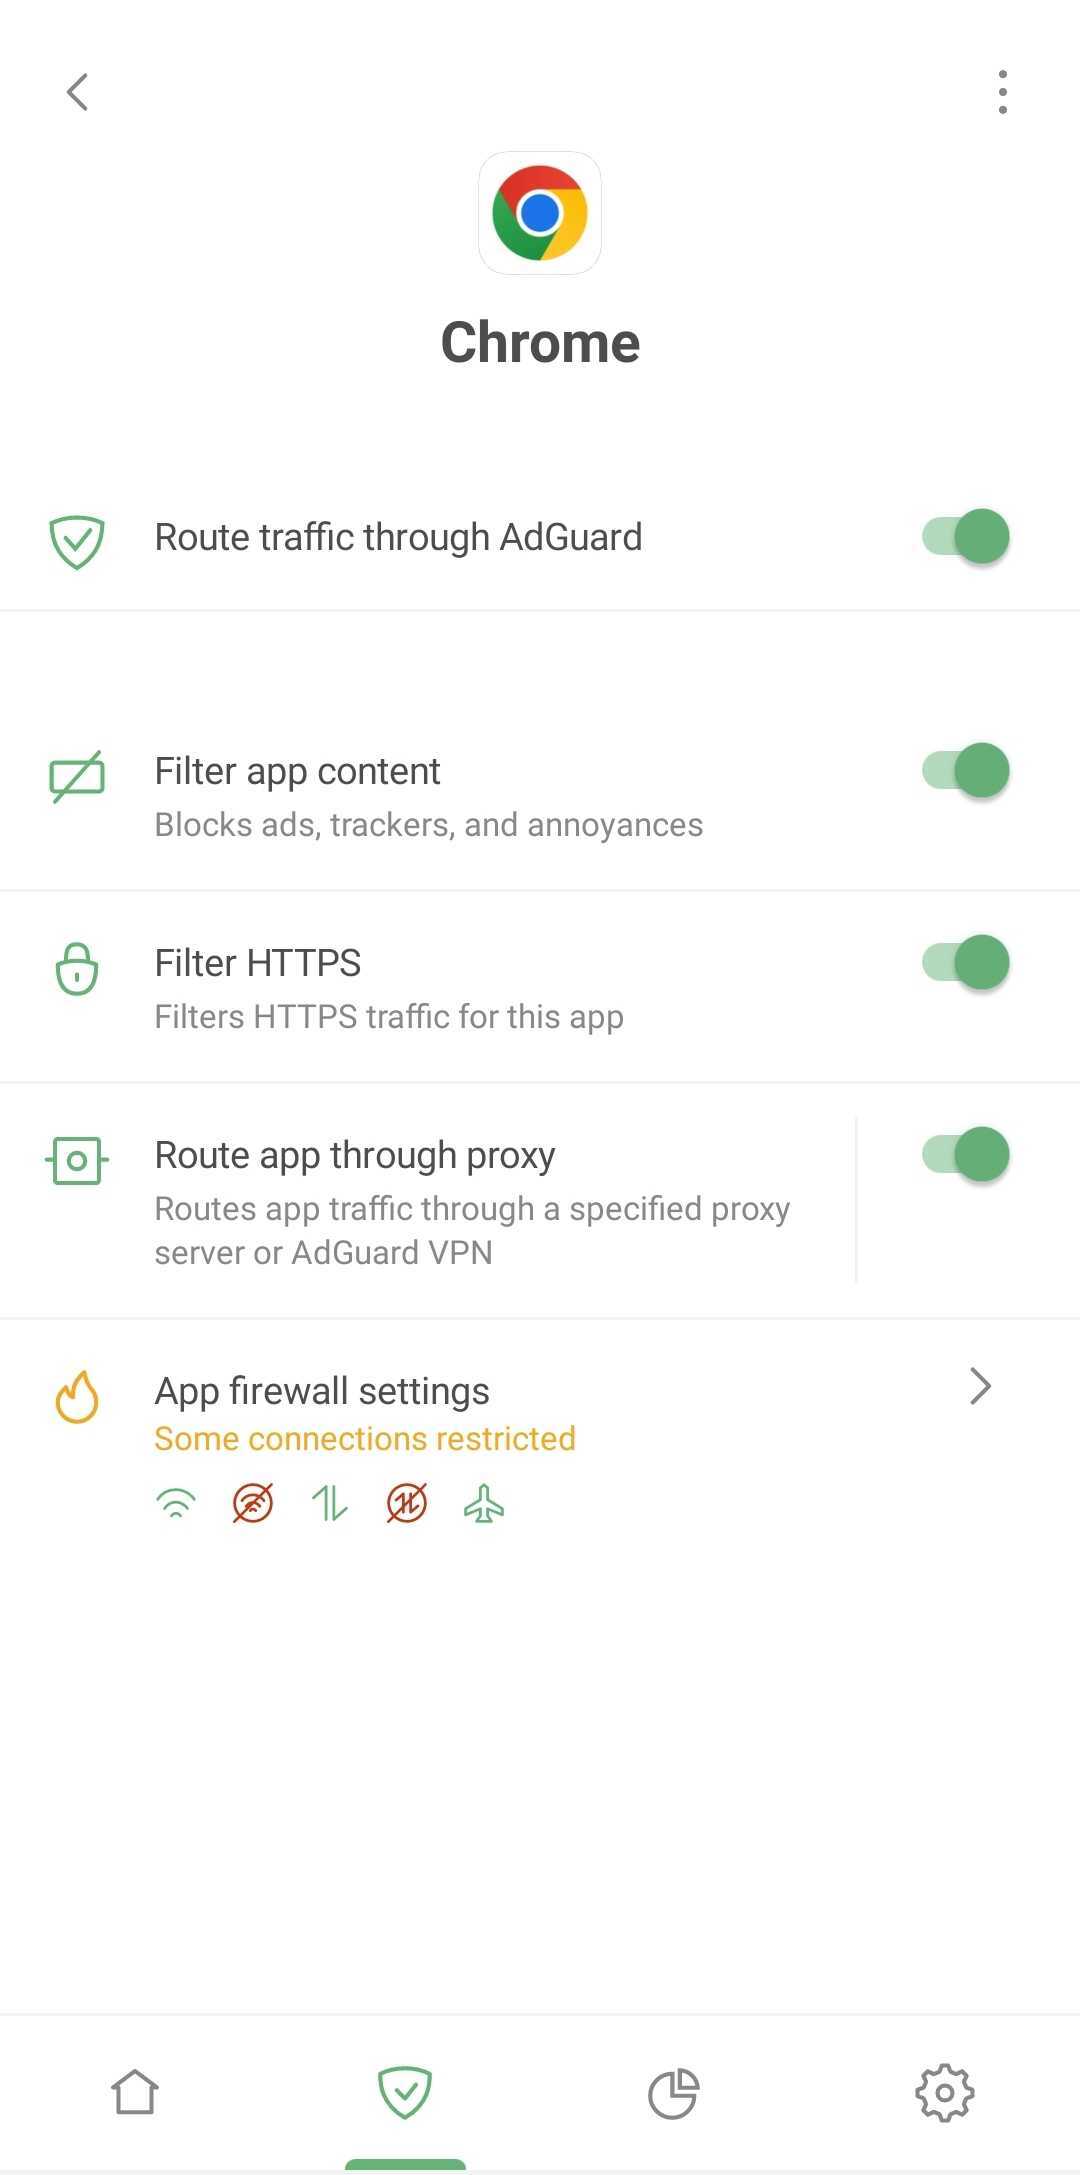
Here are two ways to access it:
For a specific app
Go to Firewall → Custom firewall rules and tap Add. Select the desired app and go to the context menu → App management. That's it!
For all apps at once
Open Settings → Filtering → Apps → App management. From there, you can choose which apps you want to configure filtering for.
Filters
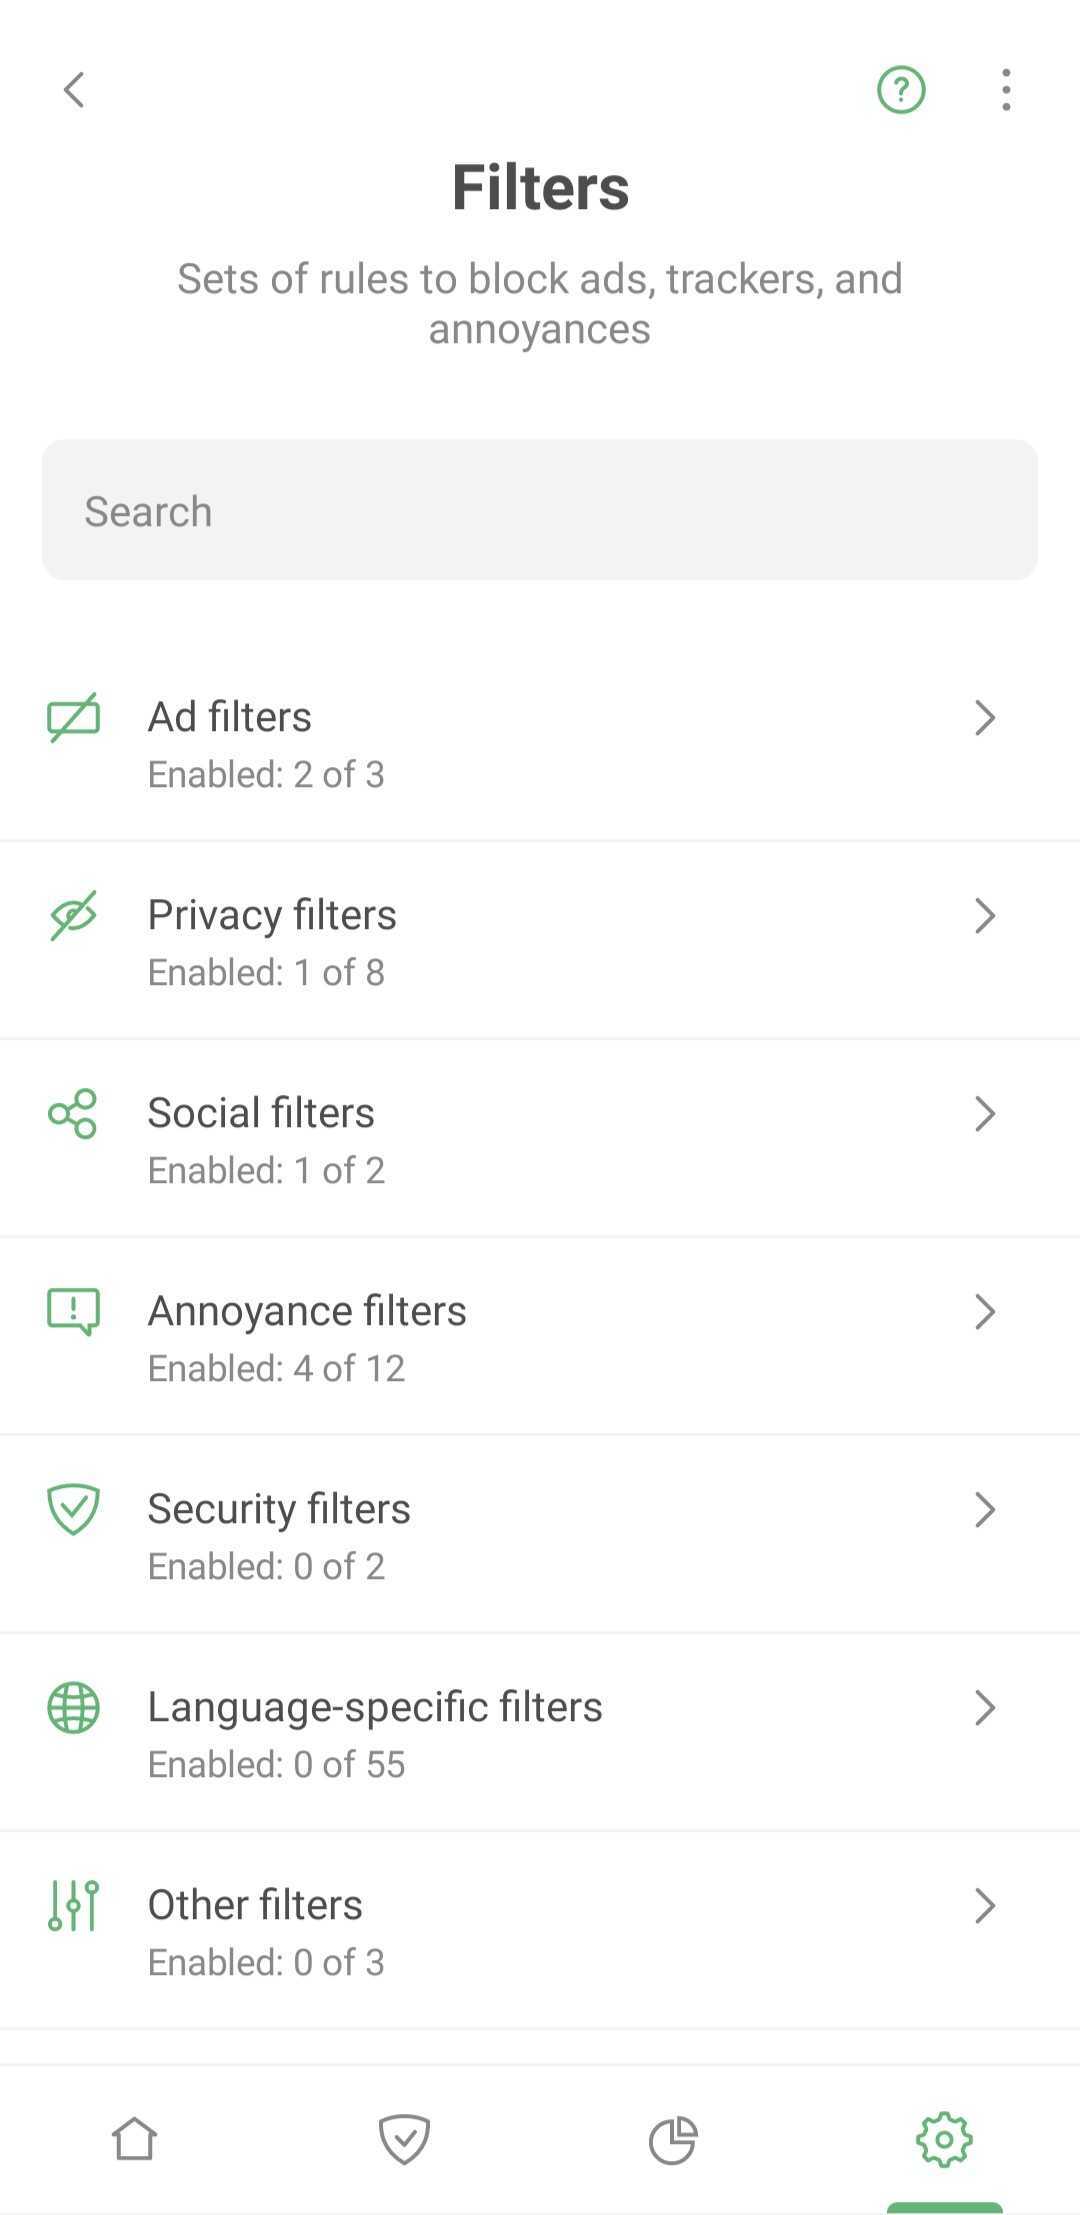
You don't need to search for all the filters that power AdGuard's protection. They are automatically switched on when you enable Ad blocking, Tracking protection, or Annoyance blocking. However, if you need additional filters, here's where to find them:
Settings → Filtering → Filters.
Filtering log → Recent activity
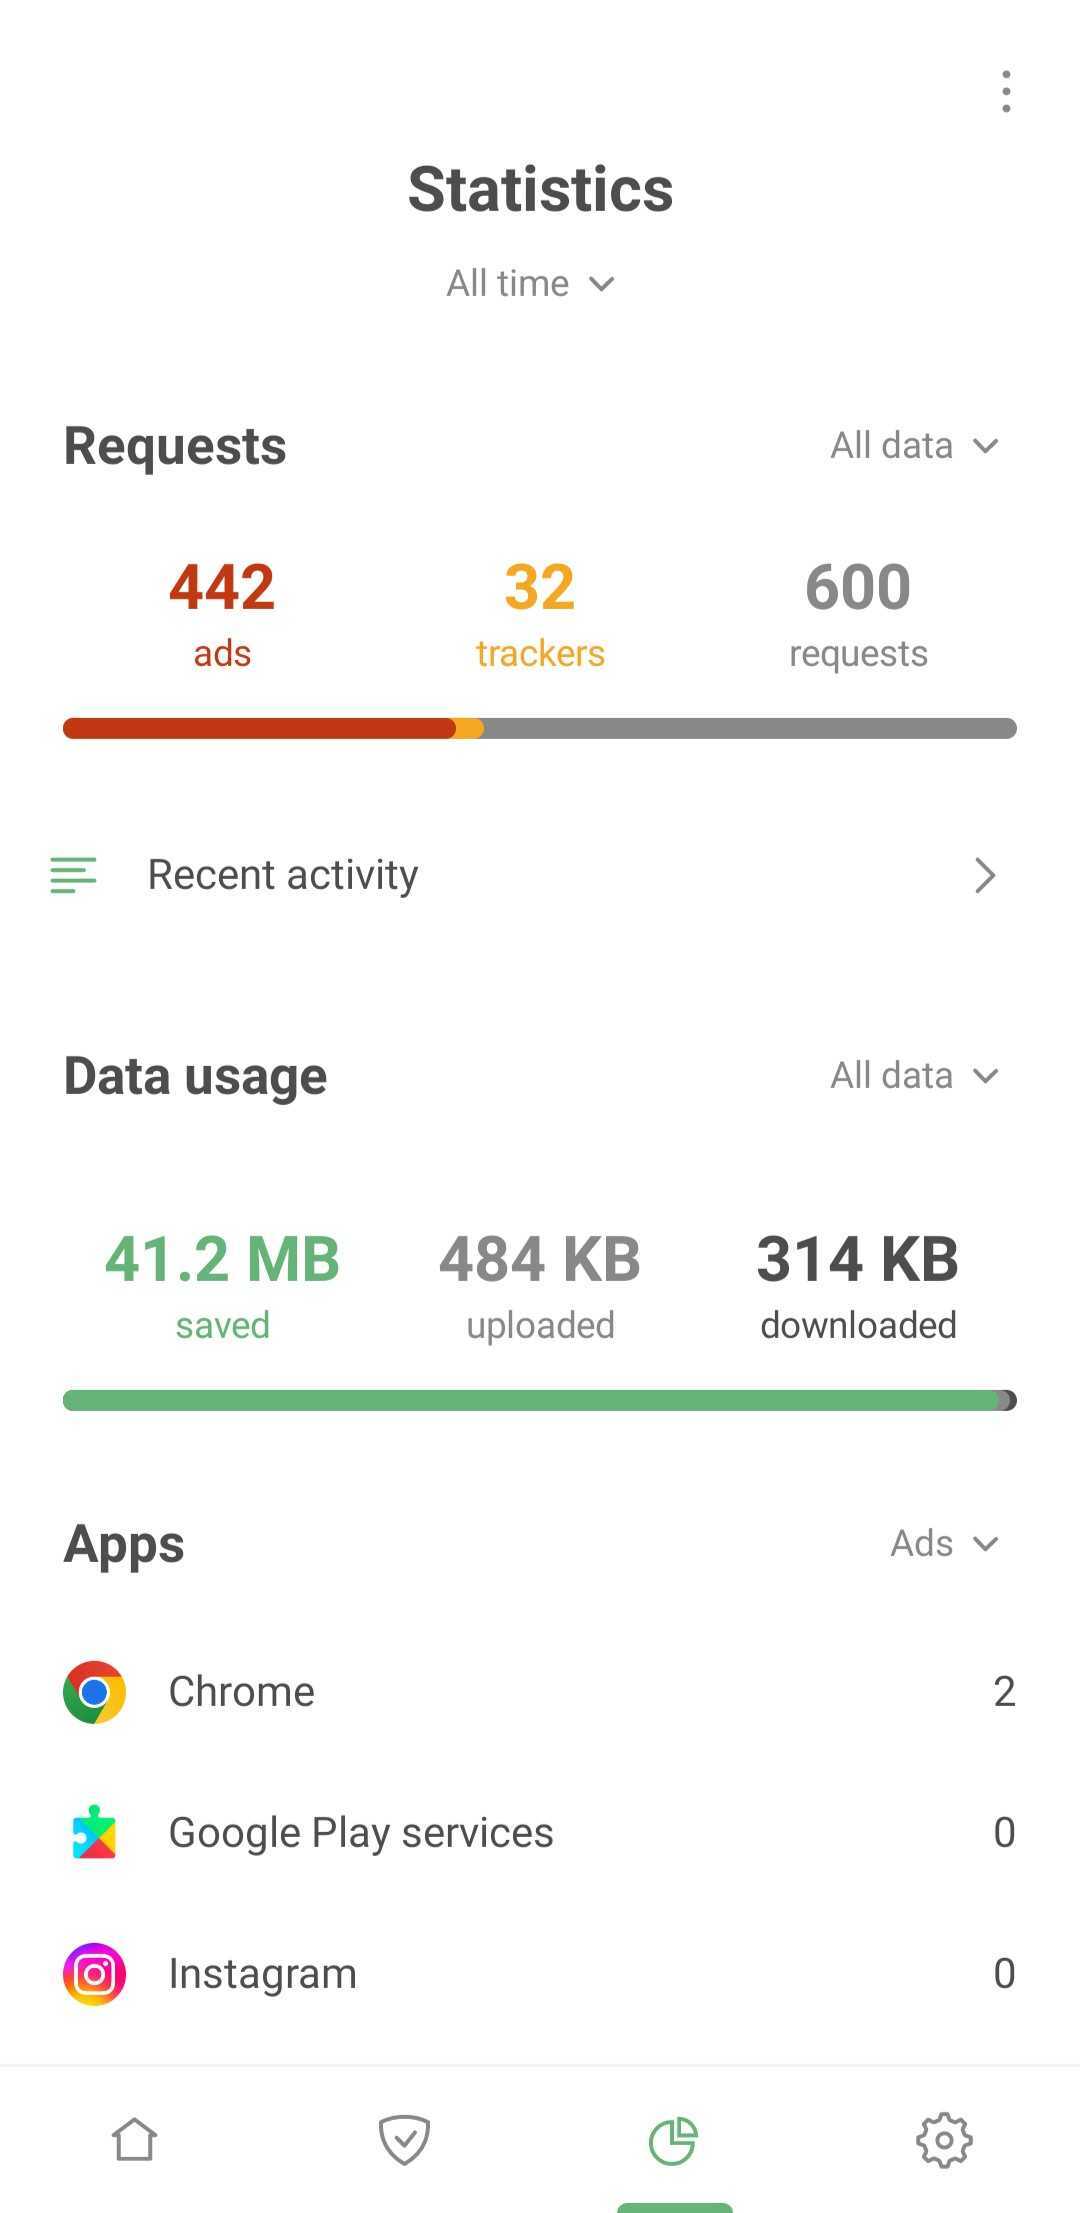
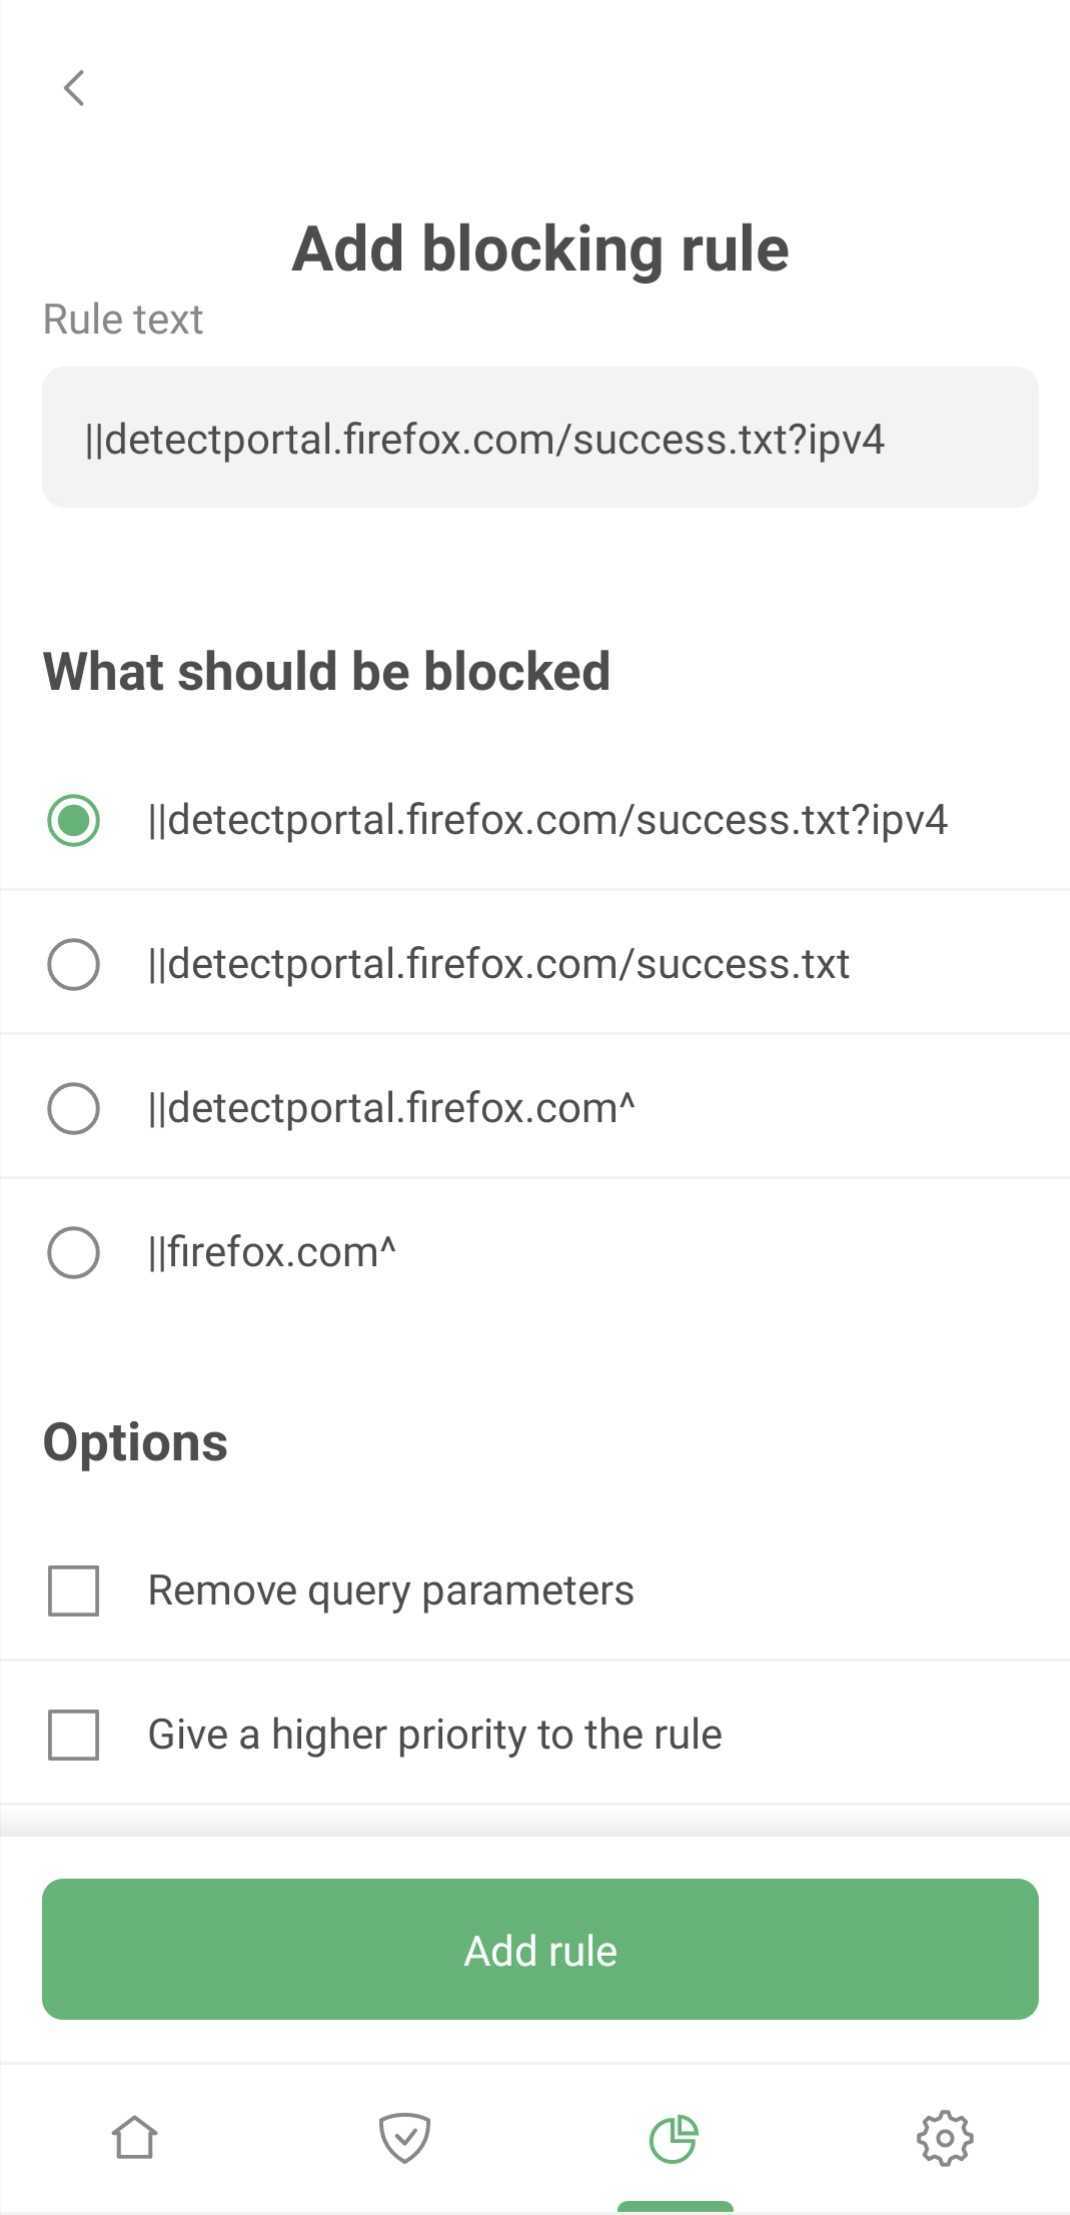
This feature has been elegantly integrated into the Statistics feature which we’ll discuss in more detail shortly. In the Recent activity section itself, there is almost nothing new. However, when adding a rule from a request, there are now more options available. You can choose what the rule should look like or, for example, whether it should apply to a specific app or universally.
In conclusion
We believe that using AdGuard for Android will now become easier. The core features of protection are now more intuitively organized. Perhaps even the features that were less obvious before will now become familiar to you. However, if that's not the case, we would be happy to hear your feedback on GitHub. We welcome both feature suggestions and bug reports. Just in case, here's a guide on how to properly report bugs.


